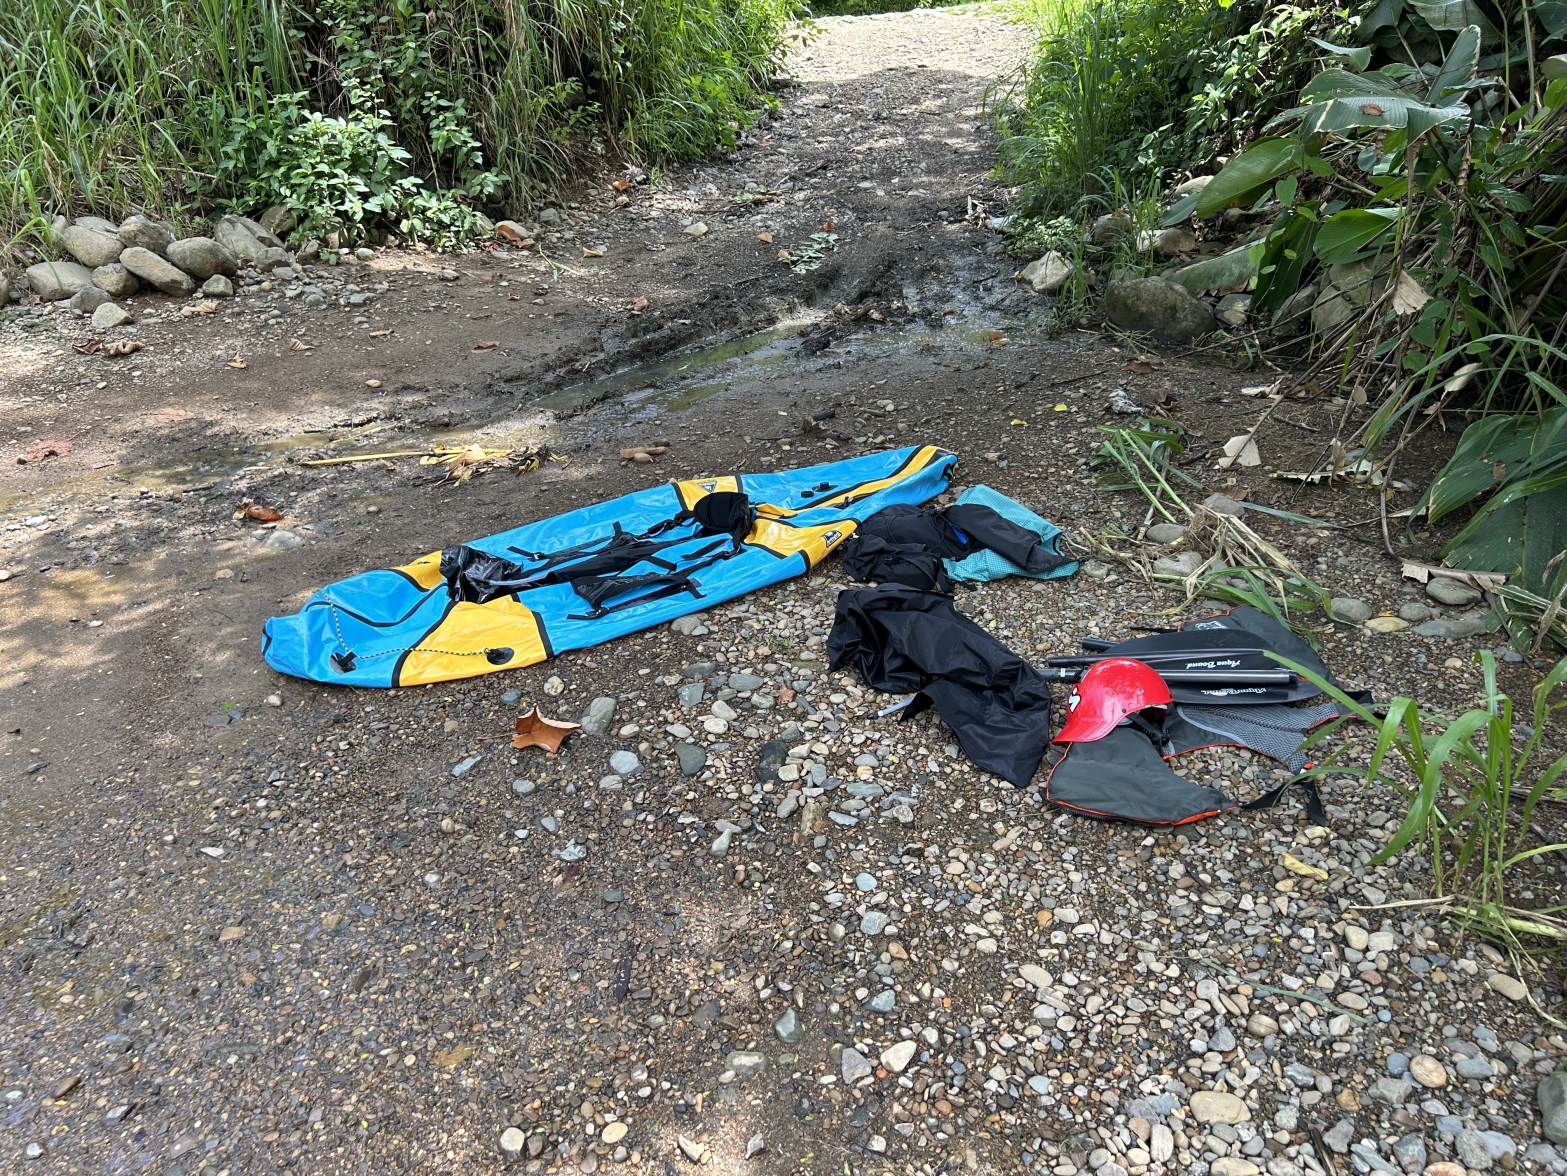
I took my Gnarwal on our family trip to Costa Rica this summer to paddle a few miles of the Rio Chirripo Pacifico near San Gerardo de Rivas. On this trip in the middle of the rainy season, the section of the Rio Chirripo I intended to run was way above my skill set to run solo, so I bailed. But later on the trip, I got a fun afternoon run on the much tamer but still fun Rio Uvita, located on the southern Pacific coast. I parked at the bridge in the town of Uvita and walked about 3 km on back roads to the river, where I floated back to the bridge. This is primarily a Class II section with a few large holes and ledges that could flip a boat:
Warning: Large (14-foot) crocodiles live just downstream of the bridge, where the river slows as it nears the ocean. Anyone trying this run should take out at the bridge or above.
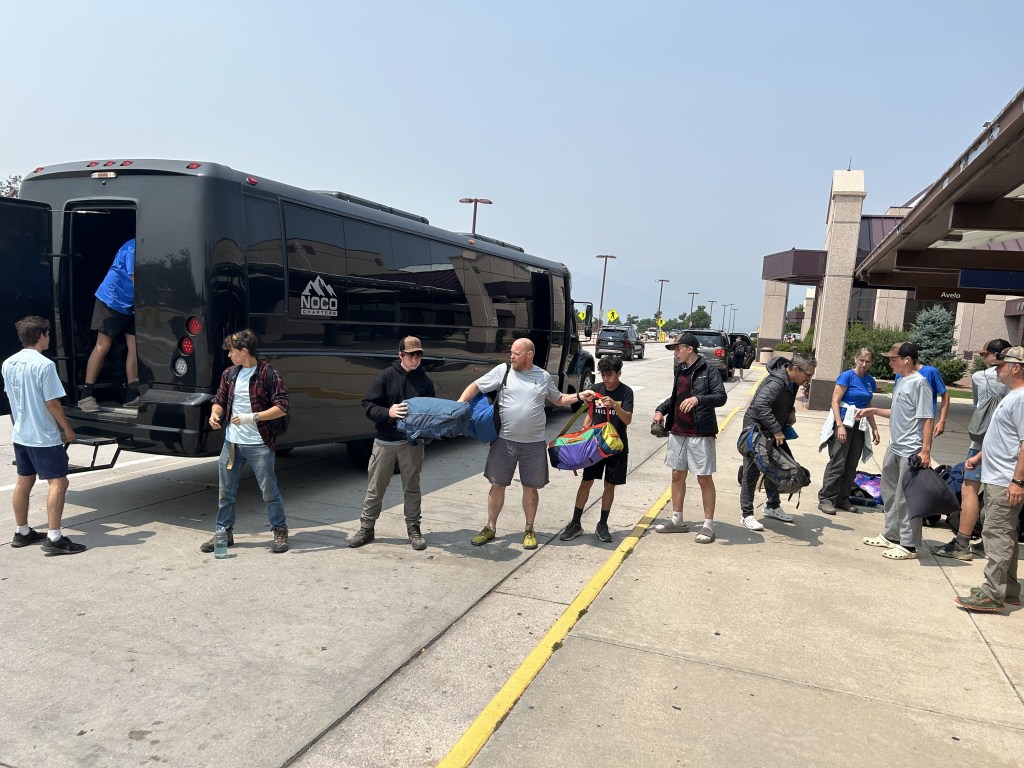
Day 0 (travel day): We flew from Austin on an early morning flight to Colorado Springs, where we caught a charter bus to Philmont. The bus ride was a little more exciting than we had hoped, but we made it safely. After registering, we toured Villa Philmonte, ate dinner in the dining hall, and chilled. Cell phone reception at Basecamp was 1-2 bars with T-Mobile, nothing with Verizon.
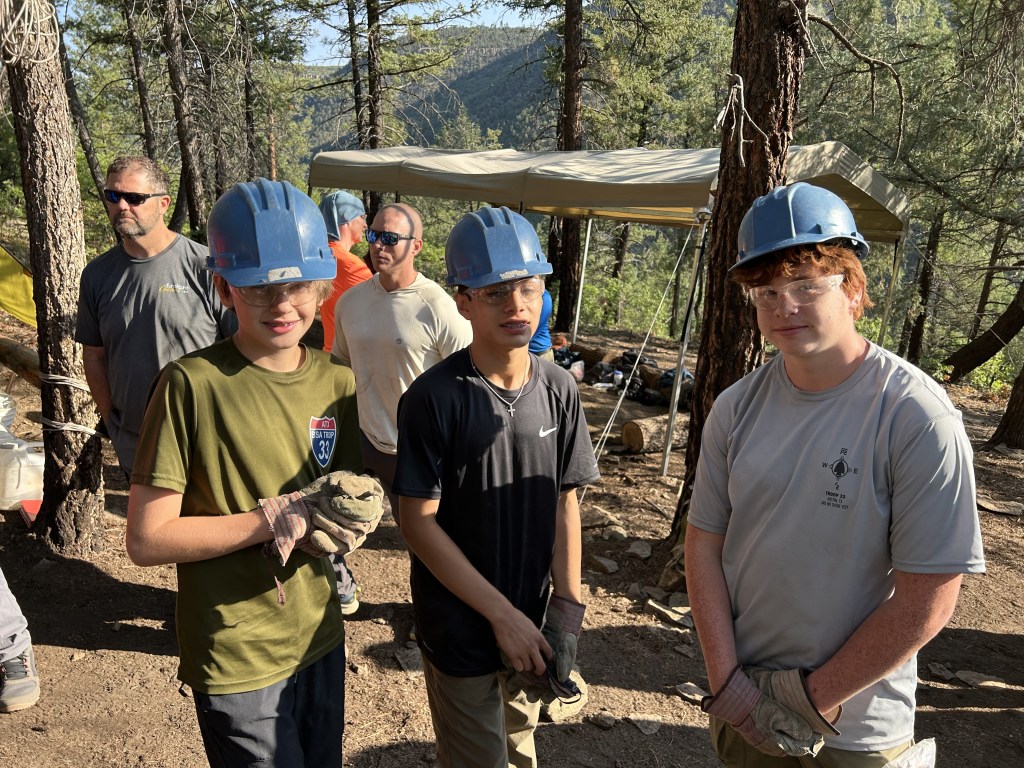
Crew Leaders for both Troop 33 crews being briefed at the Welcome Center, while the rest of us, including adults, look on.
Day 1: After breakfast, we met our Ranger Lance, who led us through a medical recheck, logistics, gear checkout, our official crew photo, and a brief equipment shakedown. This ended up taking most of the day. After dinner, we hiked with all the other crews departing the next morning to the Trailbound campfire.
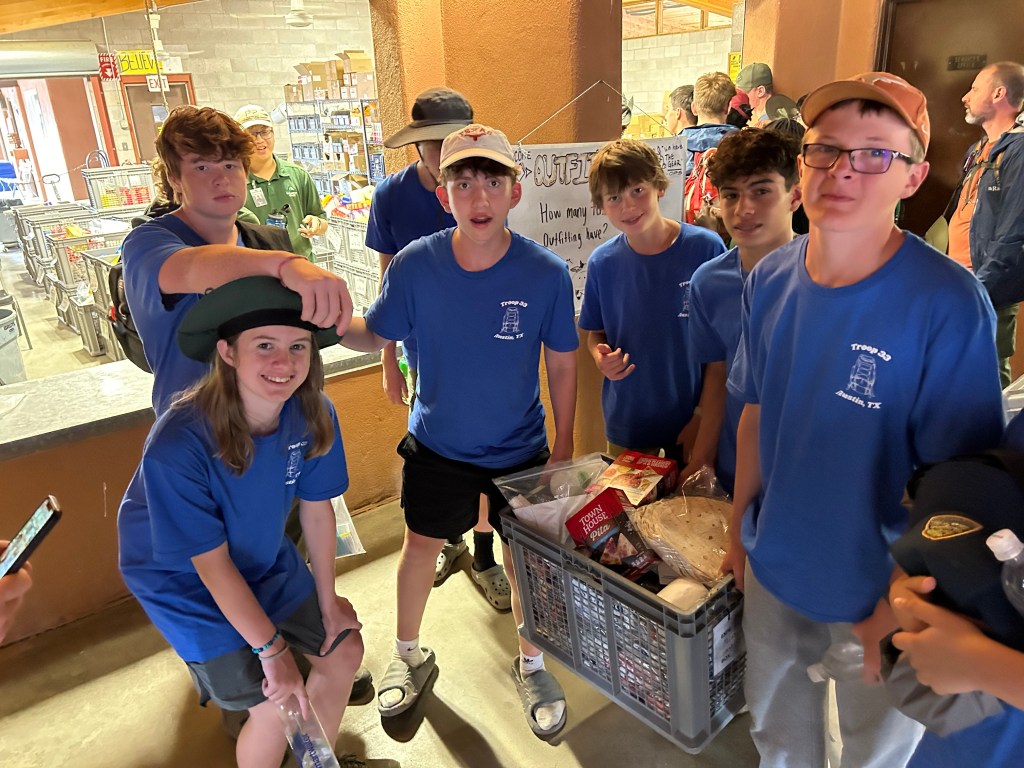
Picking up crew food.
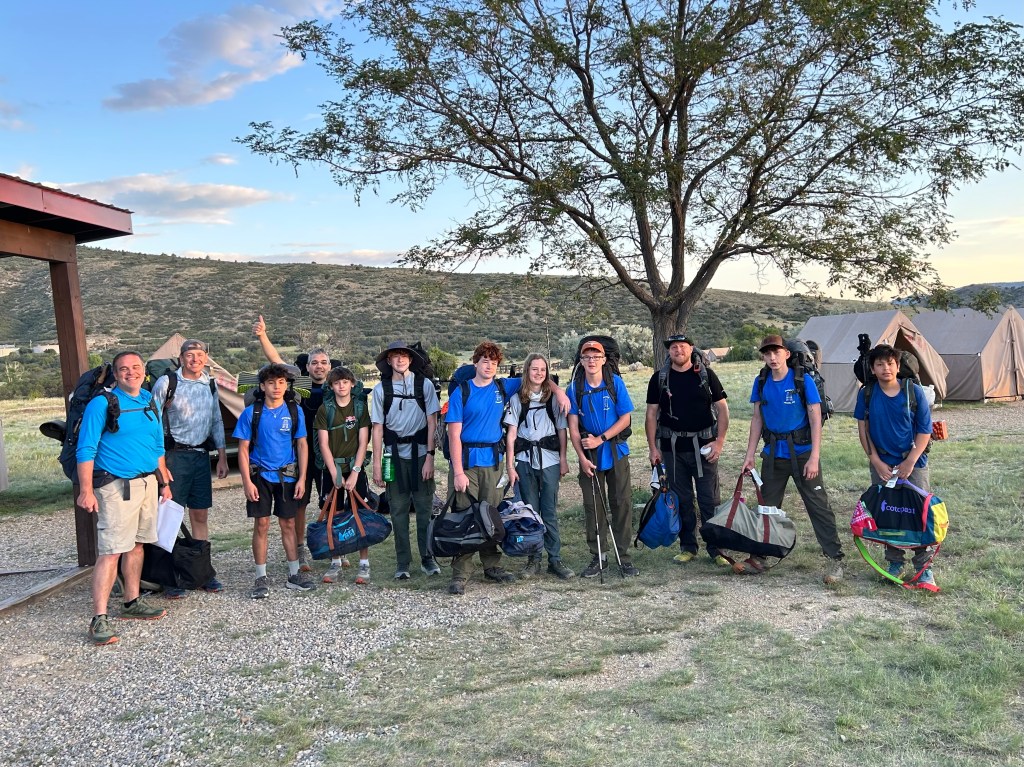
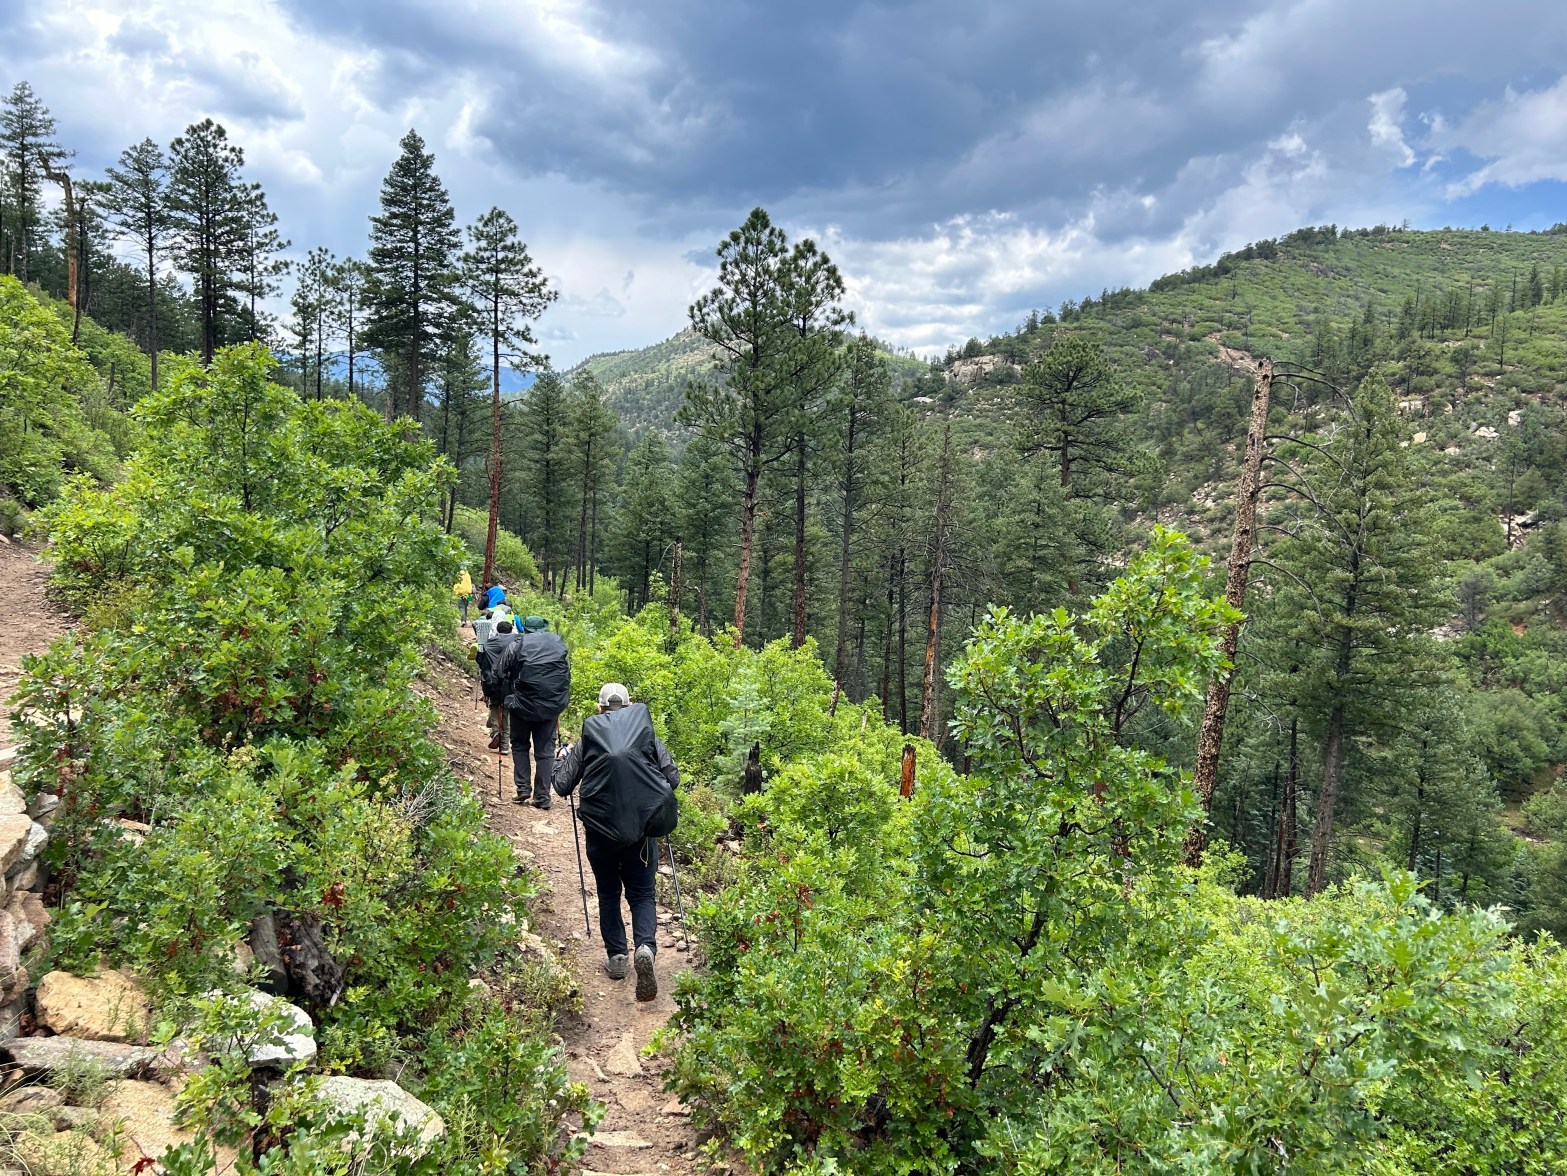
Day 2 (first day on the trail): We packed up early and were bussed to the Poneil trailhead on the north side of Philmont.
Rolling out of Basecamp (we stored our duffels in lockers while on the trail).
On the trail, Lance provided quick lessons on backcountry hygiene and navigation. We then hiked a couple miles to Poneil, where the scouts enjoyed the cantina, which served two flavors of root beer: Crunchy or Creamy.
Our Ranger Lance instructs the scouts over root beer.
The scouts then branded their hats and crocs, and everyone took a turn learning to lasso.
In the afternoon, we hiked another mile to our campsite, Sioux, where Lance instructed us to hang bear bags and prepare and clean up dinner the Philmont way.
That night, we returned to Poniel for a pioneer-themed evening program with great music and storytelling. Poniel was the original Basecamp when the property was donated, and it was a fun visit.
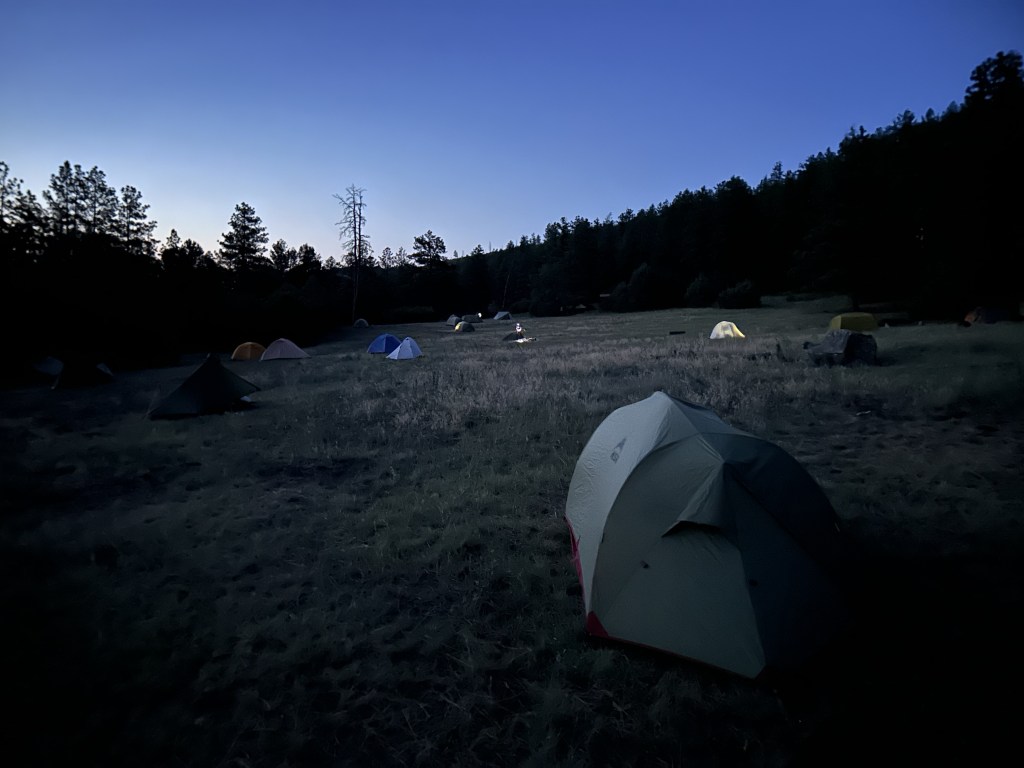
Dawn at Sioux.
Day 3: We spent the morning building a trail on the hill above Sioux. Overall, it was fun, but I wish it had been scheduled on a slower day.
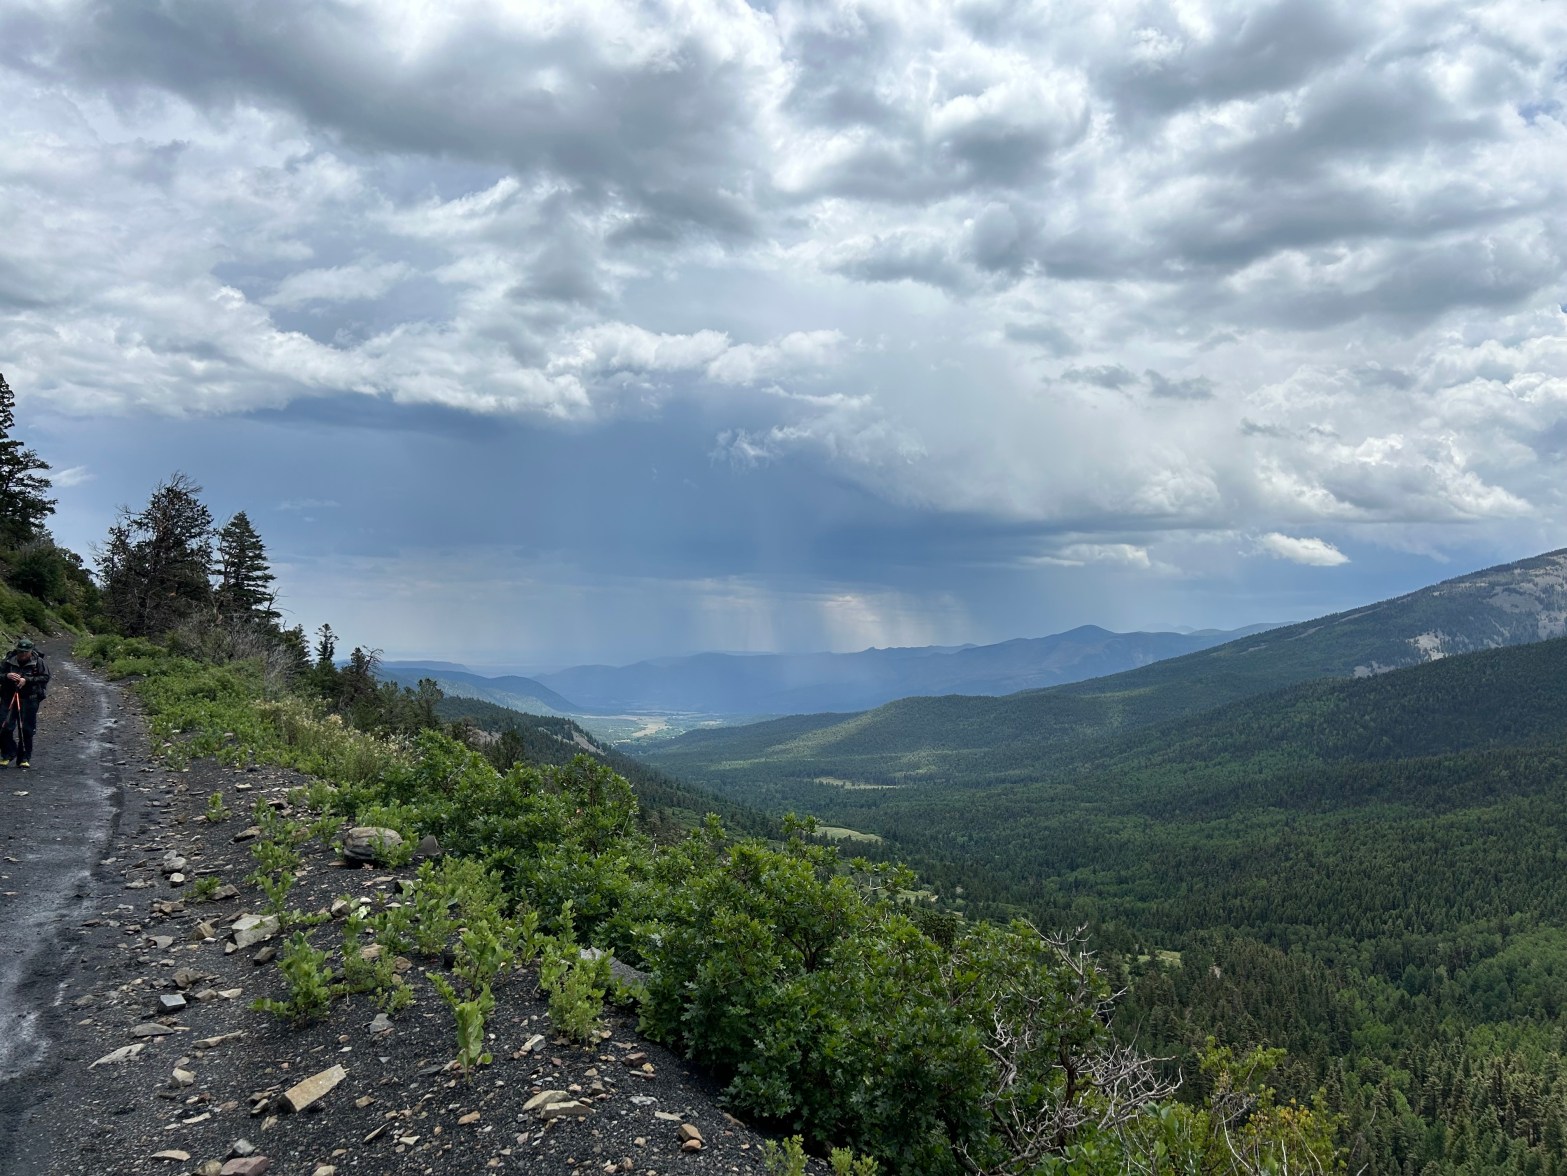
After the conservation project wrapped up at 10:30, we still had a five-mile hike to our next activity at Poblano, which meant the afternoon storms arrived before we climb spar poles. This was the only activty we missed on the trek, but was one that some of the boys were really looking forward to doing. The campsite at Poblano was beautiful in the trees, and we were treated to another great musical program by the staff that evening.
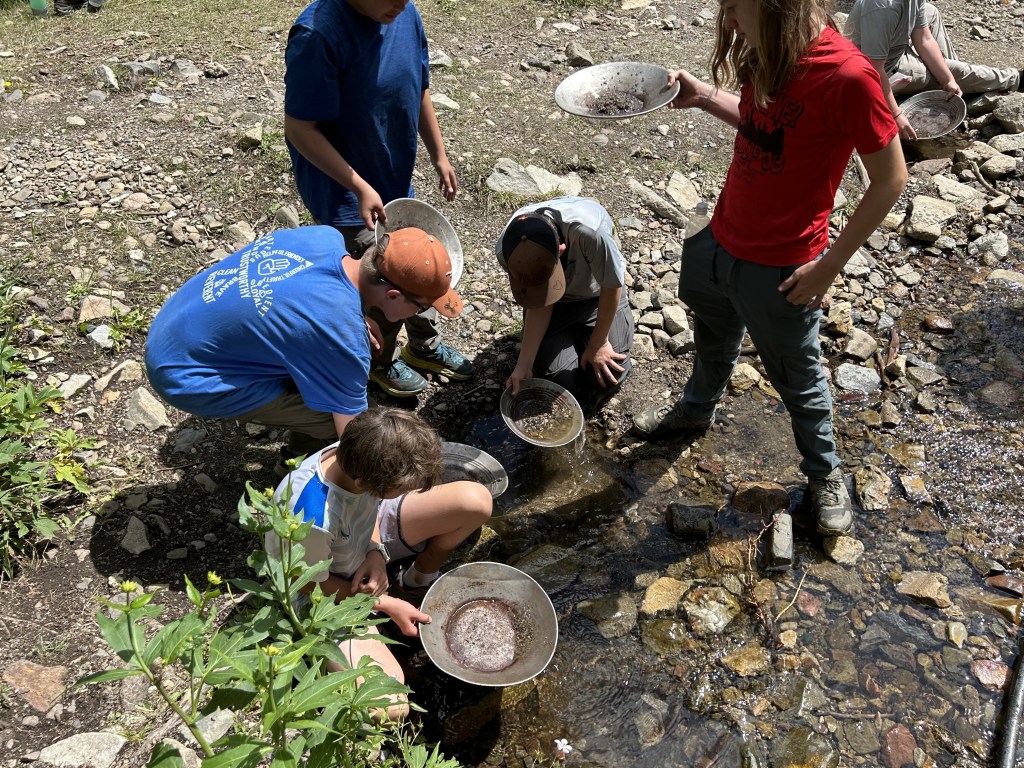
Day 4: This was an 11-mile day. Our Crew Leader made the tough but correct decision to abandon spar pole climbing at Poblano in favor of an early departure. This put us at French Henry, a cute mining-themed staff camp, by 1000. The scouts participated in a mine education program, panned for gold (found a tiny amount), and then made a butter knife at blacksmithing.
On the hike from French Henry to Baldy Town, we were hit with our first hail storm.
At Baldy Town, one scout bought a new pack cover after the hail storm demonstrated that his original was too small, and we went to the commissary and reloaded on food. Our packs were full as we headed out from Baldy Town in another rainstorm for Miranda, a fur trading-themed camp, which we reached mid-afternoon. Our itinerary officially called for us to hike another 0.7 miles past Miranda, but the staff radioed logistics and got us permission to stay at Miranda. We quickly set up camp and participated in an hour-long hatched throwing activity.
Day 5: The scouts were up at 0300, and we were on the trail by 0400 for a 10-mile, 3,000 feet up and down Baldy summit hike. We made good progress and were on the summit by 0800. The top was windy, and temps were in the 40s, but we could fit our entire crew behind one of the rock walls that hikers have built over time. Out of the wind, we were comfortable, and we shared a pound cake and a can of apple pie filling that Lance had left us, spread by the butter knife the scouts had made. Of course, the adults had coffee.
After about an hour, we headed down, reaching Miranda around noon. It was a beautiful day in the 80s, so I took a trail shower (pots of cold water dumped on my head), washed clothes in a ziplock, and dried things. It was at this moment that the Philmont gods decided to teach us a lesson in the form of a 30-minute hail storm that left the campsite covered in inches of ice. The temps dropped into the 40s, and we spent the rest of the day walking on ice.
That evening, our scouts and adults competed in a hatchet throwing contest, and then we attended a comedy show put on by the staff.
Comedy hour at Miranda.
We loved Miranda; it’s a great meadow! (This is an inside joke for those who have been there)
Day 6: With only a 5-mile hike, we had a lazy morning drying everything out as we hiked to the Baldy Skyline trail camp.
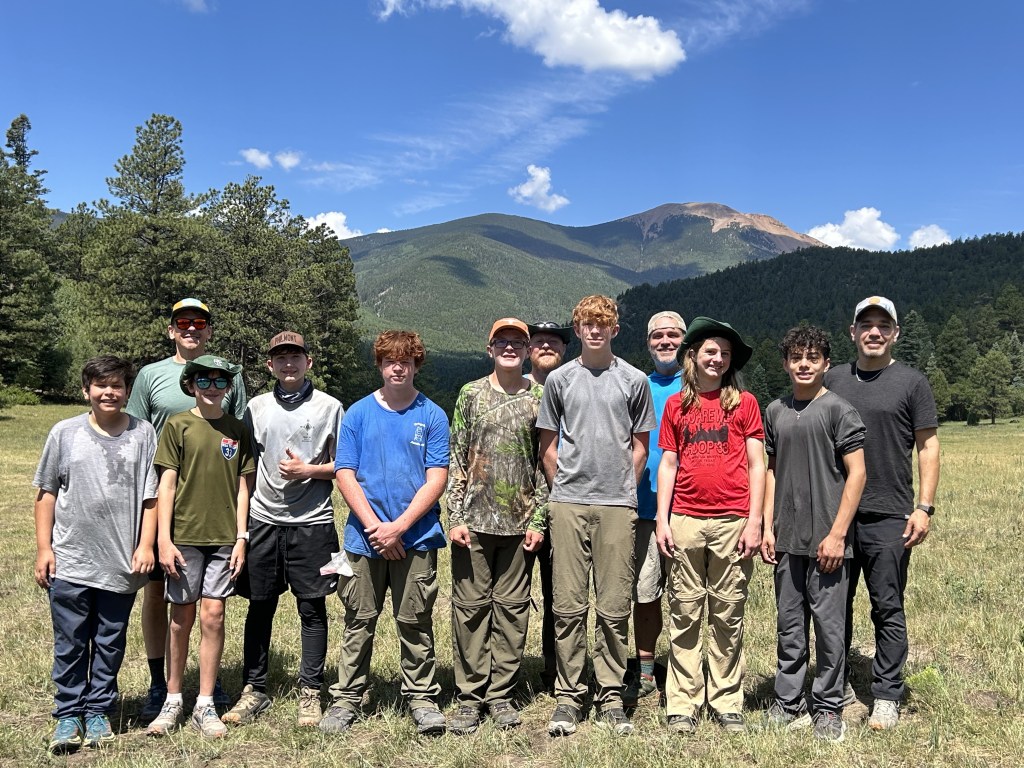
Backcountry camera tripod to take this crew shot:
Of course, after a sunny hike, it started to rain as soon as we set up camp. At this point we were running light on isopro gas, so two of our scouts made a tripod, and we boiled our dinner water in a pot over the campfire.
The scouts spent the afternoon playing football in a field.
Day 7: We had a short morning hike to Head of Dean, where we ran into our other Troop 33 crew. After a short visit, we participated in a challenge course which was really fun.
We then took the long way to the Dean Cow campsite to gain some miles and get a few more views of the mountains. We arrived at Dean Cow with plenty of time to spare and had a slow afternoon hanging out. Just before bedtime, we saw a black bear, which caused the scouts to recheck their tents for smellables, producing several unaccounted snacks for the Oops Bag.
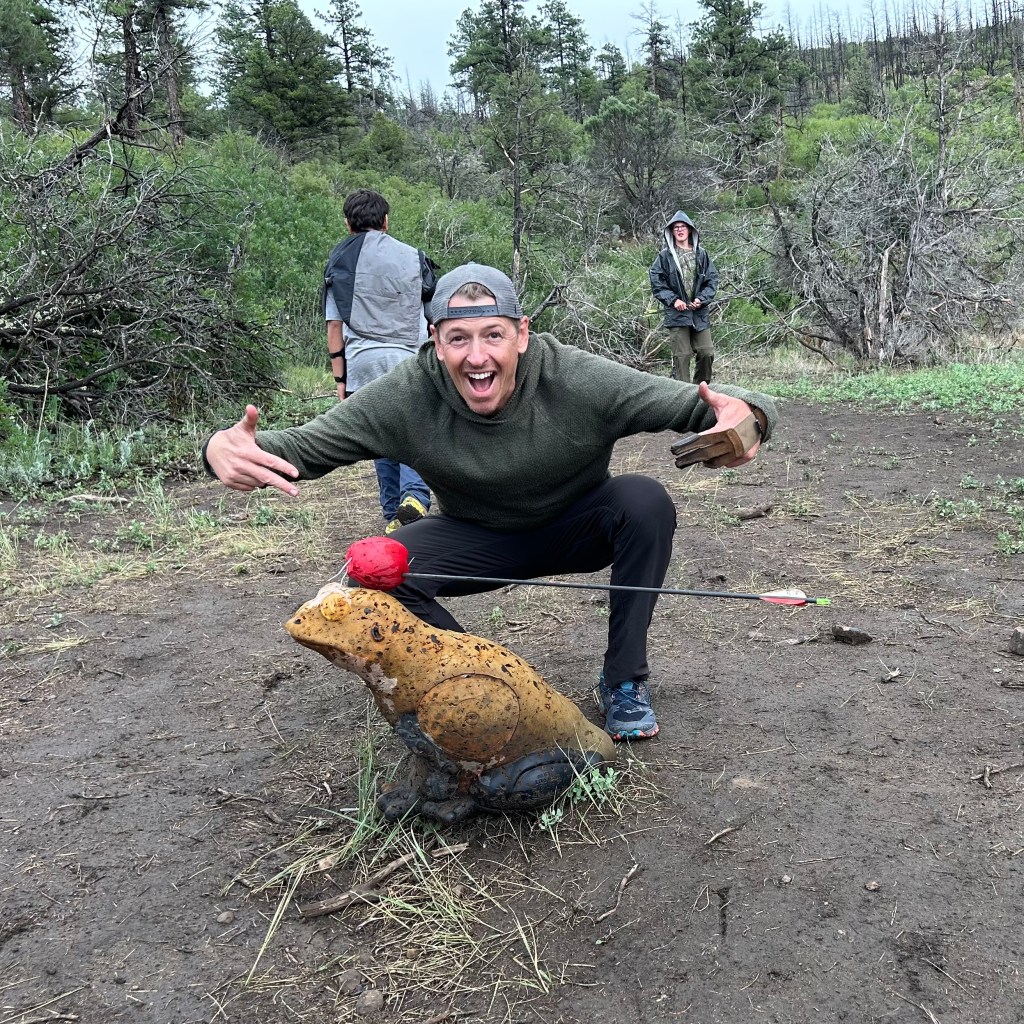
Day 8: This was a 10-mile downhill hike to the Cimmaroncita staffed campsite. After setting up camp, we did 3-D archery and took an ecology and history tour.
While trying to cook dinner, we were hit with a gusty thunderstorm, which required a temporary retreat to the tents. After the storm passed, we finished cooking and dished up ramen noodles in the chilly weather.
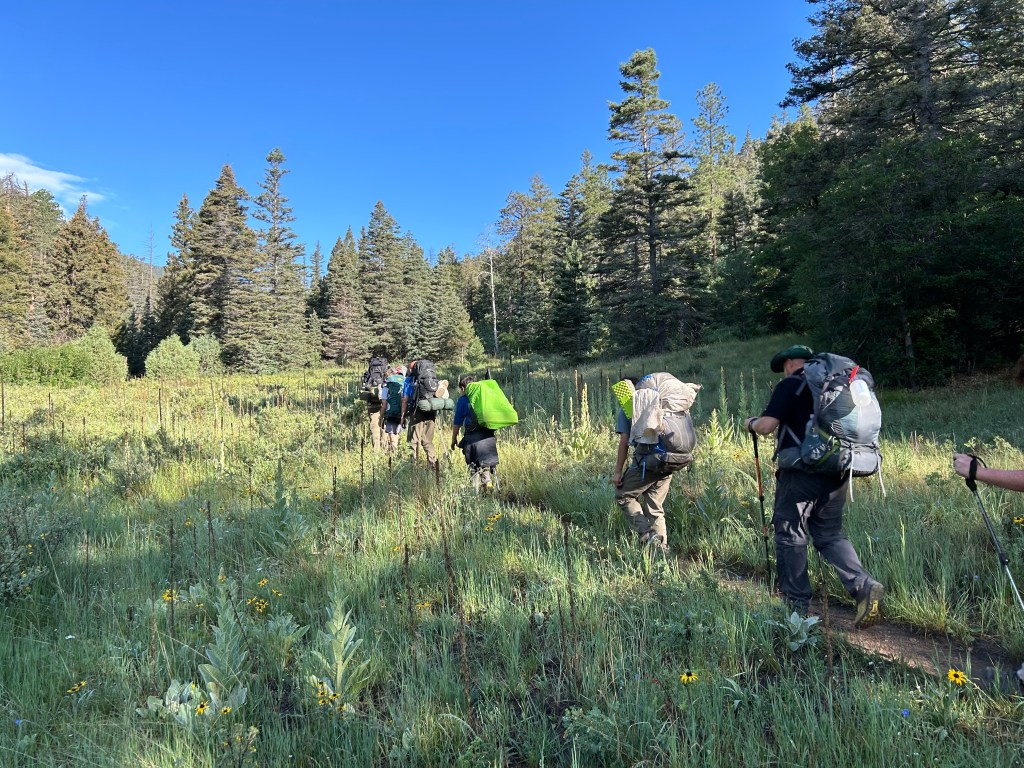
Day 9: We had another slow morning to dry things out, then briefly hiked to the bus.
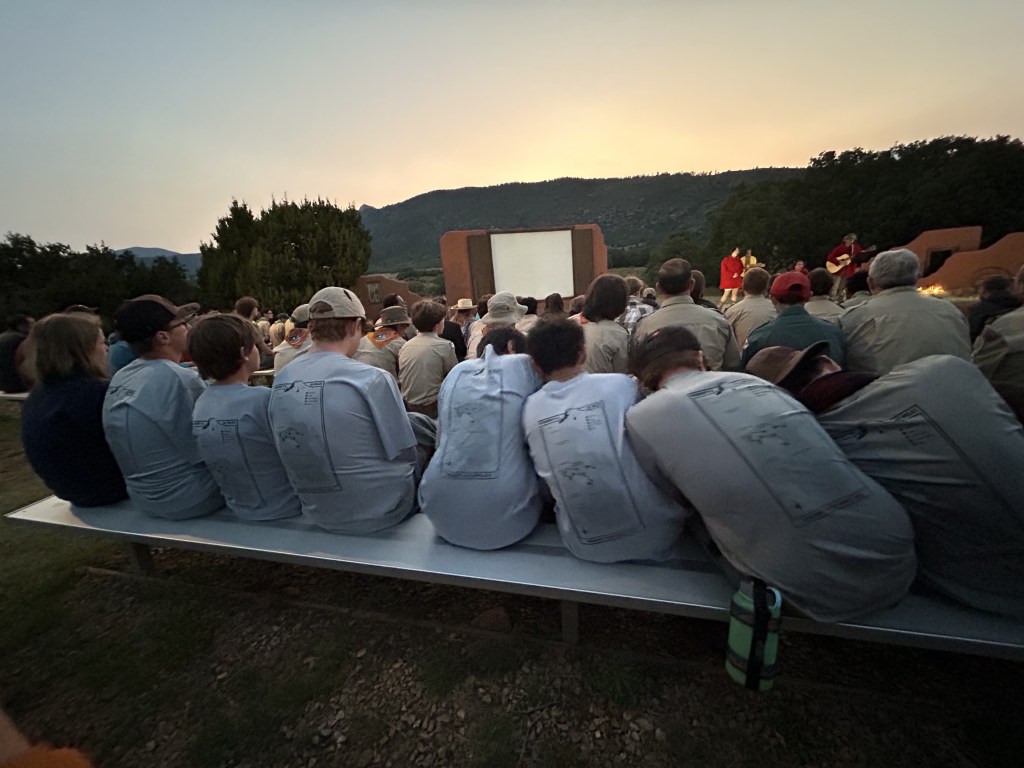
We arrived at base camp shortly before lunch. After returning the equipment, we all showered (and bought soap for the boys to ensure they used it) and visited the National Scouting Museum. The Museum has a large 3D map of Philmont and is worth a stop. That evening, we attended the closing campfire program, which was special.
Day 10: After breakfast, our charter bus picked us up at 0900, and we headed to Colorado Springs for an uneventful flight back to Austin.
This trek was fun and something I am sure I will remember. All the boys had a great time, and they are already talking about coming back for the more advanced treks. As for me, I don’t know if I will be back, but I certainly would not mind running it back with another one of my kids.
No. 1: Start Early: The activities are first come, first served, and thunderstorms occur almost every afternoon in July. The Crew Leader should set an early start to ensure that the crew gets to complete activities and to avoid setting up camp late in the day in a storm.
No. 2: Tie sticks directly to trees when hanging Bear Bags: Philmont does not allow ropes to be wrapped around live trees. Instead, dead sticks must be placed under the ropes to protect the bark of the live tree. Every time you release the ropes to lower a bag, the sticks fall to the ground, making raising and lowering the bags a pain. Bring a couple of lengths of paracord and tie the sticks to the trees before wrapping the bear rope. This way, when you lower a bag, the sticks don’t fall to the ground; you simply re-wrap the rope around the sticks.
This is the Philmont with sticks under ropes. All these sticks will fall to the ground when the rope is removed, unless held by a separate cord.
No. 3: Master rigging a dining fly high. We spent time under the dining fly every day. Because we had a giant fly and lots of paracord, we could pitch it to trees and high enough that everyone could fit. The Philmont issued flys, and pitching style is more of a small A-Frams that is much less practical.
High pitched fly using 6-foot sticks, trekking poles, and trees.
No. 4: Ask for Extra Sanitizer and TP: At some points, we ran low on both. I suggest everyone have their own small sanitizer in addition to the troop sanitizer.
No. 4: Have a conversation with your crew on timing bathroom breaks: Multiple times, after a long 30-45 minute break, our crew leader would call for packs on, and inevitably, a scout would say that they needed to go poop. Do not assume that 14 or 15-year-old boys will think: “I’d better go to the bathroom now to avoid delaying the whole group.”
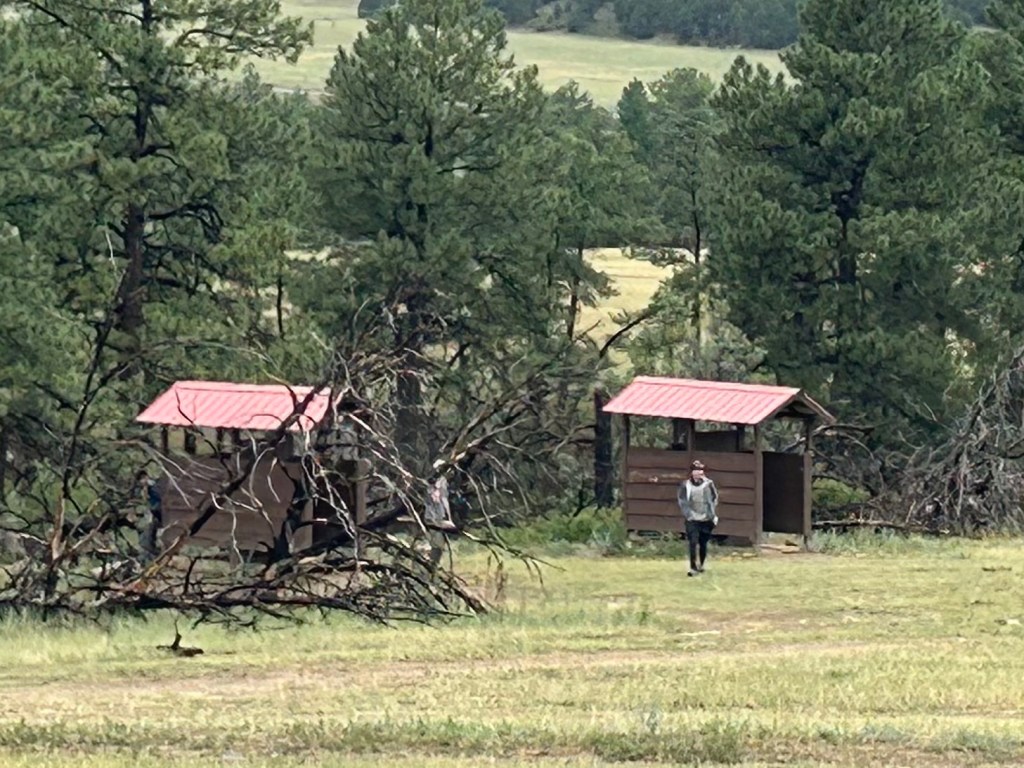
Philmont “Red-Roof Inns”.
No. 5: Have the same conversation on filling water bottles first thing during a break.
No. 6: Force scouts to put on sunscreen and lip balm: They likely will not unless directed by adults.
No. 7: Address foot problems early: The blister prevention and protection kit is the most used part of a crew first aid kit. We used K-T tape to great success. Encourage the boys to address hot spots early before they become blisters. Keep the blister kit in an easily accessible area on the trail and in a central location at camp.
No. 8: Carry the appropriate amount of water: The Philmont logistics department has information on availability at every campsite, which they will share with the Crew Leader. Assess each hike to determine what is appropriate. Philmont is highly conservative in the quantity of water it says to carry. Yes, one generally needs a lot of water in the dry climate of New Mexico, but 4 liters for a 2-mile hike is overkill. Just carefully plan it out.
No. 9: Take a photo of every camp map. These maps are posted on every trail as you enter a camp. Some of the camps are pretty large. The image will help you navigate the camp, identify campsites, locate water, and find the all-important red-roof inns. When you get home, the maps will help to mentally reconstruct the trip.
No. 10: Be able to do laundry. Backcountry laundry requires a gallon ziplock and a few safety pins. You wash the clothes in the ziplock using camp suds, then pin the wet, clean clothes to your pack. Most clothes will dry as you hike in the morning before the storms. With this approach, you will have clean socks and underwear every day.
No. 11: Bring a small (12in x12in) camp towel. Condensation and blowing rain got in everyone’s tent. A small camp towel is nice to have to get things mostly dry. Do not bring a big towel.
No. 12: Always, always store your pack with its cover on or under a tarp. We had multiple scouts have their packs soaked due to leaving packs uncovered when a storm hit. Just assume it’s going to rain.
No. 13: Bring a football or frisbee. The scouts ended up breaking out into games at every camp.
Tossing the old pigskin.
No. 14: Philmont allows open-toed shoes. Philmont is a pleasant exception to BSA’s irrational prejudice against open-toed shoes. Cheap flip-flops are way lighter than Crocs, ventilate better, and make awesome camp shoes.
No. 15: No scout phones in the backcountry. Addressed in a prior post, but phones are a distraction.
This concludes the “how to” part of my Philmont posts. I will have one more post that is simply a trip report. In the meantime, ask any questions in the comments section below.
From the first step off the bus upon arrival to the step back on the bus to leave, the youth Crew Leader, not the adult lead advisor, is responsible for leadership.
The three “official” Philmont leadership positions are Crew Leader, Chaplain’s Aid, and Wilderness Pledge Guia. Of these, Crew Leader is, by far, the most crucial position. In consultation with the other scouts and with appropriate advice from the adults, the Crew Leader makes decisions for the crew. We encouraged our Crew Leader to rotate responsibilities for the various jobs between the scouts. For example, each scout was the navigator for a day. This worked well for us as it gave all the scouts ownership in the crew’s success or failure.
This is not to say that adults are just spectators. As crew members, adults owe a responsibility to everyone else and must pitch in to help the crew achieve its goals. On our trek, this meant that I helped hang bear bags, cook dinner, clean dishes, and hang the crew dining fly at various times.
Most adult advisors I observed and visited with understood their role appropriately. But I know from visiting with staff and other advisors that this is not always he case. The most common problem is adults who fail to allow the youth to lead. Adults should not decide when a crew will take a break, where to set up camp, what route to take, or what programs to attend. Of course, adults can advise the crew leader on these matters, but adults should be prepared to abide by the crew leader’s decision even if the adult disagrees (unless the decision is unsafe).
Indirectly, adult advisors also play an essential role in setting the tone for the crew. If adults are laid back, laughing, and positive, chances are the scouts will take that cue and be positive. If adults are critical of each other in front of the scouts or overly critical of the scouts, a negative vibe will likely take hold of the crew. On Day 1 of the trek, the Philmont General Manager held an advisors meeting, where he advised each of us that we would be confronted with a situation where we would need to force ourselves to smile when we did not want to, but for the sake of the crew, we had to. This was great advice.
A Note on the Importance Advisors Coffee
The staffed camps usually hold an “Advisors’ Coffee” in the evenings, where the adults from different crews can visit with each other and staff. This is an excellent opportunity for adults to recharge and share perspectives. My crew’s adults also held our advisors’ coffee at the unstaffed trail camps. We were not compelled to limit advisors’ coffee to once a day! Sometimes, we would have an impromptu advisor’s coffee under the tarp during an afternoon rainstorm or around a campfire; other times, we would have it during a long trail break. We even had advisors coffee on top of Baldy. These on-trail breaks allowed us to joke around, maintain our sanity, and give space to the scouts to own their trek. So make sure you bring your mugs and coffee.
Adults, working on knots after afternoon advisors coffee.
The foremost rule for gear is to go as light as possible and not take unnecessary stuff. Your base weight should be 21-22 lbs or less, equating to 30-35 lbs once loaded with food, water, and crew gear. If your pack is more than that, it is too heavy.
Our crew had to load this huge pile of food into our packs after a backcountry commissary pickup.
Philmont recognizes that people bringing too much stuff (compounded by participants being out of shape) is a problem, and, to their credit, going lightweight is discussed in the prep material Philmont sends out. But in this regard, Philmont is fighting the “be prepared” headwind of BSA, which has traditionally encouraged an antiquated – by that, I mean heavy – approach. Large packs, leather boots, heavy pants, thick socks, white-gas stoves, multiple Nalgenes, huge multitools, and knives are all common at Philmont. Over the past few decades, the light/ultralight backpacking movement has proven that all that stuff is unnecessary, particularly in a benign Northern New Mexico summer environment. Yes, it thunderstorms many afternoons, and it can be chilly on some mountaintops, but these are not conditions requiring an extreme amount of gear. A fleece or light puffy under a raincoat will suffice even when cold.
Unfortunately, at Philmont and scouting in general, the least physically prepared individuals are often the ones who show up with the heaviest packs. It’s not a problem if an in-shape 165 lb sixteen-year-old varsity athlete wants to carry a heavy 65 lb pack. It will likely be a disaster for the crew, a 105 lb fourteen-year-old or an overweight 50-year-old to try to carry the same pack. Thus, the slowest hikers should be the most concerned with limiting pack weight.
Comfortable pack weights are possible.
The average pack weight for our crew with food, 2-3 liters of water, and crew gear was about 30 lbs (mine was 33), with a few packs under 20 lbs and one pack over 40 lbs The scout with the heavy pack had unnecessary items like a full-sized beach towel and a 2 lb hatchet so should have been lighter, but it ended up not mattering because as a high school cross country runner he spent most of the hike waiting on us geezers anyway.
Philmont has an official packing list, which is generally good. Below are some of the strategies we used to have light packs, as well as observations on gear that was/was not necessary.
Items on the Philmont Packing List
Backpack – One can rent a large Osprey backpack from Philmont for $18. Most, however, will purchase a pack for training and other uses. Philmont says the pack size needs to be at least 65 liters. Most of our crew had smaller packs in the 55-liter range, which worked. If you have a smaller pack, you should have a way to strap on or attach a bear bag to hold food at a significant resupply. Get a pack that is 3 lbs or less. Sam and used the following, but we had a wide selection of packs in our group from ULA, HMG, Osprey, Granite Gear, and REI.
REI Flash 55 – Sam used this one and his pack weight when we hit the trail was 19 lbs. This is a good pack for a small person, and is probably on the small end of what you can get away with. He often carried a crew hear between the lid and pack body.
ULA Catalyst – This has been my workhorse for over a decade and was more than large enough at Philmont.
Backpack Rain Cover—This is mandatory for the July Monsoon. I used a light ULA one. Others used Osprey, REI, and cheap Amazon ones (which do not have a grommet and collect water). Make sure to get a large size to cover bear bags and other items you strapped on the outside of your pack.
Waterproof stuff sacks—Trash compactor bags and Gossamer Gear pack liners are the lightest options and are sufficient, and waterproof stuff sacks also work well. The main advantage of stuff sacks is organization for those who dislike stuffing everything in thei but slightly her pack.
Sleeping Bag – If you are going to spend money, a sleeping bag or quilt is the place to splurge. Something light (2 lbs or less) and comfortable in the 30s (which means a 20-25 degree rating) works. Western Mountaineering, Feathered Friends, and Enlightened Equipment make nice bags; other options are cheaper. I slept in shorts and a T-shirt every night and was warm in my WM Terralite 25 degree bag.
Tents—We had three scout tents: a 4-man REI shared by three scouts, a 3-man Alps Mountaineer shared by three scouts, and a Philmont Thunder Ridge shared by two scouts. They all worked fine. If I had to do it over, I would just encourage all the scouts to share the Philmont tents, which are not that heavy if split. The adults all had lightweight one-man tents. We never had a problem finding a place to pitch the tents.
Clothes
I never used gloves or long underwear. Otherwise, the Philmont clothes list is pretty good. One could drop a shirt from the list and be fine. Most days I hiked in quickdry Patagonia shorts and a merino shirt or light sun hoodie, but some days the activities required pants.
One suggestion when picking clothes is to make sure that each item is the lightest possible version. A postal scale is helpful, as I was surprised to find a large variation in the weights of shirts and pants. Some items are surprisingly heavy, which is bad not only for the weight but also because light clothes dry quicker. Merino shirts are nice because they are light and don’t smell nearly as bad as synthetics.
If you are concerned that things will get too dirty, trail laundry is an option. One sunny morning, I washed a shirt, socks, and underwear in a ziplock using trail soap. I pinned these to my pack with safety pins, and they dried out pretty much on the hike to our next camp.
Puffy – A lightweight down jacket is nice but unnecessary if you have a fleece. Mine weighs 8 oz and doubled as a pillow.
Raingear—I wore my rain jacket daily and rain pants about half the days. Make sure your rain gear is light. Frog Toggs work but are not durable. The Montbell Versalight jacket and pants are pricy but super light and nice for adults. REI has decent cheap rain pants that worked for Sam. I also carried a 6-oz umbrella, which was helpful in sun and hailstorms.
Trailname: M.F. Poppins
Shoes—Only one scout brought proper boots, and that scout had the worst blisters. Trail runners, even high-top trail runners, are the way to go. Half the group had blisters due to not training in their shoes before the trek.
Socks– Lightweight merino socks are the way to go.
Camp Shoes—Not necessary, but nice. Most brought Crocs. I did not bring my flip-flops but I should have, as Philmont is not a closed-toe shoe area, unlike most BSA camps.
Headlamp – Mandatory and extra batteries, as most summits require a pre-dawn departure.
Not on the Philmont gear list but worth bringing:
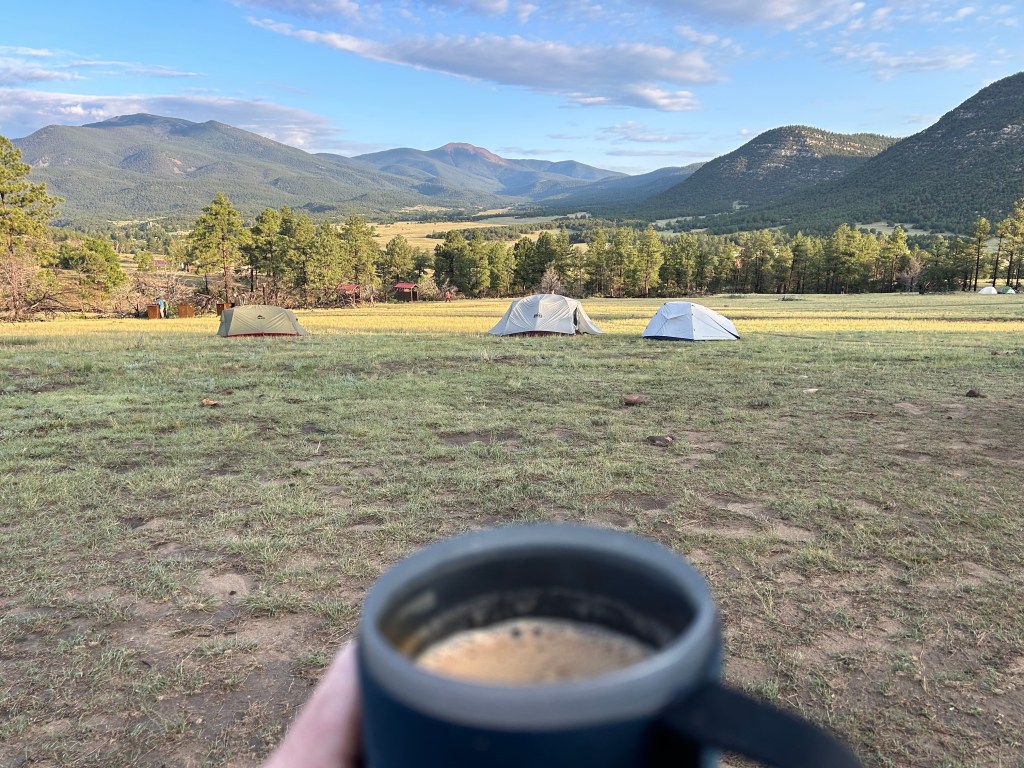
A Jetboil—A shared jet boil for adult coffee is mandatory for a civilized trek. We brought three cans of Starbucks instant coffee and a box of Chamomille tea, which worked well for four adults over seven trail days.
Nothing like a hot cup of coffee on a mountain morning.
Chair – For adults, the 1 lb penalty for a camp chair is worth it. There is significant time in camp, and afternoon everything is wet.
Hot sauce– We went through 4 small bottles of Yellow Bird in 7 days.
Battery—I took one Nitecore 10000 mAh power bank (6 oz). With my phone mostly in airplane mode/low power, I had plenty of power for seven days in the backcountry. I spoke with others with solar chargers, including my wife, and I don’t think they are worth the weight penalty.
Crew Gear:
Dining Fly—We brought our own dining fly, a 12×12 Equinox tarp. This tarp is bigger than the Philmont-issued dining fly, and we rigged it using paracord so it was pitched high. We spent a lot of time sheltering under the fly in the storms and were happy we had it.
“Our tarp is too big” said nobody ever.
Stoves—We brought two Kovea Spider canister stoves (we only used one). Many troops bring white gas stoves, which are less reliable and messier than canister stoves. It does not get cold enough to impair the use of gas.
Pots – We brought our own pots, which are the same model as Philmont rents. This was useful as two nights, the boys built tripods, and weowever, this blackened the pots, which heated water on the campfire. We don’t mind the pots being black but Philmont might.
Putting those Pioneering skills to use boiling water the old-fashioned way.
Bear Bags and Kitchen Stuff – We used the Philmont-issued spoon, scraper, bear bags, and bear rope. I don’t see that bringing these from home is worth it.
A note on Phones
My primary use of my iPhone was as a camera, with a secondary function of double-checking navigation using Gaia. Cell phone reception was limited, but I could call and text home a few times from high areas, including on my daughter’s birthday. While on Baldy, I took pictures of each scout and texted their parents, which was appreciated.
I regret that we allowed the scouts to carry phones. One scout started watching Netflix when we were at a camp with reception. The phones were a distraction. I recommend requiring all scouts to store phones at base camp, as there are enough photographers with adult phones.
Steps to ensuring a lightweight pack: Now that you have an understanding of what is useful and what is not, here is how to dial in weight:
Assemble and weigh everything on the Philmont packing list.
Remove anything you think you will not need (gloves, long underwear, maybe a shirt).
Go do a big hill hike with your pack, include 2-4 liters of water and 10 more lbs to represent food and crew gear.
Only if the pack weight feels fine, consider if you want to bring an optional item.
These steps will ensure a comfortable pack weight, which will make for a safer, more enjoyable experience and better cohesiveness with your crew.
This is going to be a short post. While some backpacking experience helps, one does not need to know any Philmont-specific skills or procedures before arrival. A Philmont Ranger accompanies every crew for the first few days of the hike and will teach these skills—even if the crew already knows them. A physically fit crew with light packs, good attitudes, and zero skills but a willingness to learn will be fine at Philmont.
So, don’t spend time practicing skills unless you are absolutely sure that (1) everyone in your crew is in tip-top shape, (2) you have good crew dynamics, and (3) every member of the crew has an appropriately light pack.
Even though you will be taught all the necessary skills at Philmont, I recommend at least one pre-Philmont shakedown hike to reinforce the need for packing appropriately. Everyone should carry full packs and at least 4 liters of water. The shakedown should be difficult enough to punish those with heavy packs and cause those with new boots to get blisters. Bring a scale to weigh the packs to reinforce the importance of packing light.
Again, don’t sweat the skills. You will learn skills at Philmont. You can’t learn fitness.
The two most important things for a successful Philmont trek are:
A high level of physical fitness.
The personalities in the crew getting along.
Everything else – gear and backcountry skills – can be bought or learned after you arrive at base camp. But showing up at Philmont out of shape or with an a-hole in your crew cannot be remedied.
Need to be in shape to get to the top of Mount Baldy.
On Fitness: Philmont does not allow crews to split up, which means the entire crew moves at the speed of the slowest person. In extreme cases, one person’s failure to adequately train can cost a whole crew the opportunity to participate in activities and achieve crew goals. Nobody gets to summit the mountain if 11 crew members want to, but the twelfth person cannot. Therefore, failure to train adequately is a failure to be a good teammate. This concept – that failure to train is a failure of accountability to others – must be explained to the whole crew well before the trek to give everyone adequate time to prepare.
The adult leader of the crew needs to assess the crew participants early and identify members who will need extra help and encouragement getting into shape. Roughly speaking, crew participants can be divided into four categories:
Physically active youth play competitive, year-round, rigorous sports requiring running or high exertion (martial arts, football, soccer, basketball, cross country, track). They require little if any, extra training. These scouts are not overweight, eat with a hollow leg, and are the workhorses of the crew.
Less active youth are not heavily involved in sports. These scouts lack the physical work of regular sports practice and the mental strengthening that comes with tough workouts and competition. Some of these scouts are just plain soft, while others are surprisingly tough. These scouts need to attend crew workouts regularly.
Physically active adults who already train. This category includes adults who are not overweight and who legitimately train (i.e., more than just walk around the neighborhood) over 7 hours a week. Good metrics: Can comfortably run 10 miles, can comfortably bike 30-40 miles, can comfortably swim 1-2 miles, can do 10 pull-ups, or can easily deadlift more than one’s body weight for reps. This group will find a Philmont trek easy.
Less active adults are the most common adult group and struggle most on the trail. This group lacks an endurance base, strength, or (most commonly) both and carries too much weight. Adults in this group cannot run even 5 miles and cannot do a pull-up. This group needs extensive training, at least 7-10 hours a week for a year.
The best way to convince crew members of their need to train is to require an early, mandatory workout involving hill repeats with a full (30-40 lb) pack, which exposes weakness. For this test, I prefer to let everyone hike at their own pace (scouts as buddies) and see how everyone does after 2 hours. Here in Austin, we have the Hill of Life, about 300 feet of climbing over half a mile on a rough trail. This workout separates the youth and adults in shape (that was easy/not too bad) from the ones out of shape (very slow, out of breath, taking lots of breaks, gassed).
After the initial test, the crew leader (for the scouts) or lead adult advisor (for the other adults) should regularly check in with each participant who is not in one of the “physically active” categories above and confirm they are executing a training plan of 7 to 10 hours. The most efficient workouts are those with vertical components like hill repeats, inclined treadmills, and the Stairmaster.
Be blunt and tell your crew: Don’t go to Philmont if you are unwilling to do the work. Philmont is a physically demanding adventure. Most of the problems on treks result directly or indirectly from participants who are physically or mentally weak. When forming a crew, it is essential to communicate the expectations for fitness and training. The lead-up to the trek is over a year, which is more than enough time to get in shape. With positive encouragement, everyone can be physically and mentally at Philmont ready for success, but everyone must commit and be accountable.
Crew relationships. Besides a lack of fitness, internal conflict is the most likely thing to blow up a crew. The adult advisors in a crew should be familiar with the youth and have a plan for encouraging positive behavior. I was fortunate to have three other laid-back dads as advisors in our crew with great senses of humor. While there were occasional tensions within the scouts, there were never adult conflicts, and we were able to help the scouts resolve their conflicts.
Crew 714-9B-1 scouts happy about halfway to the summit of Baldy after a 4 am start.
As mentioned in the prior post, having an asshole adult as one of the advisors will be disruptive and is likely to result in a bad experience for everyone. An overbearing, conflict-seeking, or bossy adult can be a cancer for a crew. I would be particularly wary of adults in troops who like to pretend they are in the military (if you are involved in scouting, you know what I mean). These are the adults with ribbons all over their uniforms who like to give orders rather than empower others to lead. I would not participate in a crew with such a person nor allow my child to participate.
Physical fitness and a great crew are the keys to a good trek. Take care of those two issues and the crew will likely have an excellent experience. The following post will deal with the less critical but always fun topic of gear.
Warning: this is a paperwork and planning post, not an adventure post.
Philmont offers 7-, 9- and 12-day treks of varying difficulty. This post outlines how to choose the appropriate trek for your crew and get through the registration process. This explains how the process works for individual scout units, not council contingents. In summary, the steps are:
Identify your crew of 8-12 participants, including 2-4 adult advisors per crew.
Figure out what duration of trek you want to take.
Pick dates that work.
Register in the Philmont lottery in October two years before the trip.
December before the trek, pick your itinerary.
Forming your Crew
Crews are 8-10 participants, with the majority being youth. Philmont counts ages 18-21 as a youth. Officially, the limit on adult advisors is 4 per crew. Unofficially, Philmont grants exemptions to crews of 13 with an extra adult or youth if one emails the registrar.
When a troop is meeting to assemble a crew, the organizer should discuss expectations for crew members, particularly adults. Two things make crews succeed or fail: (1) physical fitness and (2) attitude. It is easier for an out-of-shape person to get into shape than for an asshole to learn how to not be an asshole. For this reason, I would be hesitant to allow an overly bossy, argumentative, or controlling adult to join a crew. It is better to have a difficult conversation at the early stage than have acrimony on the trail that ruins the experience for the rest of the crew.
(Note: I have always had great adults on my trips with Troop 33, but I have heard horror stories through the grapevine. Follow the no-asshole rule, and your crew is unlikely to be a horror story.)
When forming a crew, also have a discussion of the costs. Specific costs are listed on the Philmont website. Ballpark, each participant is looking at around $1,500 in program fees + travel + equipment.
Figuring out the trek duration.
Calculate travel time. Understanding the travel time is essential as it affects the total duration of the trip as well as the cost. Philmont is not convenient to get to. Crews drive, take the train to Raton, NM, and then a short shuttle, or fly into Albuquerque, Denver, or Colorado Springs and then take a bus. We elected to fly via Colorado Springs and then take a 3-hour Charter bus because the drive from Austin exceeds the 10-hour BSA driving limit, and our adults were already limited by missing work, so we wanted only one day of travel. Our travel cost was about $600 pp.
Calculating travel and base camp days. Crews sleep at basecamp on the first and last night of the trek, meaning they spend two fewer nights in the backcountry than the official duration (i.e., on a 12-day trek, crews camp ten nights in the backcountry). The first day of the trek involves hours of medical checks, registration, gear checkout, and talks with a Ranger. Speaking with staff, the latest a crew could arrive and still complete everything is mid-morning on Day 1. For most crews, this means either arriving a day early or spending the night somewhere within a few hours of Cimmaron. Crews leave base camp the morning of the day after the trek ends. Thus, those flying or within a 10-hour drive can get home the day after the trek. Other crews take two days to get home. These constraints mean that two or more travel days must be included in calculating the total trip duration.A seven-day itinerary means at least nine (and possibly more) days away from home, work, and family.
Deciding on Duration – The primary time constraint for many crews will be the adult advisors’ ability to miss work. Longer treks have more opportunities for activities. We picked a nine-day trek because we wanted more than five days in the backcountry, but our adults could not afford two weeks away from work. This decision worked out for us. We had many fun activities but were ready to be home after seven days with 14-year-old boys. I think we would have been rushed on a 7-day trek.
Registration
Once your crew decides on a trek duration, you need to enter the Philmont lottery. To do that, a lead adult must create an account on the Philmont Camping Gateway. The lottery opens on October 1, two years before the trek. (i.e., on Oct. 1, 2024, the lottery will open for 2026 treks). In the lottery, you can reserve multiple crews for your unit and select various dates for the trek. The lottery drawing occurs in mid-October, and you will be informed of your trek date. The initial deposit is $150 per person, and the balance payments are made in the fall and spring before the trek.
Selecting your itinerary difficulty.
Philmont releases the descriptions of the coming summer’s trek itineraries in December. It is worth reviewing prior years’ itineraries to get a flavor of the options. Philmont has four classifications of the trek in ascending difficulty: Challenging, Rugged, Strenuous, and Super Strenuous. The tradeoff for doing a more challenging trek is that crews are less likely to be able to participate in programs, even if programs are officially part of an itinerary. This is because program availability at the backcountry staffed camps is first-come-first-served. A crew that arrives at a camp late in the morning or afternoon risks having all the program slots taken by earlier crews. In addition, during the July monsoon season, afternoon programs are often canceled due to thunderstorms.
Because the programs distinguish Philmont from other backpacking trips, crews should carefully assess fitness and hiking speed and choose a less difficult itinerary. We chose a ” Rugged ” itinerary, and most of our participants found it easy. We had plenty of time for programs, and the boys had plenty of time to play around. I have spoken with many adult leaders on crews who selected ambitious itineraries and who missed many of the unique activities.
I would not have had time to make this 40-yard shot at the Cimarroncita 3D archery course if we had been still on the trail that day!
At first glance, the itinerary selection process can be overwhelming. The 2024 Itinerary Guidebook is over 200 pages. Fortunately, each year, Sid Covington, a passionate volunteer from Austin, creates Excel tools to assist with itinerary selection. Sid’s spreadsheets include a survey asking the scouts to rank the activities. The spreadsheet then identifies the itineraries that most correspond to the crew’s preferences. We used Sid’s tools to narrow the list to a few itineraries we discussed at a meeting. Once we had a final choice, I entered our list into the Philmont Camping Gateway, which lets you pick up to 4 itineraries.
Enough of paperwork. The following post will discuss how to prepare a crew for the trek.
I just returned from a nine-day trek at Philmont Scout Ranch with my son’s scout troop (Austin Troop 33). It was great fun. This is the first in a series of posts on what to expect, how to prepare, and vital tips for a successful Philmont trek. At the end of the series, I will summarize our specific trip and the pros and cons. This post is a basic overview explaining how Philmont works and how it differs from other high adventure opportunities.
What is Philmont?
Philmont Scout Ranch covers approximately 140,000 acres in the Sangre de Cristo Mountains near Cimmaron, New Mexico. Elevations range from about 6,000 to over 12,000 feet, and the terrain includes open grasslands, pine forests, burn scars, and alpine tundra. Oilman Waite Phillips donated the property to the BSA in the 1930s. The base camp area includes a training center, museum, and tent city where participants begin and end their treks. The majority of the property is backcountry with a well-developed trail network.
Philmont offers seven-, nine-, and twelve-day backpacking treks, cavalcade (horseback) treks, and several longer treks. For the traditional treks, participants are organized in crews of 8 to 12 participants, consisting of four to eight scouts (age 14 and up) and two to four adult advisors. A little-known, unadvertised fact is that Philmont will authorize increases to these numbers on a case-by-case basis. I will focus on the traditional backpacking treks in this series, but much of the advice applies to all treks.
What makes Philmont unique?
While the hiking is fun and the scenery fantastic, there are more challenging and stunning landscapes for a backcountry trip than at Philmont. What sets Philmont apart are the staffed backcountry camps. Each of these camps has a theme and programs. The staff are mainly college-age kids who play period characters and run activities. Most of the staffed camps focus on an aspect of the American West. Thus, camps celebrate native peoples, early pioneers, railroads, logging, fur trapping, and mining. Most camps are set in a specific historic year – for instance, one of our favorite camps, Miranda, is a fur trapping-themed camp, and the year is always 1829. In addition, there are camps with modern activities such as climbing, challenge courses, archery, and shooting. Most staffed camps also offer evening programs, including songs, traditional tales, and skits.
Philmont is more like a fun summer camp where one must backpack from activity to activity than a wilderness trip. The program/backpacking combination is excellent, particularly for teenage youth. For this reason, I advise crews to focus much more on what programs they find interesting than mileage—save those big mile days for other trips.
Philmont logistics.
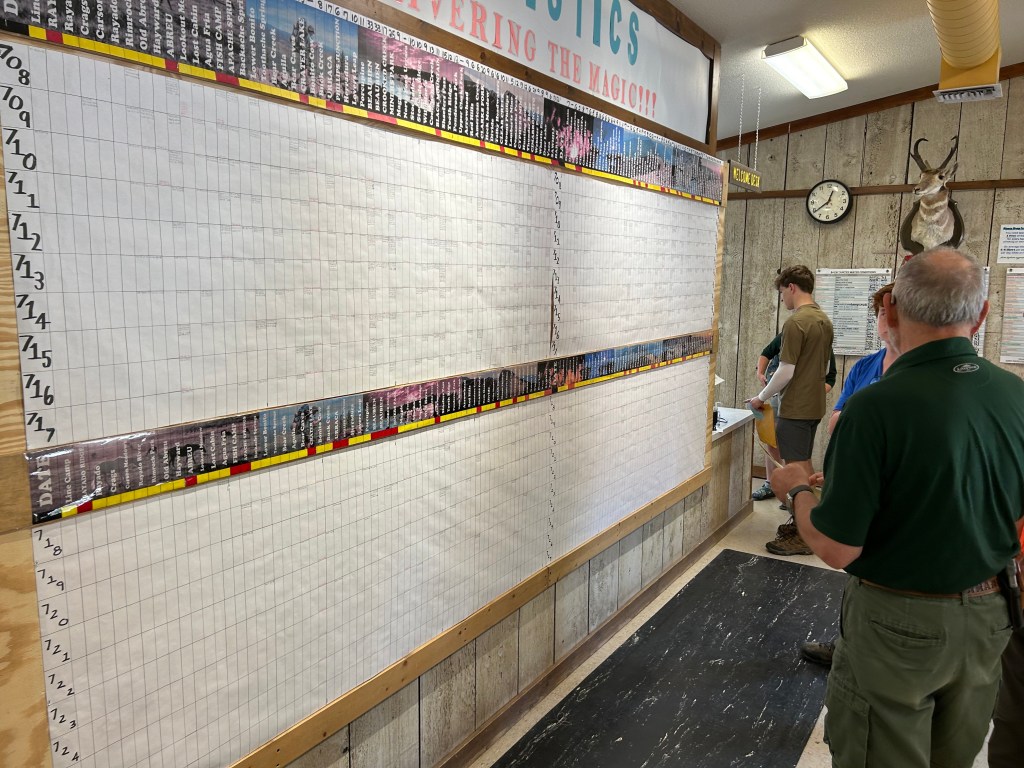
Philmont employs over 2,000 staff, and each day, hundreds of people head out and return from treks. The Philmont logistics department tracks each crew and ensures that food and other supplies are provided to each crew in the backcountry. The operation is impressive.
This is the logistics office. Each column is a backcountry campsite on the wall, and the rows are the days in a two-week period. Every crew is listed on the wall, so logistics knows where each crew is each night (if they did not get lost).
One anecdote about Philmont logistics comes from our other Troop 33 crew, hiking on a different itinerary than my crew. Over the first two nights of their trek, one of the adults discovered that her sleeping bag was not warm enough. She bought a new sleeping bag from the Tooth of Time Traders at basecamp, and they sent it to the staff camp where the crew was camping that night, so she was warm for the rest of the trip.
Philmont has its way of doing things, and that’s OK.
Philmont is likely the most used backcountry area in the United States. Thousands of scouts and adults hike in the backcountry daily during the summer. Each year, 15,000 to 25,000 people participate in Philmont programs, which has led to the development of unique procedures to protect the land and wildlife. A Philmont Ranger teaches every crew these practices during the first days of a trek, and they are mandatory, including:
Stringent procedures regarding food and smellable materials.
Unique bear-bag hanging processes.
Tents only; no hammocks or tarps are allowed for sleeping.
Patrol-method cooking in a large central pot.
Specific dishwashing practices.
Many find these practices to be cumbersome and inefficient. To that, I say get over it. There are reasons for the Philmont procedures, and, in any event, the private property owner, Philmont, sets the rules. Implementing modern lightweight backpacking at Philmont is possible, but some accommodations must be made to comply with the regulations.
Philmont focuses on the youth, not the adults.
I will post more on this later, but Philmont emphasizes youth leadership. Adults are there for safety and support, but everyone should expect that scouts will be the primary decision-makers and leaders of the trek. I have heard scouting referred to as a tremendous bait-and-switch in that scouts think they are learning outdoor skills while learning more critical leadership and teamwork skills. The same applies to a Philmont trek. Each crew will have challenges, highs (hopefully literal highs on mountaintops), and lows, but dealing with these circumstances will instill leadership and teamwork lessons. For adults with a proper perspective, observing the scouts go through this sometimes-rough process is very fulfilling.
The proper role for adults: drinking coffee, enjoying life, and letting the kids lead..
Why go to Philmont?
Despite a background of not entirely uneventful activities, I found Philmont to exceed my expectations. I treasure the chance to spend a week with my son while he has a blast with his friends. What Philmont offers is something that, to my knowledge, is not available anywhere else. Anyone with a kid in scouts should at least consider going on a trek.
Last week I attended the Class III Rowing School put on by Northwest Rafting Company. The school involved 5 days on the Rogue River in southern Oregon where I learned basic oar boat whitewater skills. Here is a short highlight video. My detailed review of the trip is below the video.
Why did I sign up? Multi-day whitewater trips on the great rivers of the West are awesome opportunities for family adventure. But I don’t have any experience behind the oars in whitewater. So, I needed to start somewhere and professional instruction seemed like the most efficient route, particularly if I am going to be taking the kids along. Plus, it sounded awesome.
Students and Instructors: To my knowledge, this is the only whitewater rowing school where each student can row their own boat for five days. This “time on the sticks” proved essential to learning and I would not have had the same experience sharing a boat or spending less time on the water.
The class had 12 students, each in a 12-14 foot raft, three instructors who spent the days on the water with students, and two guides and one guide in training who ran the trip gear boats. For most of the time, we were split into three pods; each with four students and one instructor. We rotated instructors each day, so that every student had a chance to learn from each instructor.
We had a diverse group of students from late 20s to 75. I was either directly or indirectly connected with five of the other students. While everyone had their own personality, the overall vibe of the group was very positive and lighthearted.
We also had different experience levels from total beginners to people with some river experience in other craft, to a student who owned a raft and had spent many days behind the oars. I rowed a lightweight 13’ Sotar Rogue Tyee raft for the first two days then switched with my brother to row an older Sotar 4×4 for the rest of the trip.
Me in the Sotar Rogue Tyee entering Black Bar Rapids.
It was nice to feel the difference in the super light Rogue versus a more traditional raft. Other students rowed Sotars or 14’ Wing boats. Each student boat carried the student’s personal gear in a big dry bag in the bow plus a smaller dry bag for items needed during the day. Each boat had oarlocks that could be released if the rower preferred the ability to feather the oars (I kept them locked as I had enough to think about already). The oars were heavy duty, which makes sense given that they took a beating. All of the boats were in good shape, although the Sotar 4x4s required some air each morning.
What I learned: The goal of the class is to teach basic skills to allow safe navigation of Class III whitewater. We had short lessons three times a day on various topics including reading rivers, scouting rapids, gear, multi-day trip planning, and safety.
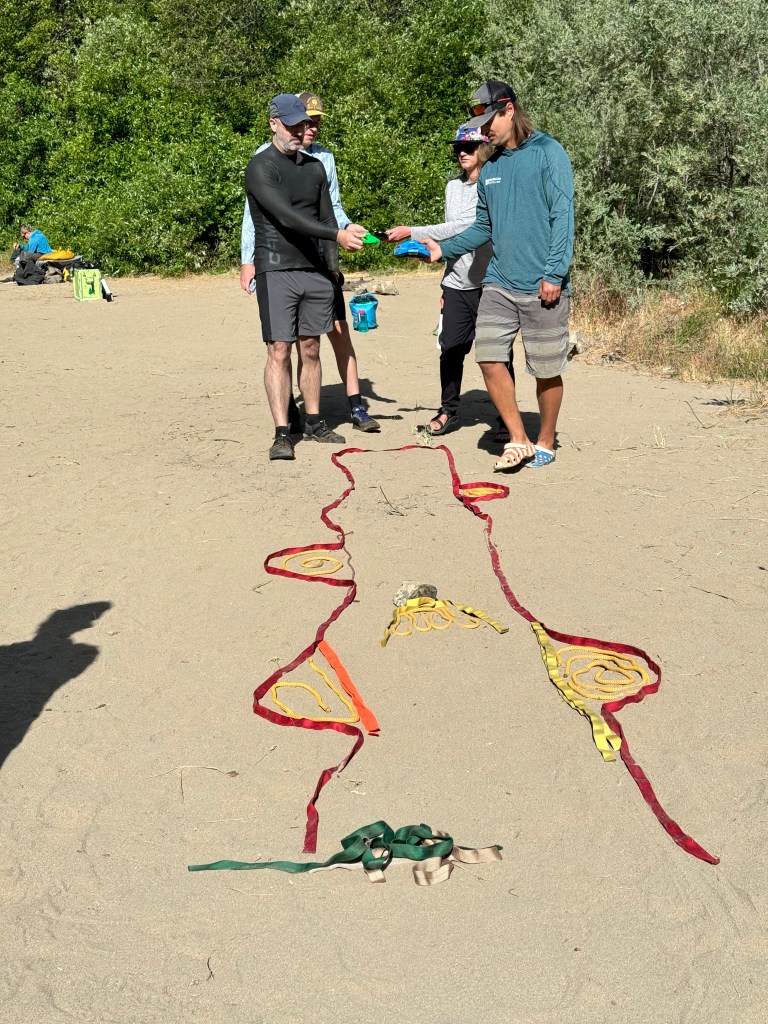
Morning lesson with ropes and webbing depicting eddies. We discussed how to pick a line and eddy out as a group using models first and then on the river.
On the water, the instruction focused on defensive rowing: setting the proper ferrying angle with respect to the current and then pulling. We were encouraged to get stable, determine what angle was needed to maneuver away from an obstacle or to cross an eddy line, pivot to that angle, and only then pull on the oars. This sounds like a simple skill, but once behind the oars in a rapid with varying water velocities acting on the different parts of the boat, it is not that easy – and is not instinctive. Specific skills and lessons that I learned:
Downstream oar management – This skill is one that I was not really focused on prior to the course as it is not that relevant to canoeing or packrafting, which is most of my river experience. Multiple students hit downstream oars on rocks during the class, but fortunately no one was injured or ejected from their boats. I avoided any problems, but learned to keep my downstream oar out of the water in rapids unless I was making a move and even then to be cognizant of water depth.
Using Eddies – The instructors emphasized identifying and entering and exiting eddies and using eddy boundary lines to safely control speed. This was the main focus of one entire day; essentially spending hours trying to catch almost every eddy. When I ran the bottom half of Blossom Bar on day four, I was competent enough at this skill that I played a game of ferrying across the river, catching an eddy and stopping, then picking my next eddy ferrying over and stopping. The ability to be moving fast down a rapid and then cross the top of a strong eddy line and come to a complete stop in seconds provides a great sense of control.
Boat Spacing – Another emphasized skill was proper boat spacing and boating as a team. On the first day, it was a disaster as we were bumping into each other or were way too spaced out. This situation significantly improved by day two, and by day three each pod did a good job of maintaining boat spacing. By the end I felt very comfortable maintaining proper spacing and maintaining the use of both oars even in close quarters.
Angles/Efficiency – My biggest takeaway was learning how to use the varying currents to control the raft efficiently. One day an instructor challenged us to put our rafts very close to obstacles and then to pivot off the obstacles and away from danger using only our upstream oar to change the boat angle in the current. This game allowed me to understand the concept of pillowing and to feel how the faster current in the middle of the river could grab the stern of the raft. Once I understood this concept, it was like a light went off. Now looking at rafting videos on YouTube, I can see how whether a raft makes or misses a move is largely determined by whether the boater has the boat on the proper angle to the current.
Skills not emphasized: This is a defensive Class III rowing course with a focus on fundamentals. We mainly avoided obstacles and did not play in big holes or waves. While more advanced skills were discussed, they were not part of the core curriculum.
Downstream Ferry – I had some opportunities to practice the downstream ferry on the last two days of the course. Timing was challenging for me hitting the top of an eddy while ferrying downstream.
Pushing Rapids and into Eddies – This was discouraged by our instructors most of the time. However, I did push a few eddies toward the end of the trip, particularly when I could judge that the eddy lines were relatively weak or when parking a boat with only a bowline in slow eddies.
Surfing Holes – There were a few chances to surf holes on the last two days, which I tried but had difficulty fully burying the bow of my raft. The best one was accessible by pushing up an eddy. I can see why this is fun.
What rapids did we row? Each student rowed every rapid between Galice and Foster Bar except the Rainey Falls Fish Ladder and the upper half of Blossom Bar. For the Fish Ladder, the instructors shuttled our rafts while we portaged mainly to avoid oar breakage. For the top of Blossom Bar, we sat in the back of our boats while an instructor rowed and narrated the move.
Confidence level after the class: Based on what I learned and practicing in actual river conditions, I am confident that I can: (1) read a Class III rapid (via scouting if necessary), (2) identify the obstacles and hazards in the rapid, (3) identify a line, and (4) navigate my line using defensive rowing techniques. I would go on a private trip on the Rogue or similar Class III western river.
I would not be confident on a Class IV rapid without a guide or other knowledgable person with experience on that river. But I would attempt a Class IV rapid under certain circumstances. For example, Blossom Bar is a Class IV rapid. After being in the boat with an instructor talking me through the move, I would be willing to run it on my next Rogue trip as I think catching the eddy is within my skillset and I understand the danger of going into the Picket Fence. Of course, different river conditions like high water might change this assessment.
One of the big things that this class opened my eyes to is knowing what I know and also knowing what I don’t know. Not just identifying the line, but understanding why the line is where it is given the current conditions what might happen if I miss the line. There is a difference in taking a calculated risk and getting in a dangerous situation without even realizing that it is dangerous. This class helped me think of rapids in a way that minimizes risk, which I like.
Camping/Food: The food was amazing, and all of our guides and instructors were a ton of fun. I had never been on a multiday commercial trip and coming from an ultralight backpacking background, I was blow away by the glamping. Simply outstanding.
Wildlife: We saw Bald Eagles, Osprey, deer, leaping Sturgeon, and snakes, including one intrepid Rattlesnake that climbed in my buddy’s boat. Exciting!
Scenery: The whole course is on the Wild and Scenic Rogue River.
Side hike to a natural water slide.
Travel: From Texas it takes an entire day to get there and a day to get home. The trip starts at the Galice Resort, which is about a 2 ½ hours from Eugene and 1 hour from Medford. We flew in/out of Eugene because Medford’s flights were limited. Once you drive to Galice, you can store your vehicle there for the duration of the trip as participants are shuttled back at the end via a 2 ½ hour drive over the mountains.
What did I not like? Nothing. They have the class dialed in. It is not cheap, but it is a high value. I learned more about safely rafting whitewater in five days that I would have in five years of DIY trips in a safer manner and at lower cost.
Suggestions: This type of class is a blend of education and fun which I find very appealing, and I wish there were more opportunities like this. I don’t really have a desire to go on a raft trip where I am not on the oars. This may be an untapped market and I hope Northwest Rafting and other outfitters consider offering similar trips on other rivers.
What is next? Will likely enter some Class III river lotteries for next summer and try to run a 3-4 day family trip. The course instructors gave us a list of rivers appropriate for our skill level and for a first private trip, including the Rogue.
In sum, this was a very very fun time and I cannot recommend it enough if you have interest in learning how to handle a whitewater oar boat. If you have any questions, please leave them below. More info on the class is on the Northwest Rafting website.