I don’t often get political on the blog, as I like to focus on outdoor adventures in awesome places. But when one of those awesome places is threatened by government incompetence and corruption, I make an exception. If you have not heard, the Department of Homeland Security announced a plan last month to build a border fence along the Rio Grande River in the Big Bend Sector, which includes both Big Bend National Park and Big Bend Ranch State Park. Below is my comment letter to the incoming DHS Secretary, Sen. Markwayne Mullin. I sent similar comments to our Texas federal and state legislators. Anyone who cares about the Rio Grande in the Big Bend, regardless of political persuasion, should oppose this idiotic idea.
(For those who don’t get the reference, “Level 11 Dumb” comes from the great Rob Reiner mockumentary This is Spinal Tap – where the band leader explains that their amps have been relabeled from a 1-10 scale to a 1-11 scale, so they are louder. When asked why not just make 10 louder, he responds: “But these go to eleven.” The Big Bend Wall plan is the 11 of border policy.)
Comment on DHS Big Bend Border Wall Plan
Dear Senator Mullin:
Congratulations on your upcoming appointment as Secretary of Homeland Security. I am writing to ask you to reconsider the plan announced by your predecessor to build a border wall through Big Bend National Park and Big Bend Ranch State Parks. I support strong border enforcement. However, this plan is unnecessary, a huge waste of taxpayer dollars, and would punish law-abiding citizens without doing anything to stop illegal immigration.
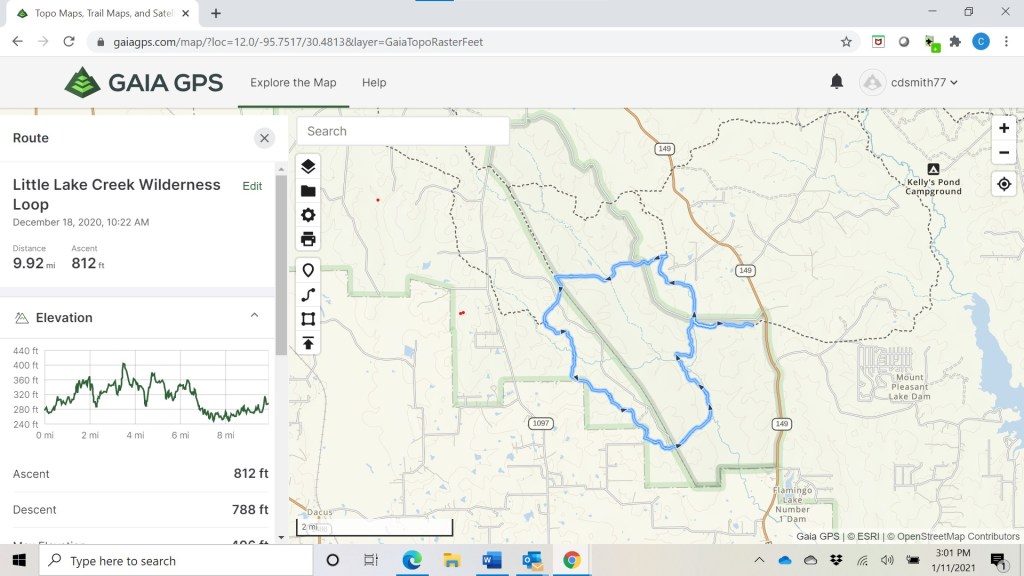
Building a wall through the parks is unnecessary because renewed enforcement has nearly stopped illegal immigration in the Big Bend Sector. The Big Bend Sector covers 77 Texas counties and all of Oklahoma, including 517 miles of the Rio Grande. In Secretary Noem’s Federal Register publication, she notes that between FY2021 and FY2025, approximately 89,000 illegal aliens were apprehended in the Big Bend Sector. These figures reflect the lax border-enforcement policies of the previous administration, not current trends. For the four months of FY2026 (Oct 2025-Jan 2026), the total number of USBP encounters with illegal aliens was 734, averaging about 184 per month – again, in an area that includes most of West Texas and all of Oklahoma. This dramatic decline shows that a strong enforcement policy is all that was needed to reduce illegal border crossings in this Sector.
Within the Big Bend Sector, the parks are the least likely crossing points for illegal aliens. The National Park has 118 miles of river frontage, and the State Park has about 30 miles, totaling roughly 28% of the river frontage in the Big Bend Sector. This river frontage is extremely remote, accessible only by a few park roads (or, in the case of the State Park, FM170) that are actively monitored by USBP. The terrain is very hostile, and the distances are too great for a viable foot crossing. USBP’s enforcement in the park is already effective.
Building a wall through the parks is a massive waste of taxpayer money. Since 2025, DHS/CBP contract awards for “Smart Wall” systems (including primary and secondary barriers, technology, and other features) average around $20 million per mile. Building a wall along the 148 miles of riverfront in the parks will cost about $3 billion. Even spread out over decades, this totals millions of dollars for each illegal crossing prevented. The cost of the wall is vastly higher than more affordable, effective solutions, such as increasing USBP staffing and using electronic surveillance tools like drones.
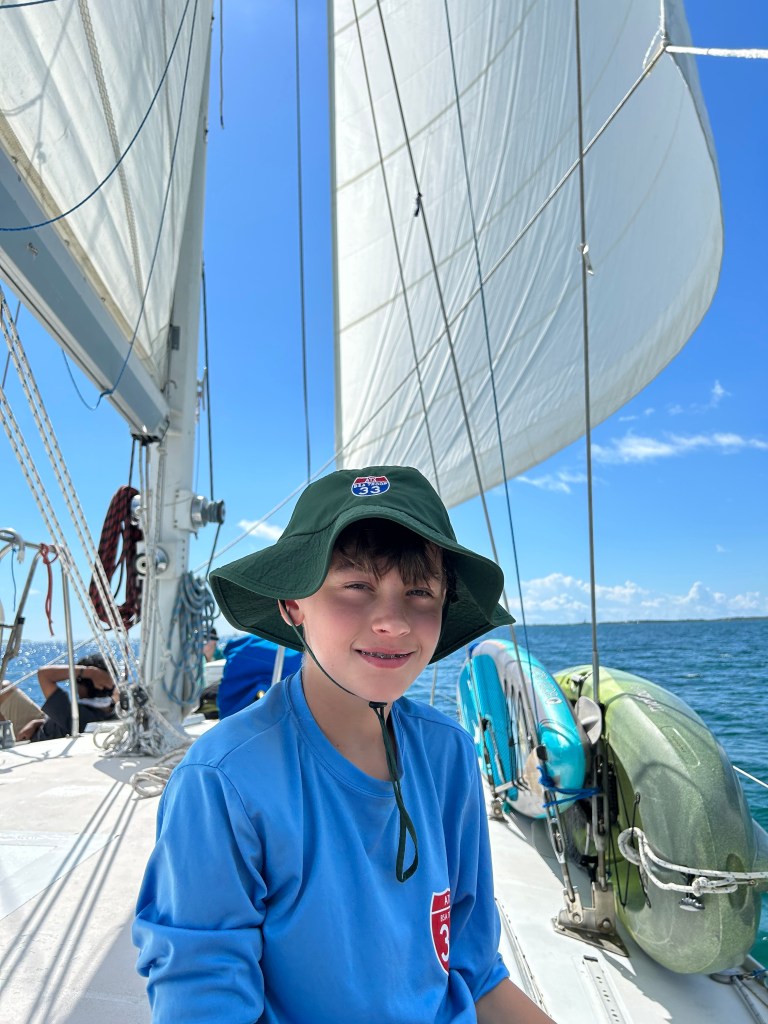
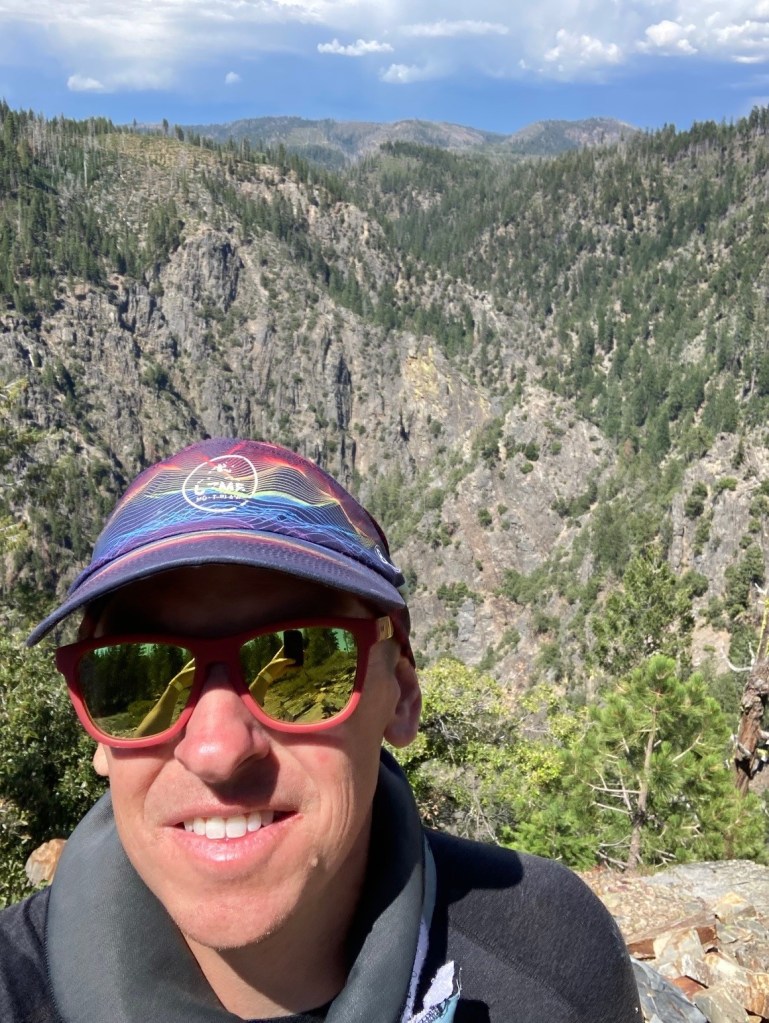
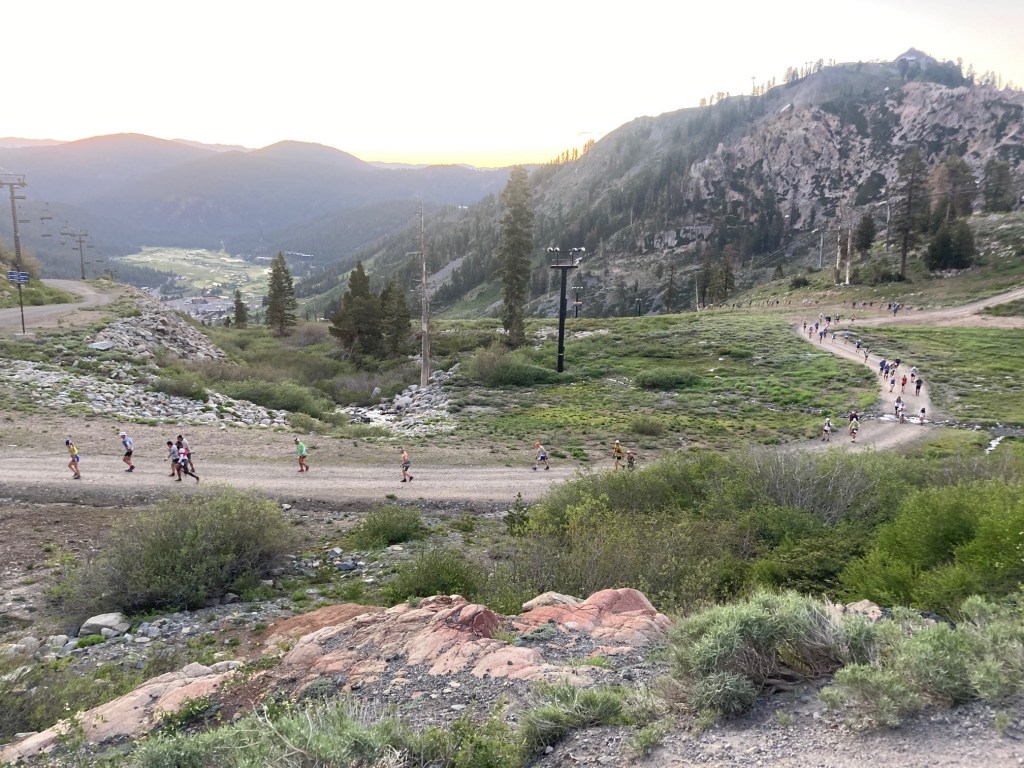
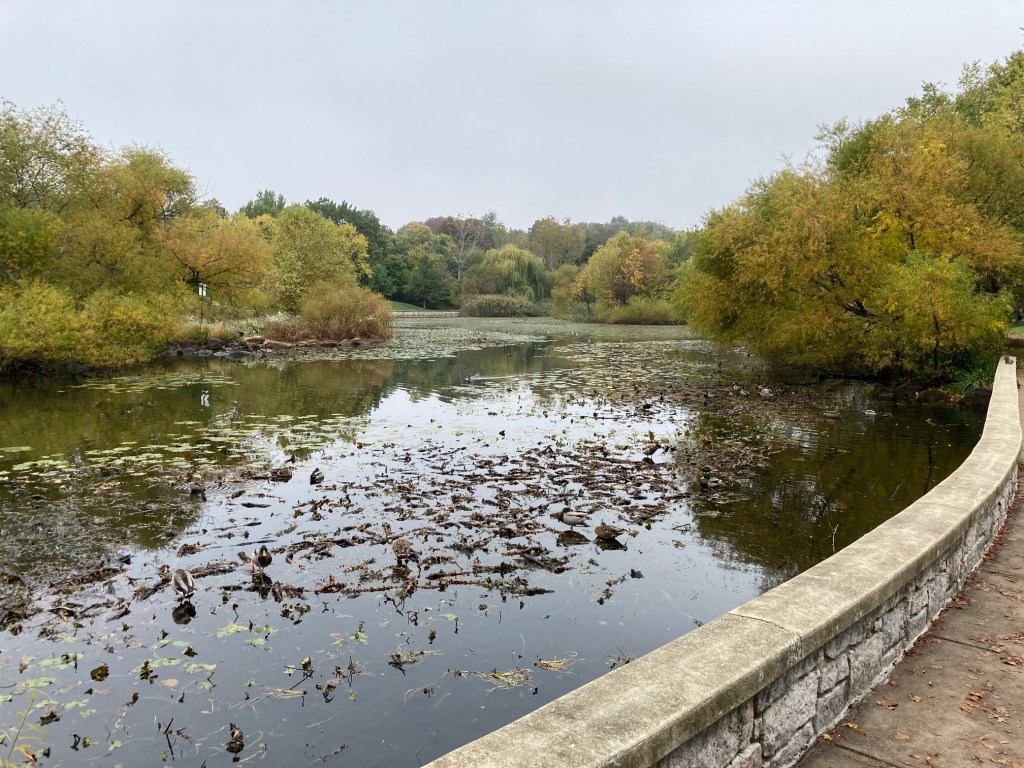
Building a wall along the Rio Grande in the parks would deny Texans the opportunity to enjoy one of the country’s most untamed public landscapes. The Rio Grande in Big Bend, especially its wild desert and canyons, is truly extraordinary. In January, I floated Boquillas Canyon with my son’s scout troop, and saw how powerfully the beauty and challenge of a river trip affect young people. In a time when we want to create more chances for active, vigorous outdoor experiences for our youth, DHS’s plan does the opposite.
Good luck in your new position, and thank you for considering this comment.
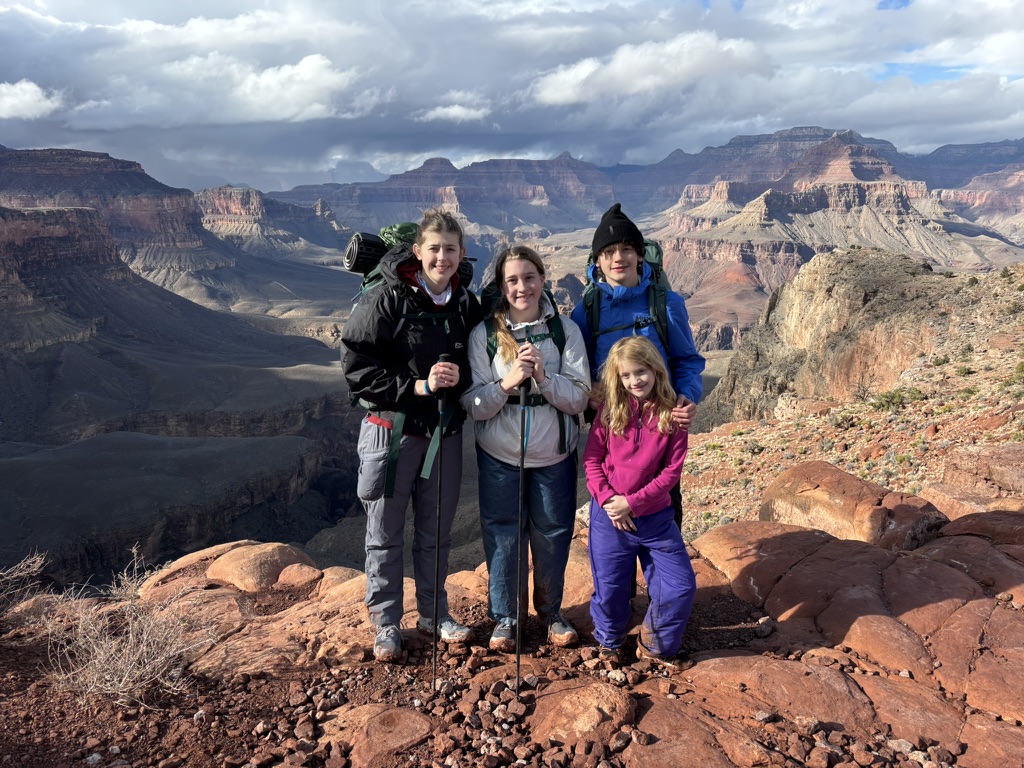
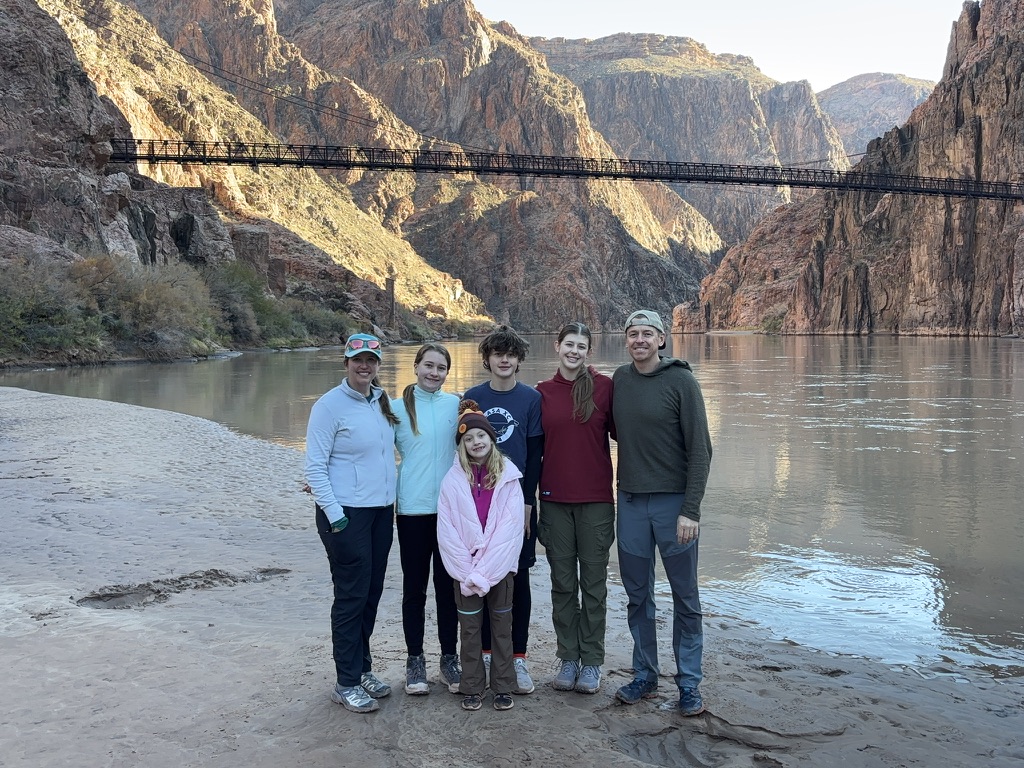
Right after Christmas, we decided to take a quick backcountry trip to the bottom of the Grand Canyon. We had only been to the Canyon once before during our COVID summer roadtrip, but had never ventured more than 2 miles down the Bright Angel trail.
We flew to Phoenix and drove a rental car to Tusayan, a cluster of hotels about 3 miles south of the park entrance. That evening, I drove into the park to pick up my permit from the Backcountry office. The ranger was very helpful and confirmed that water would be on at the Bright Angel and Havasupai Gardens campgrounds. The next morning, we woke to miserable weather: 33 degrees of rain, with the occasional wet snow flurry. We decided to start late, hoping the weather would clear. After hitting up the Tusayan Starbucks, we waited in line to enter the park and drove over to the parking lot by the Backcountry office in the Grand Canyon Village area of the South Rim. The Ranger had recommended the night before that we park in this lot because, even though it would require buses to reach the South Kaibab trailhead on day 1, it would be a short walk from the top of the Bright Angel Trail when we finished on day 3.
We boarded the shuttle bus in a snowstorm, the driver incredulous that we were going down into the canyon. At the South Kaibab trailhead, the snow continued, with almost no visibility. We started down the muddy trail in good spirits. I made everyone wear rain pants given the precipitation, and it was a good call.
We took a quick water break at Ohh Ahh point, about a mile down the trail, then a longer break at Cedar Ridge, about 1.5 miles in.
There are pit toilets at Cedar Ridge, and we enjoyed some views of the Canyon as we were now under the cloud deck.
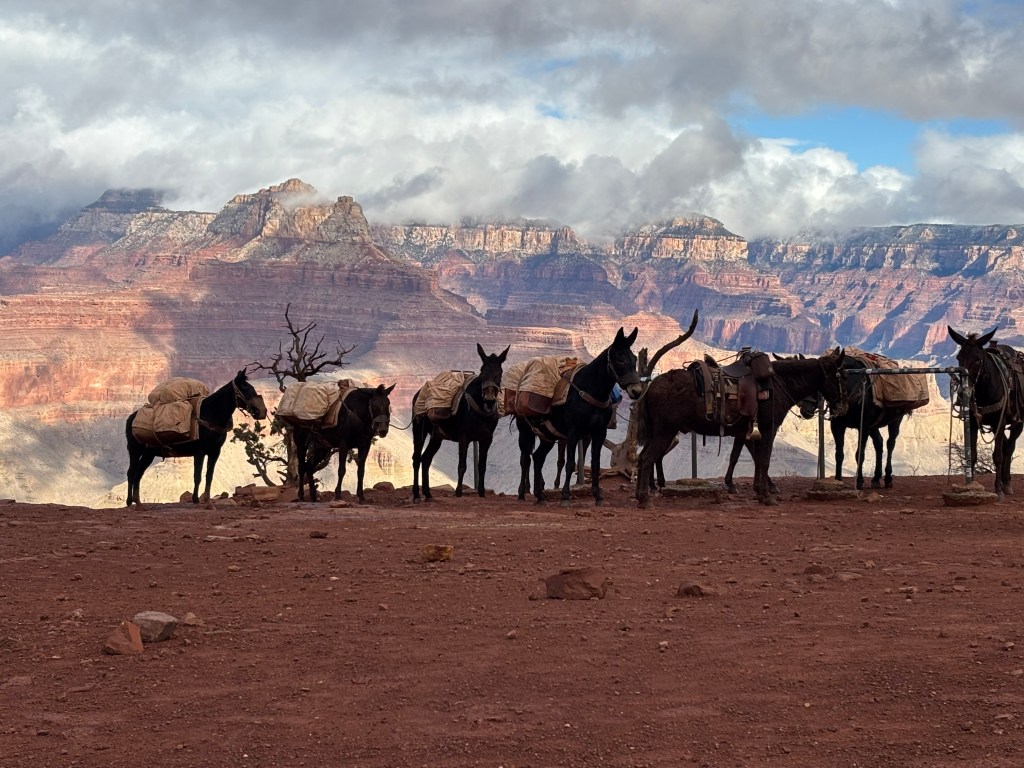
Mules taking a break at Ohh Ahh Point
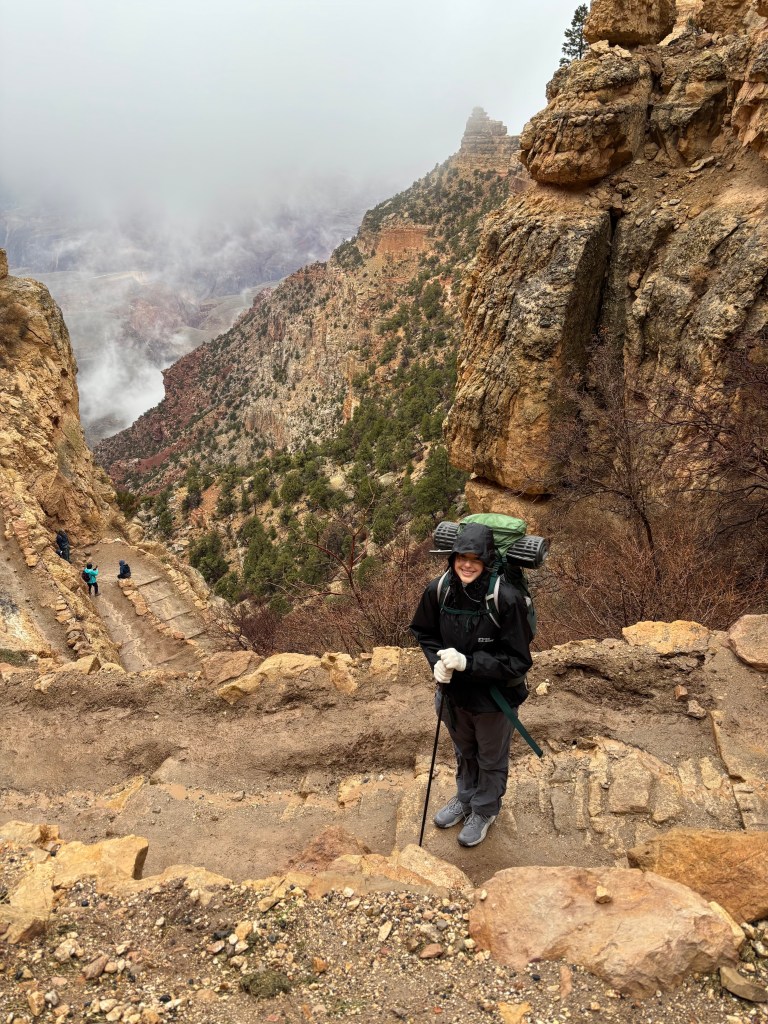
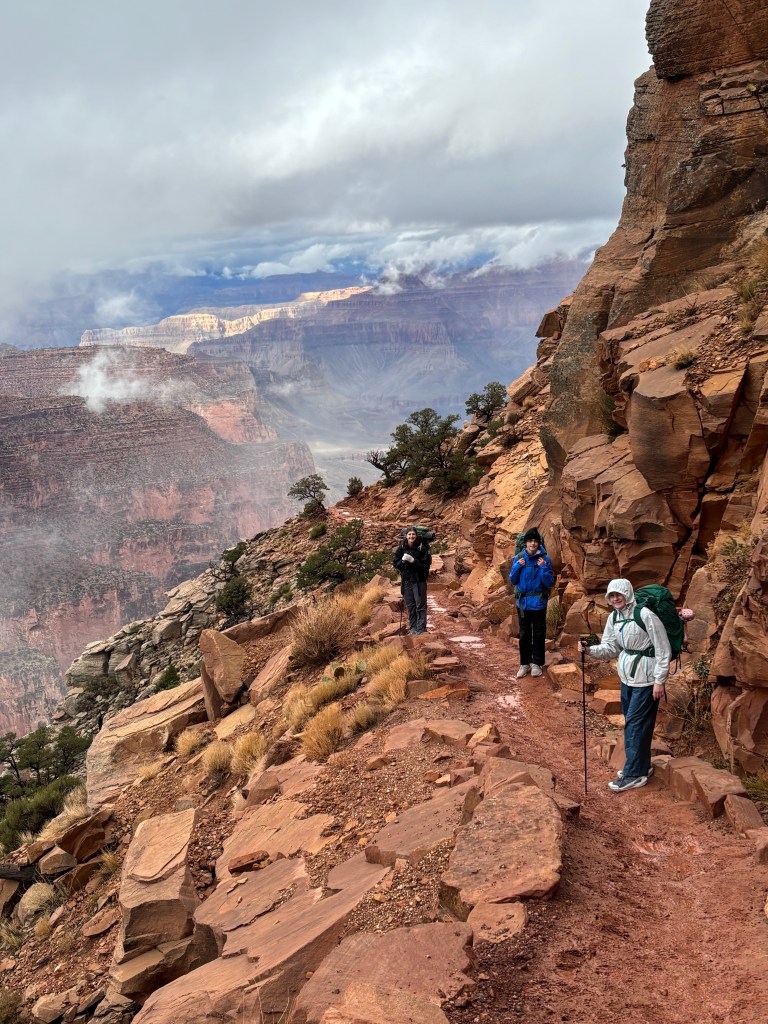
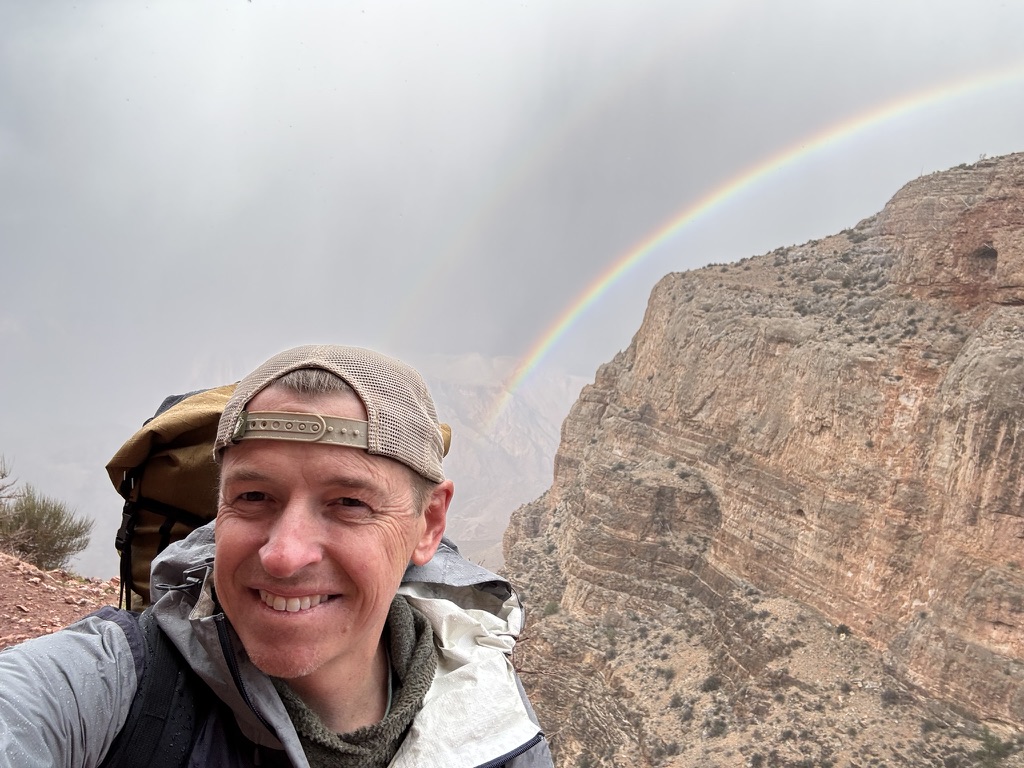
From Cedar Ridge, the slippery trail continued to Skeleton Point, which is a dramatic promontory with views of the Canyon dropping steeply from three sides. About this time, a rainstorm rolled in, bringing with it strong winds and a beautiful double rainbow.
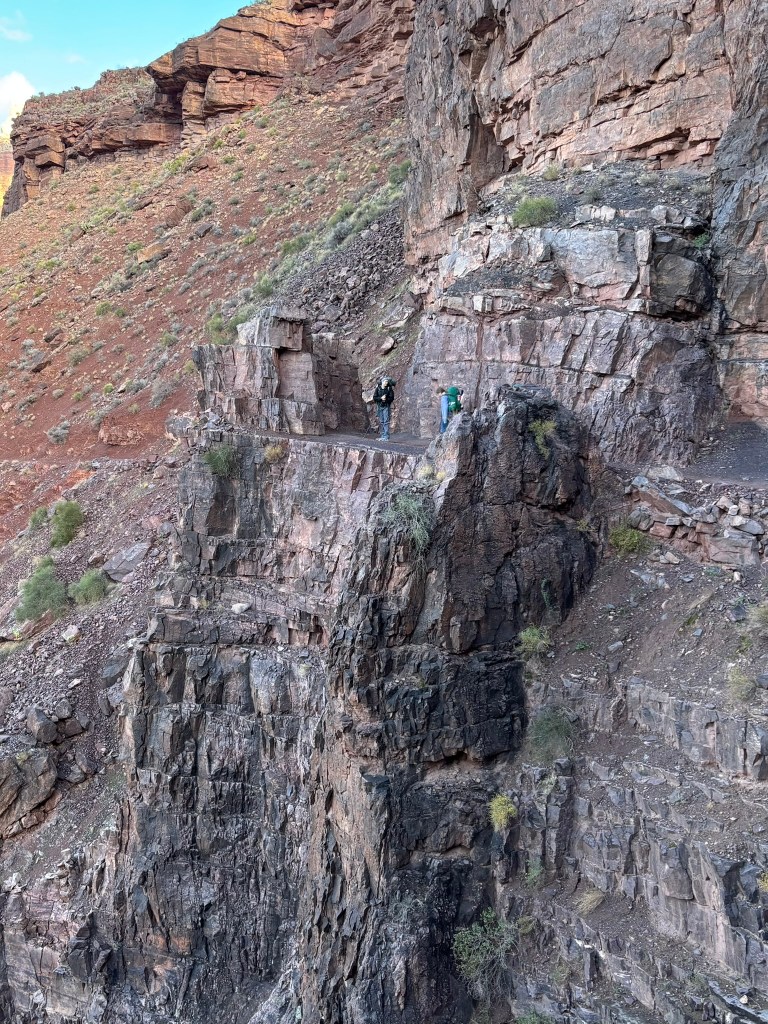
One thing that surprised me about the trail was its significant exposure in some spots. The trail is wide and well constructed, but the area around Skeleton Point has several spots where, if one were to fall off the trail, it would be fatal.
Example of the exposure typical on the South Kaibab Trail
The kids took everything in stride, and we only had a real problem when we were almost down to the Tonto Platform and passed a sign saying we had gone 3.5 miles but still had 3.8 to go to Phantom Ranch. I had told everyone that the hike was about 6 miles, and some in the group did not appreciate the additional 1.3 miles. But six-seven!
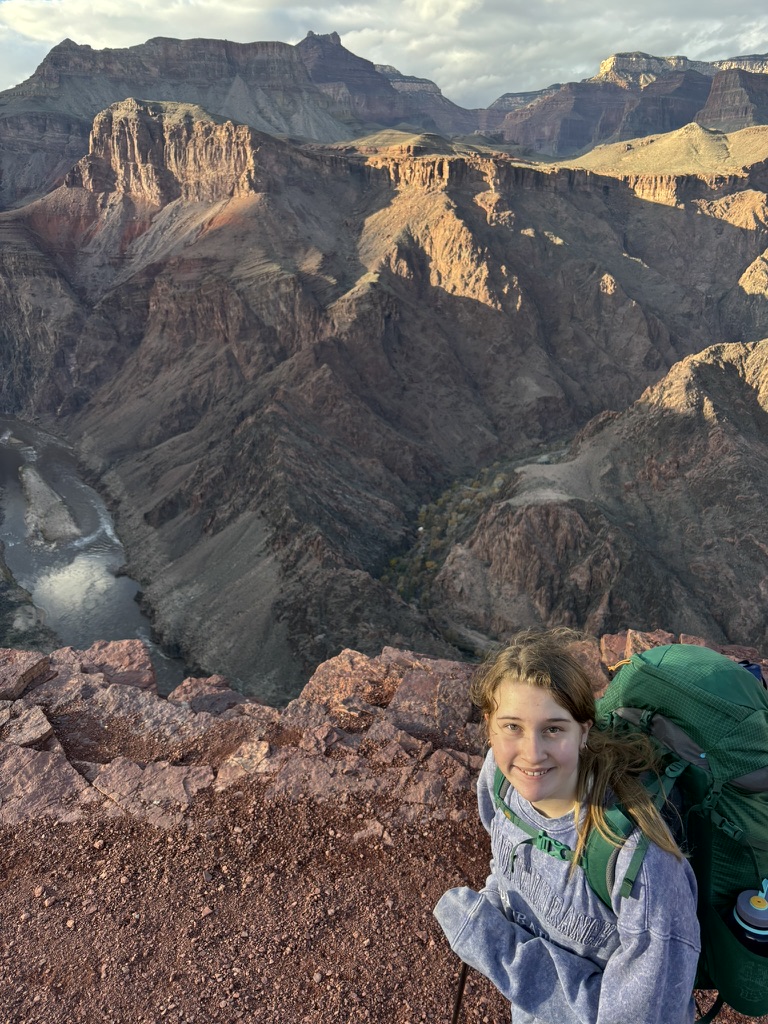
After descending the switchbacks from Skeleton Point, the slope is relatively gradual to the Tip Off shelter and bathrooms, where we took another break. This is where the Tonto Trail, which goes east/west, intersects the South Kaibab Trail, which goes north/south. The Tip Off itself is about 200 yards from the shelter and offers the first really good views of the Colorado River. The 1.8 miles from the Tip Off to the River are the steepest part of the trail, and with high-mileage knees, it was the most uncomfortable stretch.
View from the Tip Off. Bright Angel Campground and Phantom Ranch are in the creek valley at the top.
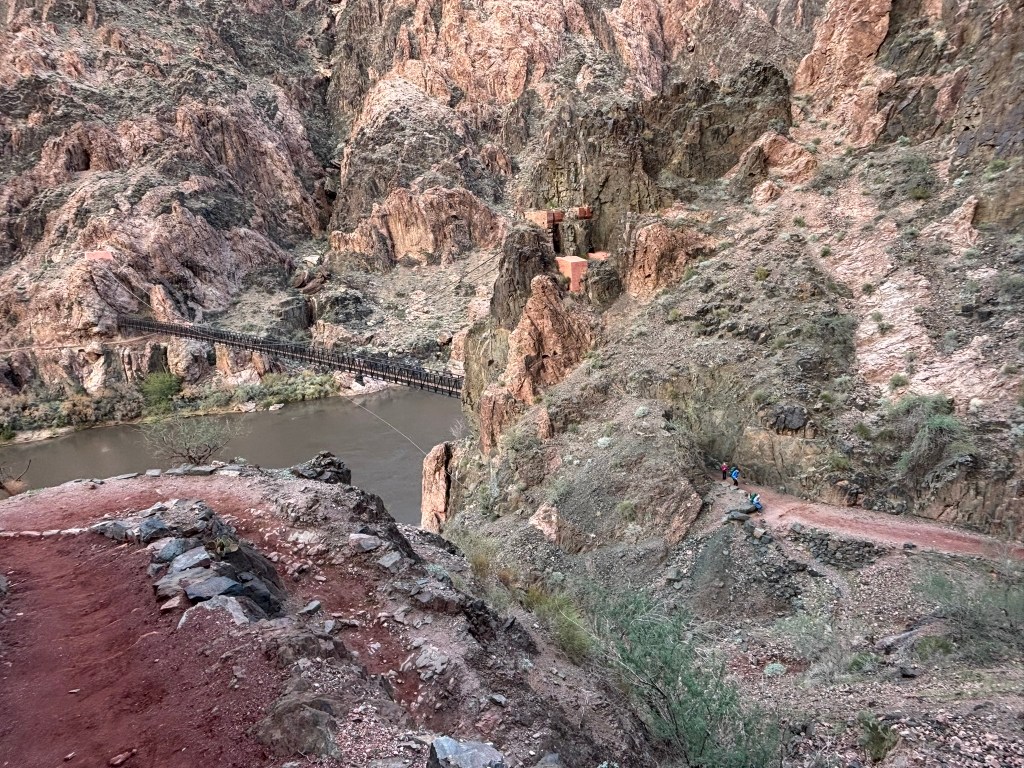
At the bottom, the trail passes through a tunnel and then crosses an iron suspension bridge, the Black Bridge, built in 1922.
From the bridge it is a short walk to Bright Angel campground. We selected our campsite, and hurried to set up the tents and cook dinner before dark. We ate dinner and were playing Uno when a Ranger came by to check our permit. She also told us that the Phantom Ranch Canteen is open from 8:00-9:30 pm every night for those who want to buy a drink or just get in out of the cold. We really appreciated this tip, as we took hot chocolate packets for the kids to drink while they played Jenga and Michelle and I had a glass of wine. Phantom Ranch is such a neat historic spot.
That night, the temps dropped into the 30s, but everyone slept well. But in the morning us oldsters needed some vitamin I as the legs were quite sore from the downhill. We had coffee, ate breakfast, then hit the bathrooms (which have actual running water – amazing in the backcountry!). Our first stop was the River, which we all wanted to touch to prove that we made it to the bottom of the Canyon. It was clear and still, and the muddy river was spectacular.
The steep hike up to the Tip Off took about 2 hours, but frankely going up is easier than coming down. At the Tip Off we ate lunch in the shelter and saw a pair of Big Horn Sheep wander a few hundred yards away.
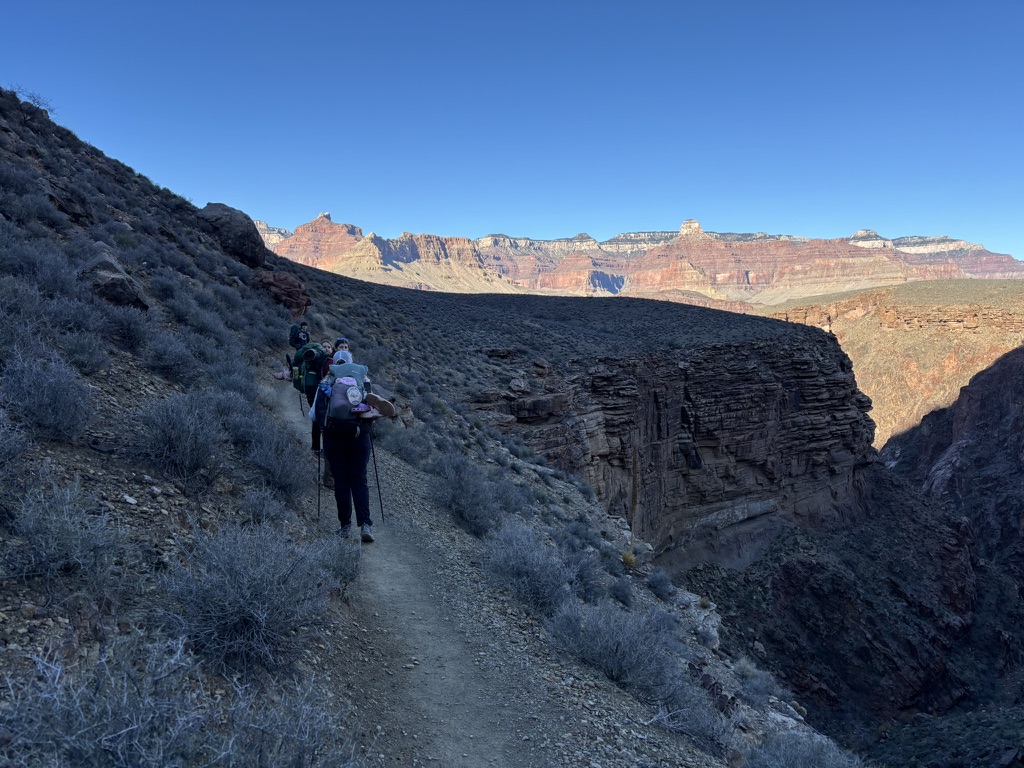
Currently, the NPS is replacing the water line that serves the South Rim. Due to the construction, the River Trail was closed, meaning the only way to reach Havasaupai Gardens from the South Kaibab Trail was to take the Tonto Trail. The Tonto trail is, relatively flat, and follows the Tonto Platform, which is a wide bench about 3,000 feet below the South Rim. We were on it for about 4 miles, and enjoyed the views as the trail meandered into the Pipe Creek Canyon.
The Tonto Trail. Again, note the exposure.
We took a break at the creek and filled water bottles, then continued on. The Tonto Trail also had several places with significnat exposure to falls of many hundreds of feet. Along the way, Sam found a curious rock which appeared to contain a fossil (which we left where we found it on the side of the trail).
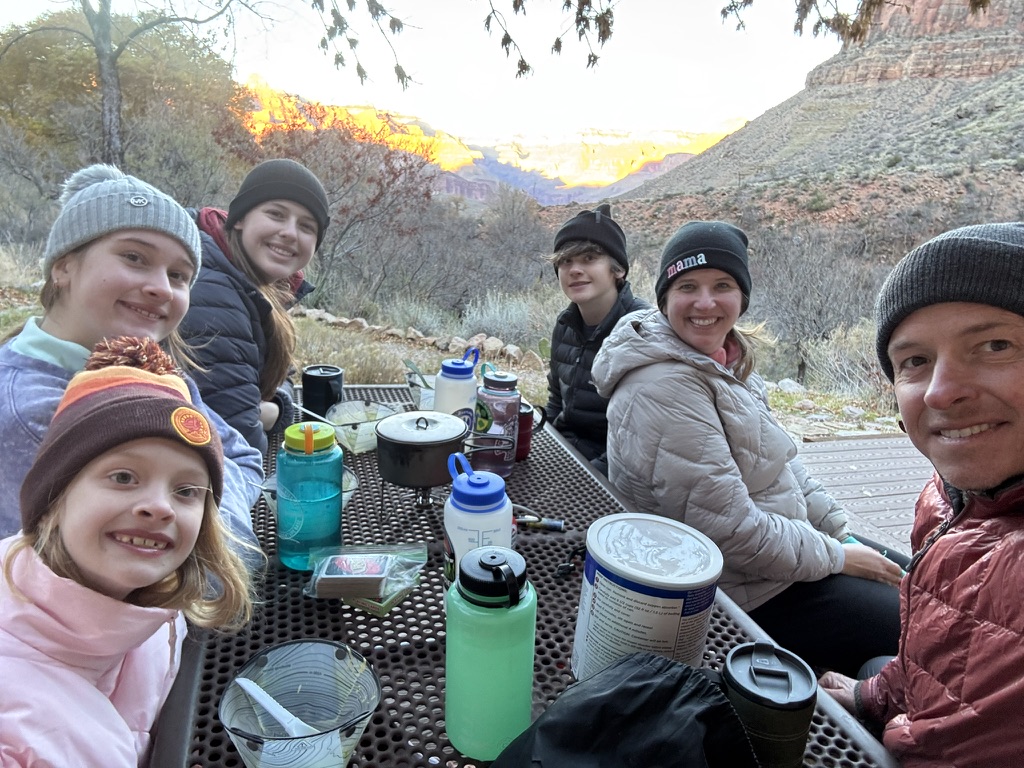
We arrived at Havasuapi Gardens Campground around 3 pm and selected a large site to accommodate our tents.
The campgound is next to a small creek, and the sites are set amoungst trees. The Ranger at Phantom Rach had advised us that we could use the picnic table on the deck of the Ranger cabin for dinner. We ate dinner there while we watched the sunset on the rocks of the North Rim.
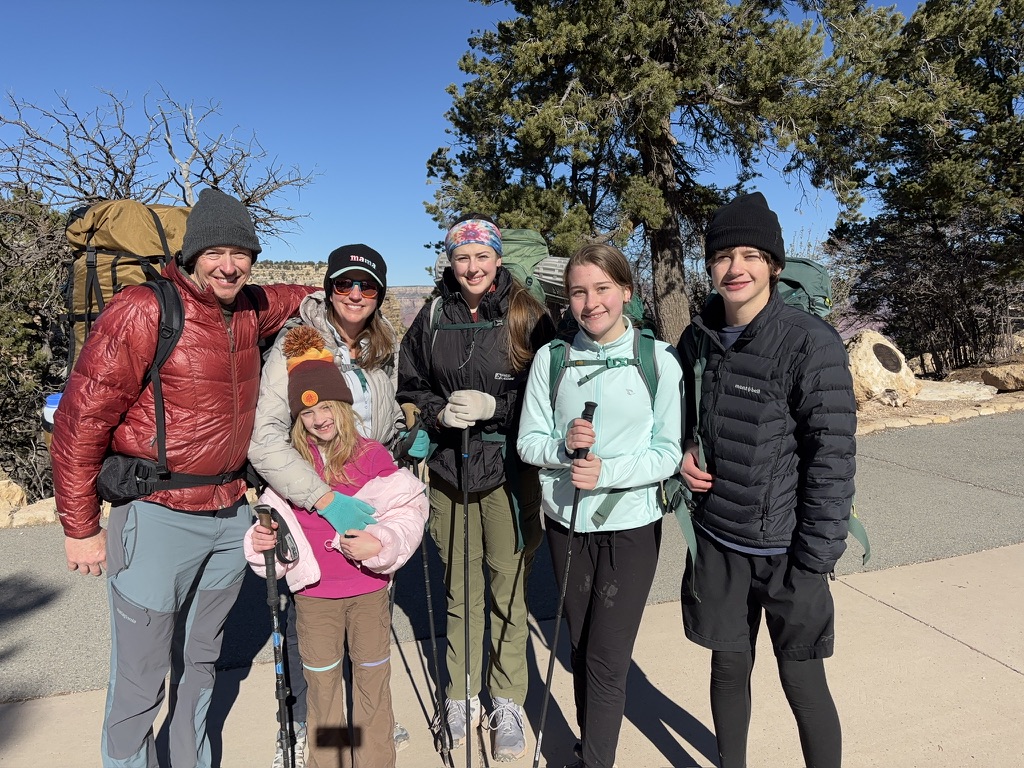
That night it was cold, with temps in the 20s. When we woke up the weather was clear but windy. We quickly had coffee and packed up and started the 3,000 foot climb up the Bright Angel trail. From Havasuapai Gardens, the trail appears to dead-end into vertical cliffs, but it winds around. We took our first break at 3-Mile Resthouse, with the temps dropping as we gained altitude. We took another break at 1 1/2-Mile Resthouse, and finished out snacks. From that point forward we were beginning to see more people on the trail. Once we were up to the last half mile, the trail was pretty crowded, and the wind was gusting. When we reached the top of Bright Angel and stepped onto the sidewalk, there were thousands of people and it was as if we had been transported to a cold, windy version of Disney World. We took a victory photo and headed to the car.
We stopped by the Visitor Center on the way out to see the big 3D map of the Canyon and realized that, in our 20 miles of hiking, we had covered a tiny fraction of the park. It was humbling. With everyone cold and the crowds unbearable, we decided to head back to Flagstaff, where we celebrated a victory feast of hamburgers and milkshakes.
Logistically, the challenge with this type of trip is getting the permits. Corridor campgrounds, including Bright Angel and Havasuapai Gardens, are available through a Recreation.gov lottery a few months in advance. The weather, although cold, was actually great for a backpacking trip – certainly better than summer with temps over 100. We brought microspikes and trail crampons, but did not use them when there was significant snow or ice.
As far as backpacking gear, a standard ultralight approach works. Potable water is available, and we each hiked with just 1L for most of the time. There are lots of pit toilets, and we never had to use a shovel. The ground at the campsites is solid, so tents that rely on stakes work well. The trail’s difficulty is manageable for those in reasonable shape. Our nine-year-old hiked without a pack and had no trouble. The rest of the kids carried full packs. The trails themselves, although they cover a lot of elevation, are very well built.
Finally, it should come as no surprise, but the Grand Canyon is really Grand. Its beauty cannot be captured in a picture. As one hikes down, one moves through hundreds of millions of years of geologic history, with the rocks along the Colorado River being almost 2 billion years old. The scale is enormous, as you can literally see for miles without human-scale references. Next time I go back, I hope to explore some of the off-corridor backcountry. But for a quick, relatively convenient, and awesome trip, its hard to beat a few days hiking in the Canyon.
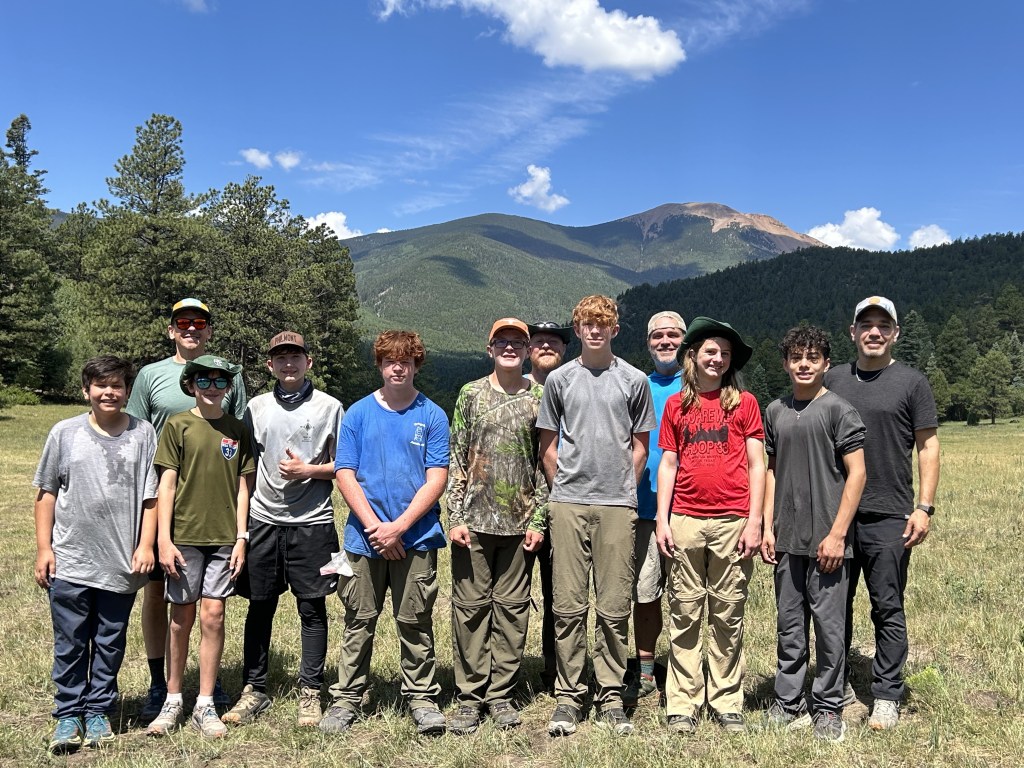
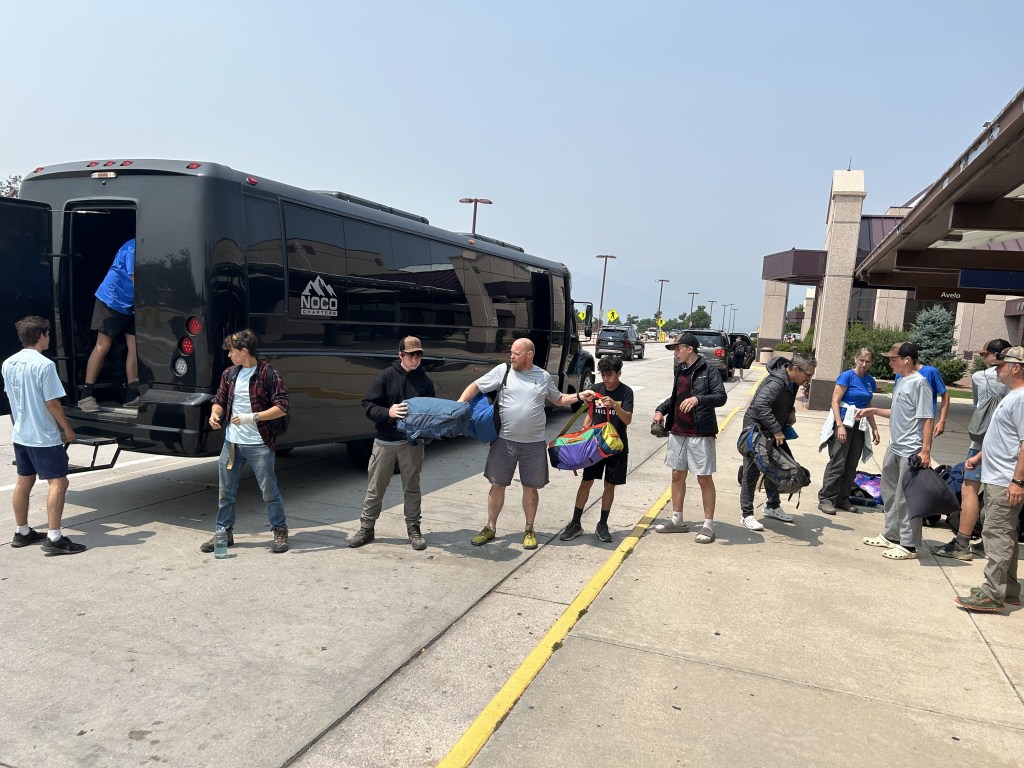
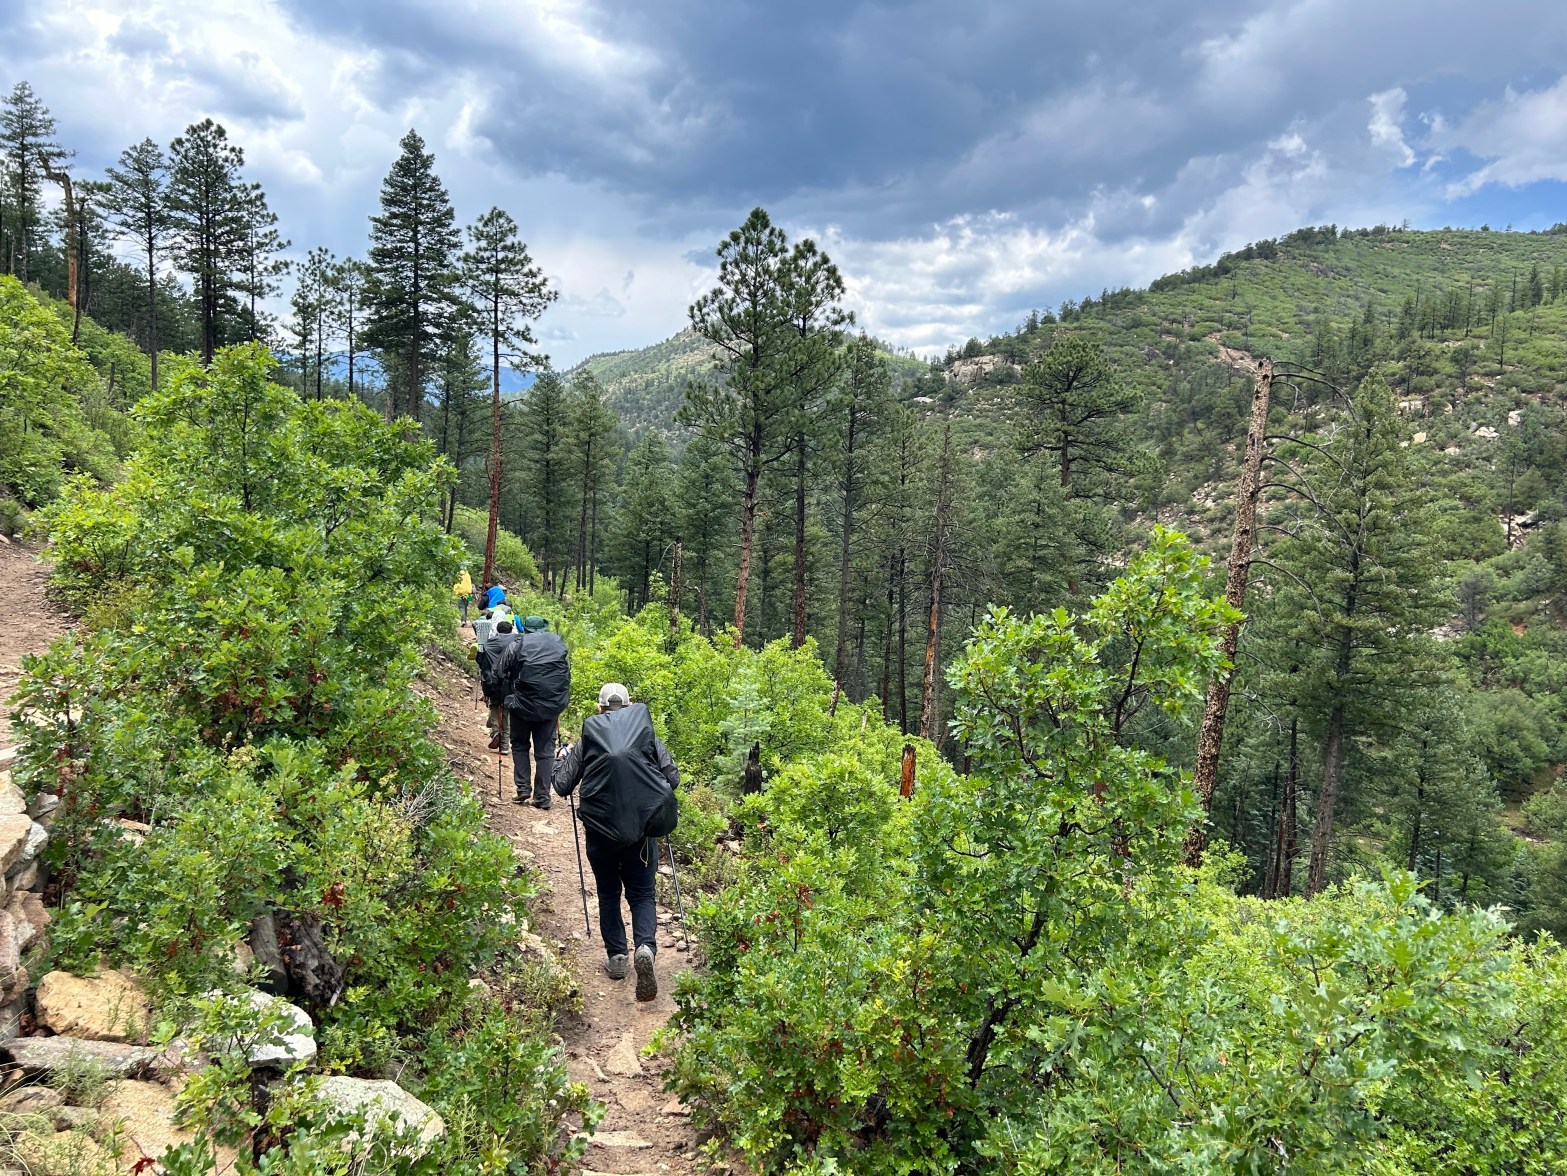
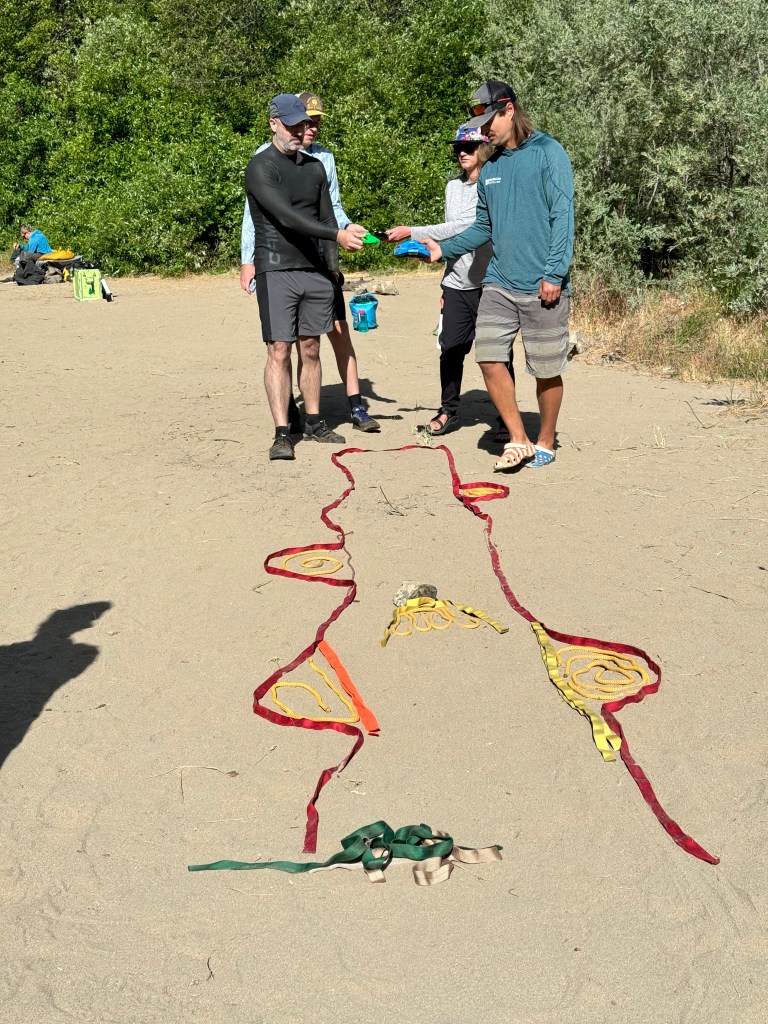
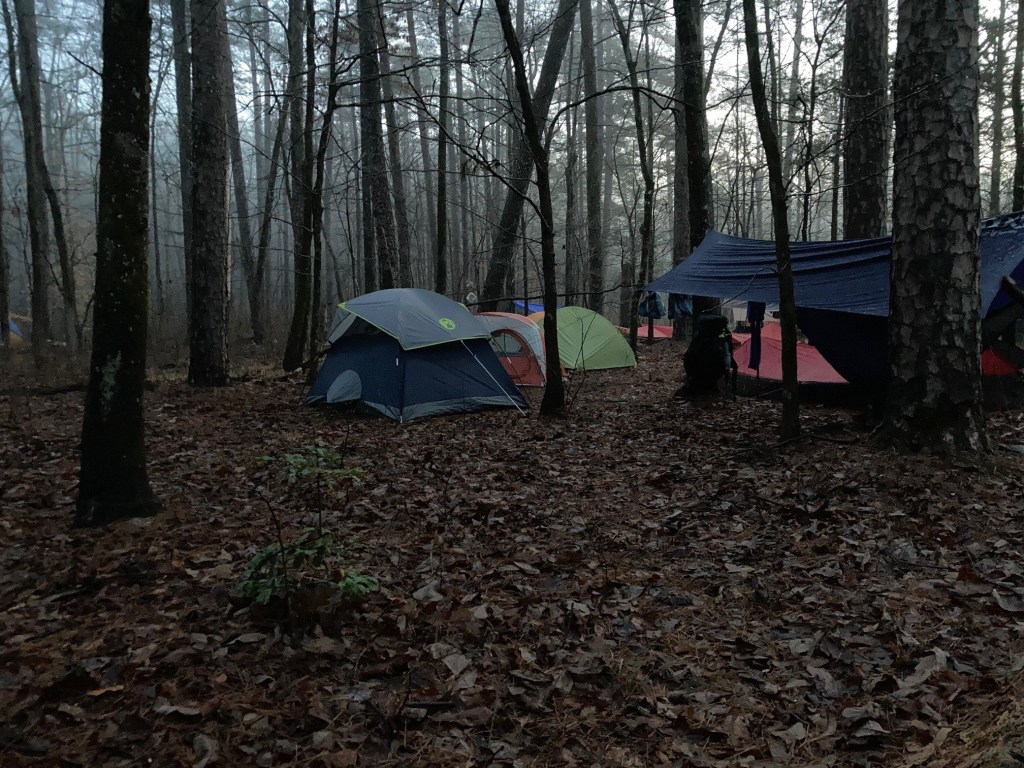
Austin Troop 33 has a rugged tradition of heading to West Texas every January over MLK weekend for a mini-high-adventure. This year, we were back at Big Bend NP.
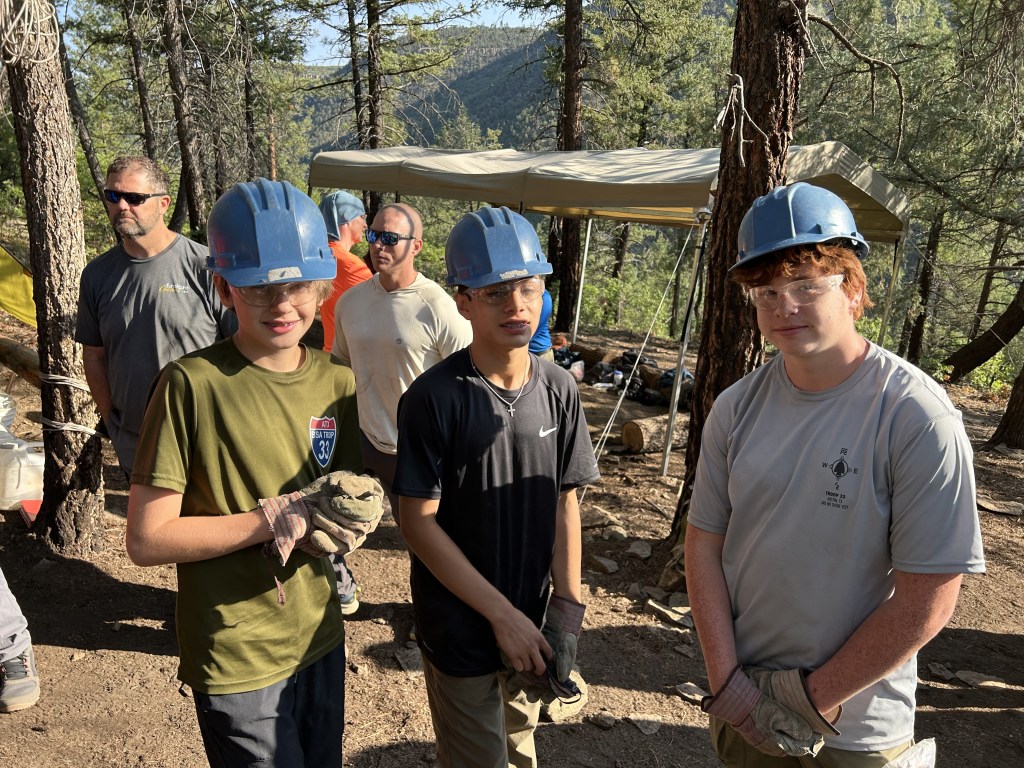
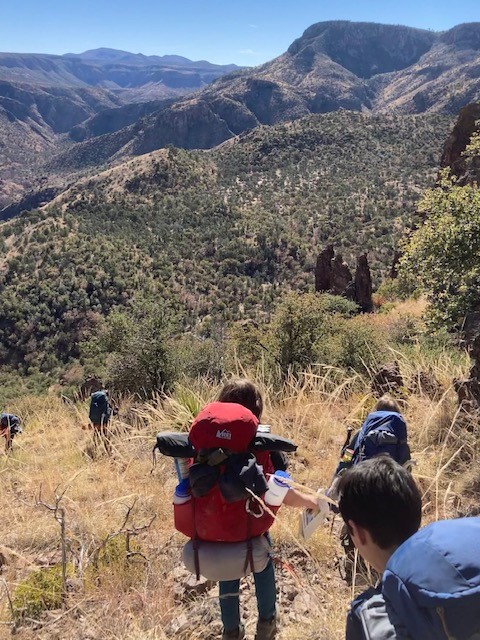
The national parks rules and regulations increase the complexity of scout adventures in Big Bend. For this trip we needed to obtain a “Special Use Permit” months in advance, which authorized the general troop activities. Then we had to come up with itineraries that complied with the Park’s group size limits, which prohibit more than one group of 15 people camping in any two adajent backcountry zones. Because the Chisos Mountains are a single zone, this effectively means that only 15 people from a scout group can camp in the Chisos backcountry on any one night. Big groups need to split up into different areas of the park.
About 40 people from Troop 33 went on this trip. Our beginning backpackers (all middle school scouts and parents) spent Saturday night at basecamp at the Chisos Group campground, then hiked to the Southeast Rim on Sunday. Our older scouts were all high schoolers who had already been to the south rim and Emory Peak and were looking for another adventure. So we planned a canyon packraft trip.
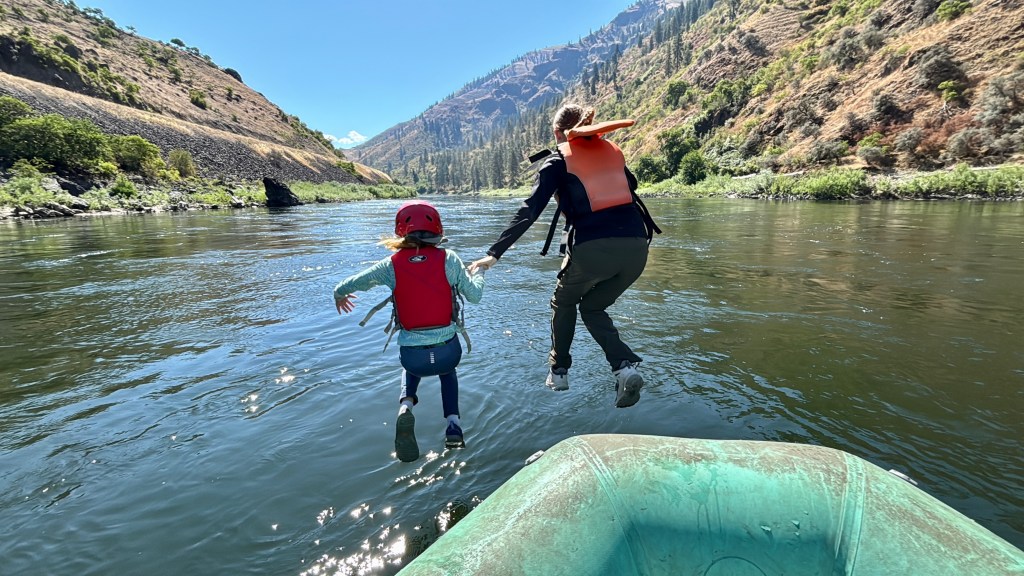
Originally, we targeted Mariscal Canyon because it offered a challenging 11-mile hike up Mariscal Mountain, followed by a float back to Solis. But speaking with a ranger in December, it was questionable whether River Road East (which had been damaged by July flooding) would be open. So we switched the plan to float Boquillas Canyon and hike out via the Marufo Vega Trail.
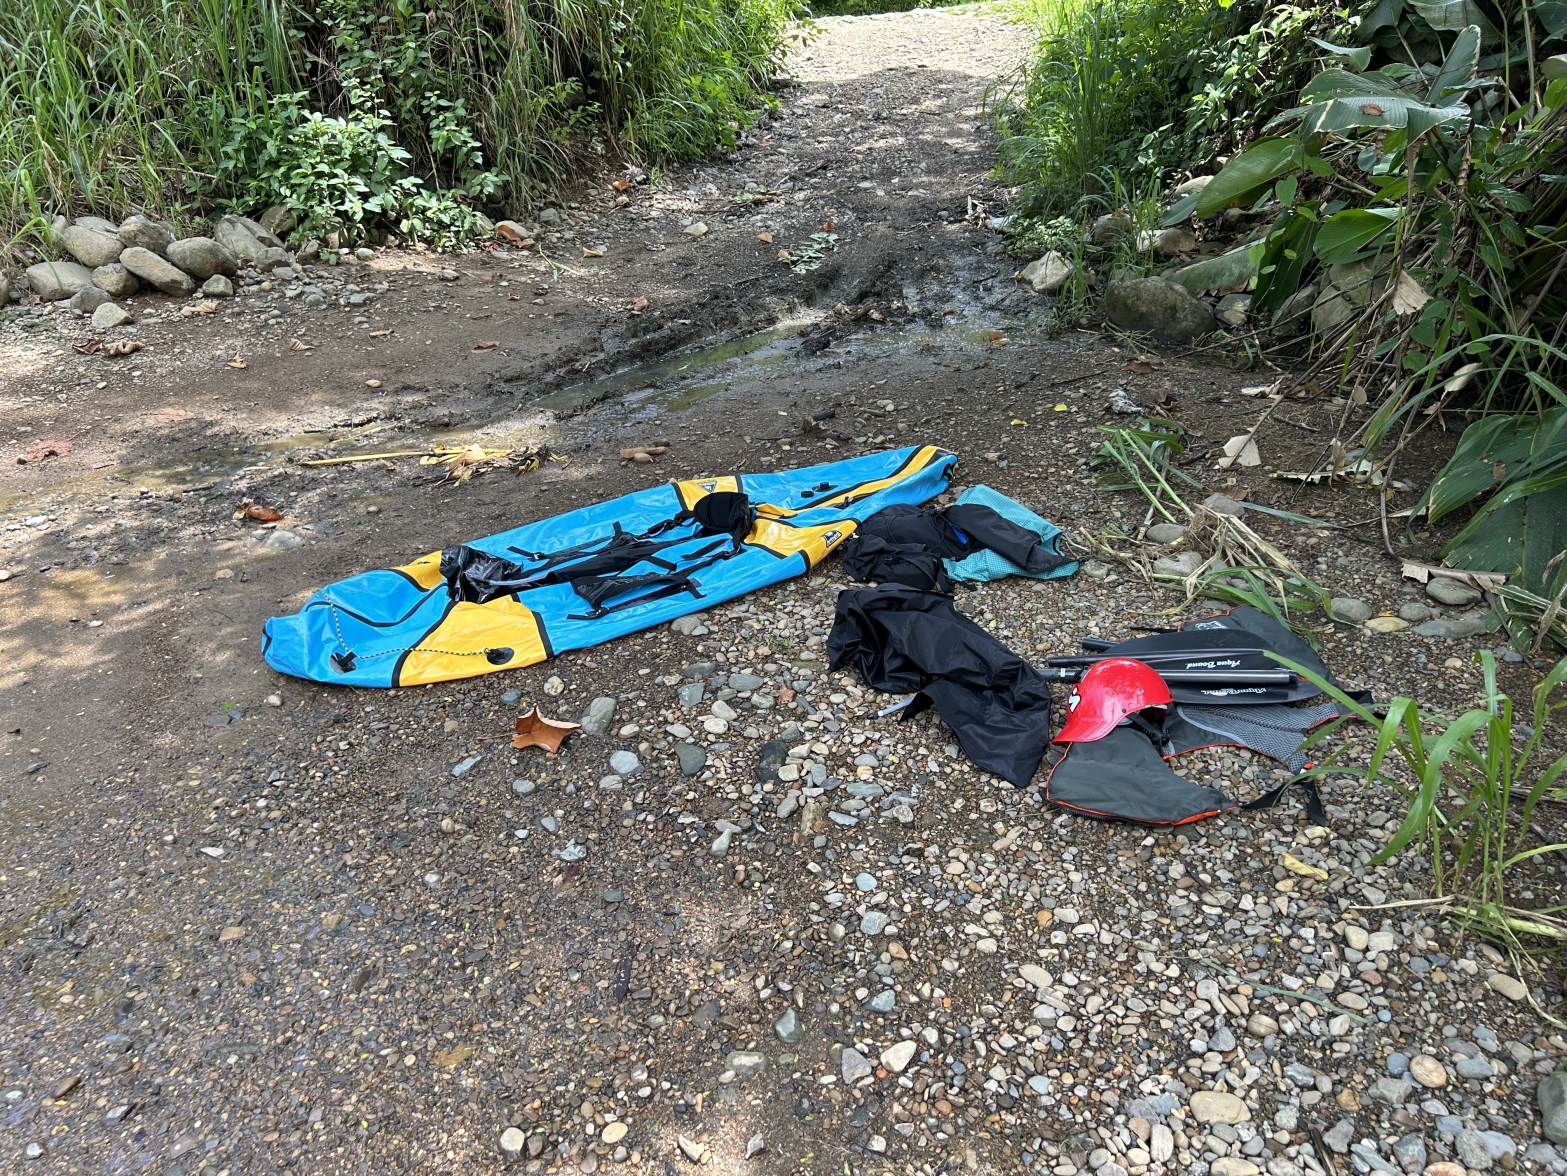
Boquillas Canyon is the easternmost canyon in Big Bend. NPS has special river use regulations that apply to overnight trips. Notably, the regulations require a wagbag, a spare paddle, and a fire pit, whether or not you plan to have a fire. Permits for these trips are not available in advance, but must be picked up at the Panther Junction Visitor Center the day before. I was able to get the permit on Friday, but the ranger I spoke with did have some hesitation due to the weight of the boats and the strenuous nature of the Marufo Vega hike out. The ranger also required us to put in at Rio Grande Village, rather than following the dry wash off-piste from the Marufo Vega trailhead.
With pemit in my bag, 15 of us headed to Rio Grande Village Saturday moerning and unloaded the packs. The drivers did a quick 4-mile shuttle to drop three at Marufo Vega then everyone inflated boats at the Rio Grande Village boatramp. Other than my two packrafts, all the other boats were rented from Backcountry Packrafts.
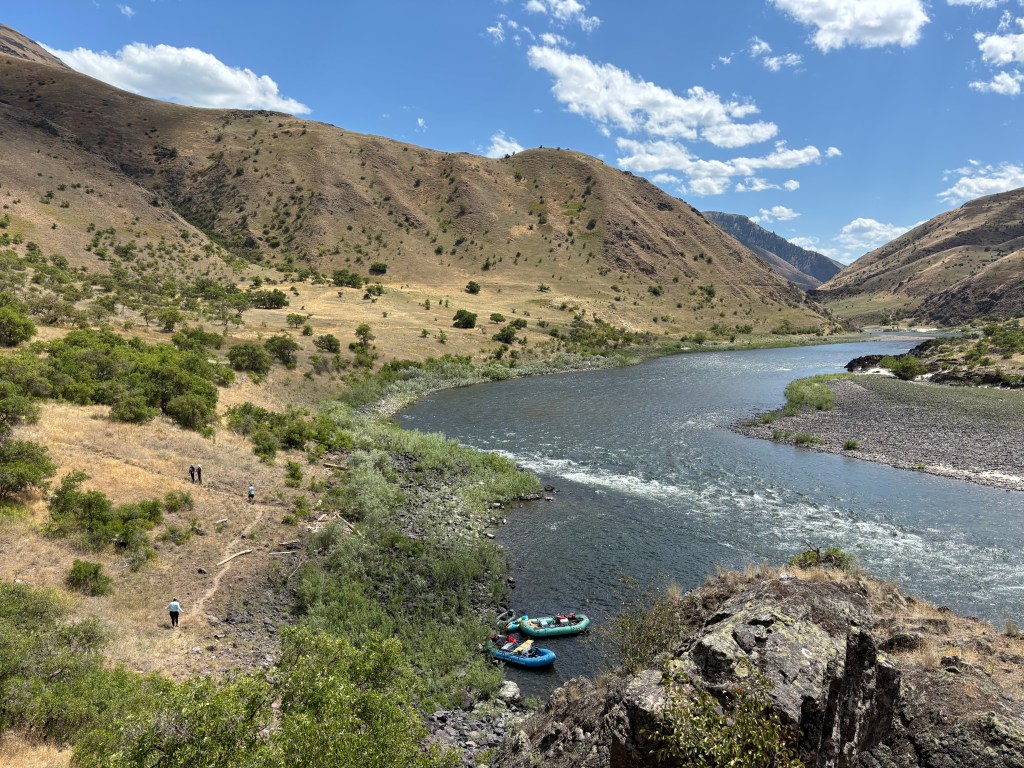
The first 6 miles on the river from Rio Grande Village to the mouth of the canyon were brutal, with increasing winds as the day went on. The USGS gauge was reading about 130 cfs, which is about as low as I would want to run it. In a few places we had to get out and walk the boats. The more pressing issue was the wind exposure in long flatwater sections, which blew the packrafts around.
As we neared the mouth of the canyon, the wind gusts increased to over 40 mph. With such strong winds, it was not possible to enter the canyon, and for a few minutes we were all pinned in mud and quicksand on the Mexican bank. With about an hour before sunset, we crossed the river and deflated our rafts. The scouts found a flat area in the scrub and decided to set up camp. As we went to bed, I thought there was about a 90% chance that we would be bailing in the morning.
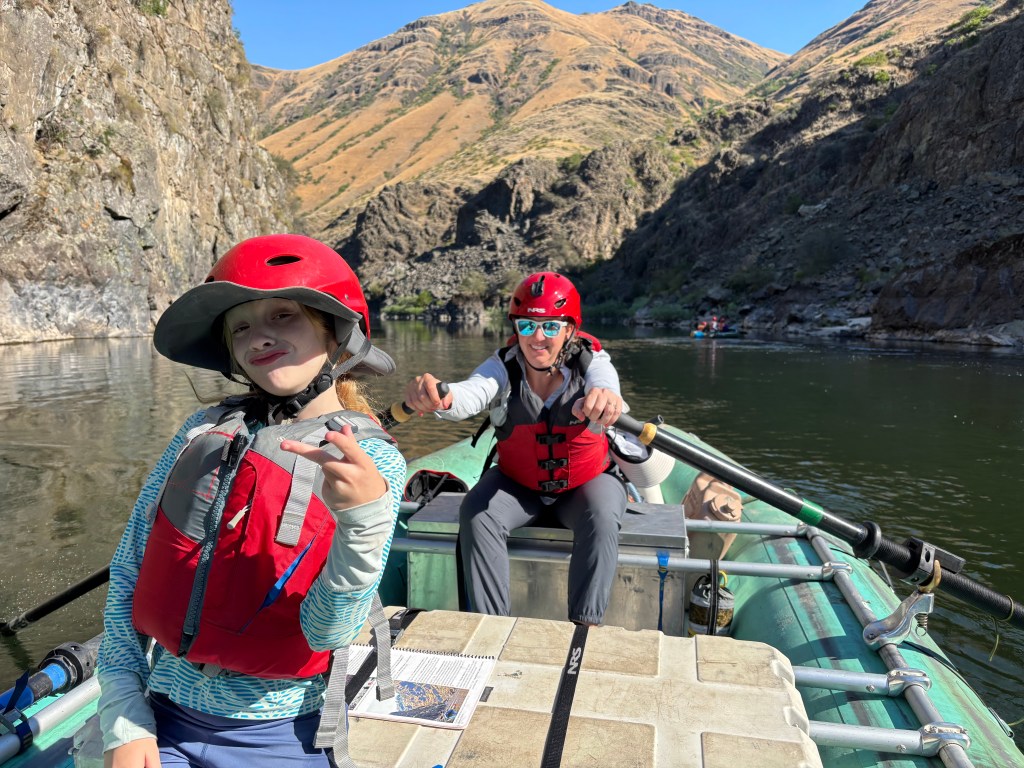
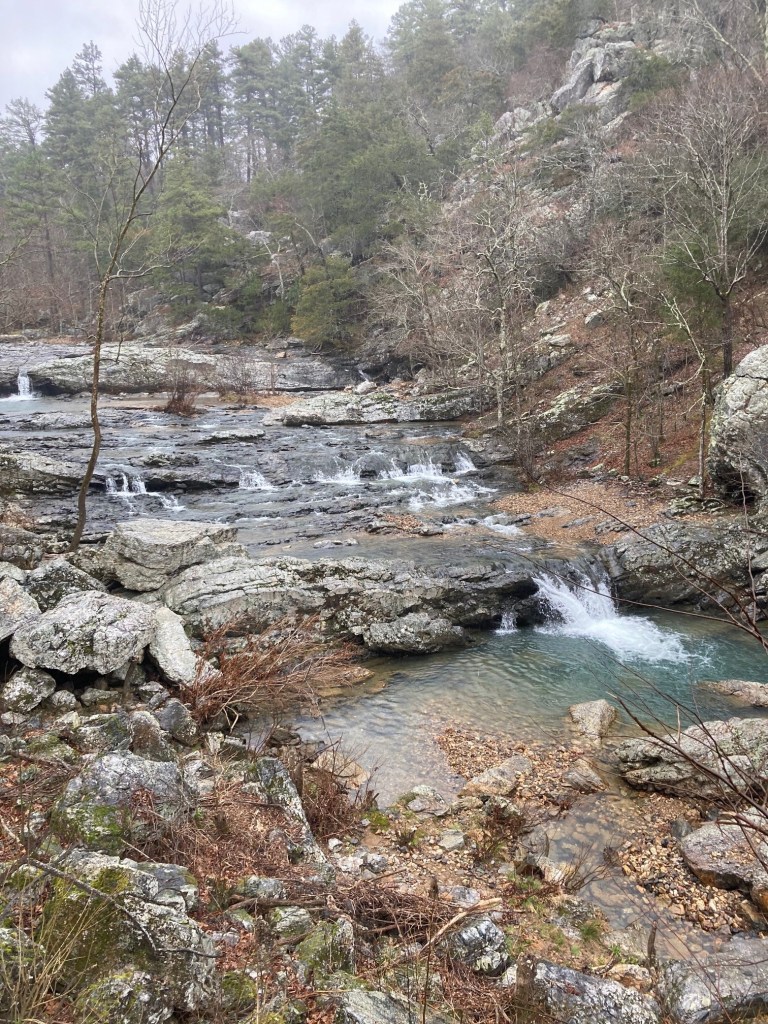
We woke up with sand everywhere and frozen dew on our sleeping bags. But there was no wind. The boys voted to keep going, so after coffee and breakfast we inflated the boats and paddled into the canyon. Boquillas Canyon is simply spectacular. It took about 5 hours to float 9 miles of the canyon, and we took out on a gravel bar near the north spur of Marufo Vega. After a late lunch, we reloaded packs and headed up the trail back to the car. This was my first time on the Marufo Vega, which has somewhat of an infamous reputation. While steep, I found it stunning and may be one of the best trails in the park. However, I can see how someone who does not know what they are doing could get into real trouble in hot weather.
By the time all of us got to the trailhead, the stars were out on a moonless night. We did a “roses, buds, and thorns” talk in the dark, watching the shooting stars. Surprisingly, there were almost no thorns, and some of the scouts said the wind, which almost ended the trip early, was their rose because it taught them to keep going.
Overall, floating in Boquillas Canyon was awesome. But it is not a trip for beginners, younger scouts, or inexperienced adults. Gear must be dialed in and very light (most of us did not take tents) because of the added weight of boats, PFDs, and paddles. Groups need people who understand river safety, backcountry navigation, first aid, and gear repair. But for those with those skills, a canyon float is an opportunity to explore one of the lesser-traveled and amazing parts of Big Bend.
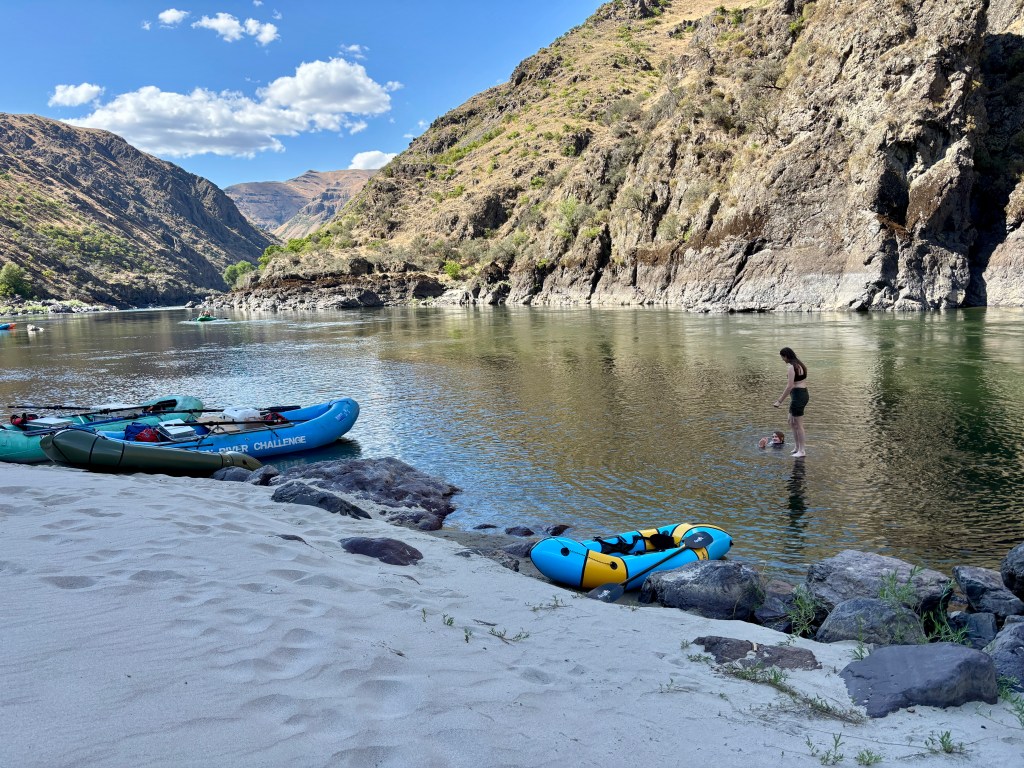
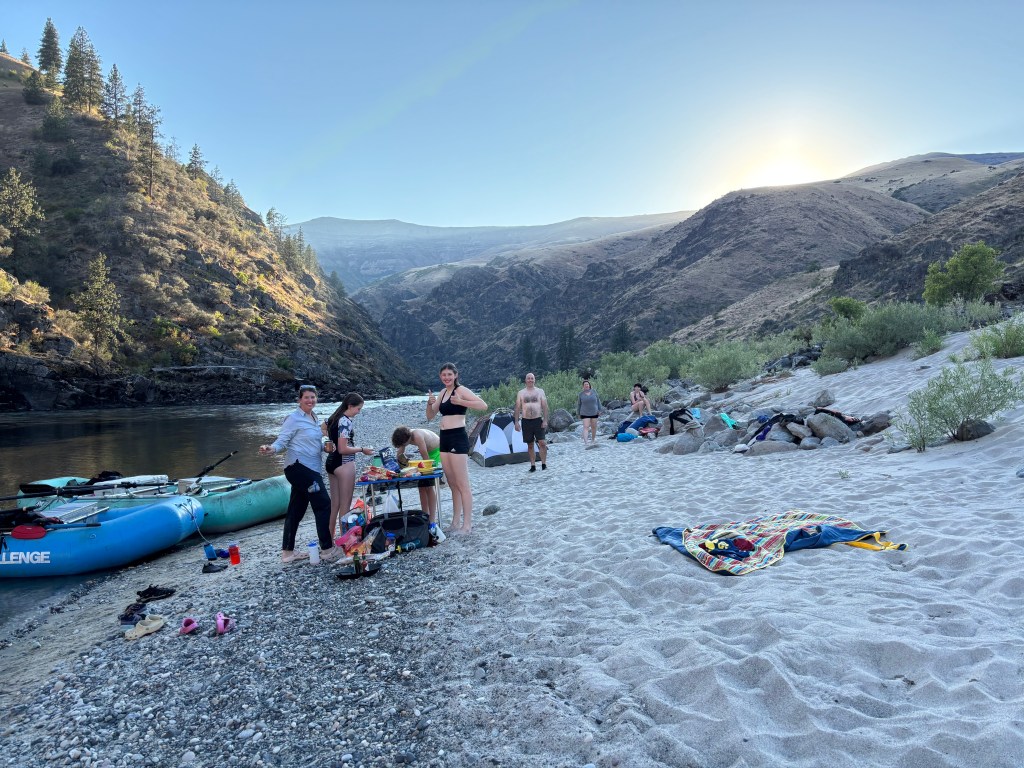
This summer, we took our first family multiday rafting trip. We were not lucky enough to pull a lottery ticket, so we went on the Lower Salmon from White Bird, Idaho, to the confluence with the Snake River, where you don’t need a stinking lottery ticket to have fun.
Rafting is an equipment-intensive sport. Living in central Texas and thousands of miles from whitewater, buying a raft and trailer for several thousand dollars and then having to tow it across the country for several days each way does not make a lot of financial sense. Therefore, we decided to rent rafts from a local outfitter and camp with our backpacking gear, which would fit in a commercial airplane and a minivan. We had two families (four adults and six kids) in two 16-foot rafts, plus a Gnarwal and a Forager packraft. This setup ended working great.
The Gnarwal goes everywhere!So does the Forager.
We targeted mid-July, to have some assurance that flows would be under 15,000 cfs at the White Bird gauge. Slide Rapid is a raft flipper over that flow. At the start of our trip the flow was a mellow 6,000 cfs, and it declined to 5,500 cfs by the end.
The closest large airport is in Spokane. We flew in, went to the grocery store to provision, then made the 3-hour drive across southeast Washington to White Bird, Idaho. We stayed at the Salmon River Resort.
There are basically two take-out options for the Lower Salmon. One is Heller Bar, which requires a 20-mile flatwater paddle down the Snake and a 3-hour one-way car shuttle. The other option is to be picked up by a jetboat at the Snake confluence and boated upstream to Pittsburg Landing, which is approximately an hour by car from the put-in at Hammer Creek. We opted for the jet boat because it sounded fun, twenty miles of flat water sounded unappealing, and with rental cars, the self-shuttle saved hours of driving.
The jetboat pick up on the last day was 100% worth it. Saved hours and was a fun ride in itself.
So, the afternoon before we put in, while the kids swam, Brian and I made the 2-hour round-trip drive over the mountains to Pittsburg Landing to drop off a minivan.
The next morning, we dropped off our equipment at Hammer Creek, which is a 5-minute drive from White Bird, and met our outfitter. The quality of the rental rafts left something to be desired. To put it mildly, they were pretty beat up. The young man dropping off the rafts was apologetic and said that they were overbooked, with only two left. With no choice, we decided to make the best of it and proceed. We loaded the food and drinks, and everything else into dry bags and tied them down. Brian and I each rowed a raft, with the older kids taking turns in the packrafts.
On the oars, with my trusty river map.
We spent the next three days on the river, camping on a sandbar each night and having a blast. The Lower Salmon in summer can get pretty hot. Its a desert canyon and sun protection is mandatory. Fortnunately, the water feels great and the low humidity cools you off quick.
Cooling off.
The evenings were very comfortable.
Going for a short hike. This is the typical scenery on the Lower Salmon.
The Lower Salmon is pretty mellow, with lots of fun Class II and Class III rapids. We let the kids in the packrafts run every rapid except for Snow Hole (III-IV) and China (III-IV), when we put them in the big boats. There were a few swims but with the warm water and flat water between rapids, everyone had fun.
The top of Snow Hole Rapid had some spice!Hannah was the only kid brave enough to join me running Snow Hole.
The easy rapids provided an excellent opportunity for everyone to take a turn on the oars and gain some experience.
One of the great things about the Lower Salmon is that because it is undammed, there are plenty of sand beaches for camping.
On the second day we ended up running Snow Hole Rapid in the afternoon, which is followed by a canyon with few campsites. We did not get to our camp until late that afternoon. Otherwise, we were usually at camp by 4 pm. Three full days on the river with a jetboat pick up at the confluence with the Snake River the morning of the forth day is totally doable without rushing.
Cooking dinner on a sandbar after a long day on the river.
The river also has plenty of good spots to stop for lunch, jump off rocks (always a favorite) or explore.
Native American petroglyphs a short hike from the river.An upside down raft becomes a slide.
Since it is not a lottery river, we saw many other groups on the river. However, with sandbars common, it is not a problem finding a spot.
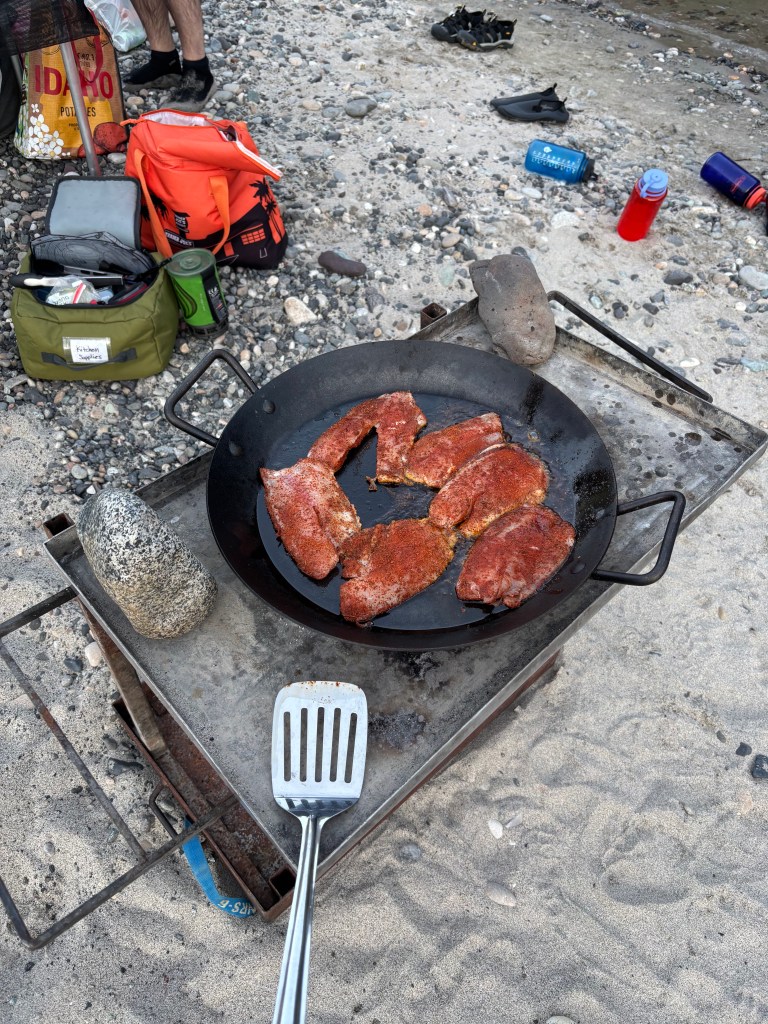
As far as gear, its really how much gear is worth it. We are used to backpacking and over the years have slimmed down our equipment, but we did splurge a bit by bringing a big tent and a cast iron pan for cooking real food.
Blackened tilapia tacos.
The Lower Salmon turned out to be a great destination for a first family multiday trip. Technically, it is comparable to the Rogue and not as difficult as some of the other lottery rivers. Although it is a Class III river, anyone undertaking this trip should either know how to raft or be accompanied by someone who can teach them. Both Brian and I had attended the Northwest Rafting Class III Rowing School and had no issues safely navigating down the river (even though I did not always run perfect lines). Rafting is a fun activity – the kids are wet, challenged, and there is lots to do. Compared to backpacking, it is easy and you can have more creature comforts.
Yes, one can have cold beer on a multiday raft trip!
Family multiday rafting trips are just flat-out fun – hopefully, there are a few more in our future.
This is a follow-up to my earlier post, which looked at the AWA accident database. One distinction is that AWA database includes all whitewater accidents from Class I to Class V – and may not be representative of a typical scout trip. By “scout trip” I mean a river trip in canoes or kayaks, on Class I or Class II water, with paddlers who have passed the BSA swim test, who are wearing properly fitted PFDs, and who are supervised by adults who have taken the BSA Paddlecraft Safety Class and BSA Safety Afloat.
I have led several scout river trips in Texas and out of state. We do not canoe in high water or cold water. We also don’t canoe rivers with long, rough swim potential. But we do float rivers with rapids, sharp bends, trees, and other obstacles. By far, the most scary situations I have observed with scouts are boats being swept into and then pinned on strainers/sweepers. I wanted to describe how these situations happen and share some strategies for avoidance in case it is helpful to other scout leaders.
The pin usually happens with a partially submerged tree in a bend in the river, often on the outside bank. The current pushes inattentive or unskilled paddlers into the strainer, where the boat fills with water and is pinned. The situation is dangerous because the pin occurs in the fast outside bend current with many branches to hold swimmers. The water at these locations moves significantly faster than a person can swim.
Typically, we set up on the river with one competent adult canoe in the front and another as a sweep boat, both with radios. The lead boats near or following the competent adult usually take good, safe lines. The strainers usually catch a middle-of-the-group boat that is too far back to get instruction from the adult in front but too far ahead of the sweep boat.
I am usually the last boat in the group. Each time we have had a strainer-pinned canoe, it has taken 1-3 minutes for me to ferry over and eddy out to provide assistance. During those minutes, the scouts are on their own. In one of the incidents, we had a scout under the water in the strainer who was pulled up by his buddy before I arrived. Fortunately, in each of our situations, the pinned scouts kept calm, climbed the strainer out of the water, and waited for help. I and two other dads had to figure out the safest way to get the scouts off of the strainer – which involved climbing over, then jumping clear and swimming from the backside. After the scouts were clear, it usually took us 30 – 60 minutes to pull the boat out.
The reason strainers are so dangerous for scouts is that in a strainer-pinned boat or a swimmer swept into a strainer, a drowning could occur before an adult can provide help, even on a mellow river. It surprised me how fast things went from a relaxed paddle to a life-threatening situation. These strainer pins scared me and caused me to rethink our float plans for scout trips. Specific changes include:
We stress to the scouts that strainers are the most dangerous thing they will face on the river. Before each trip, we describe the past strainer pin situations, often having the scouts who were there tell the story. We explicitly say that strainers are life-threatening.
We stress “cutting the C” of bends to avoid obstacles in the outside current.
We discuss where strainers occur and how to avoid them – including aggressive swimming if a capsized boat is heading toward a strainer.
We talk through what to do if you get swept into a strainer – stay calm, climb up, do not go under.
We keep a tighter boat spacing to allow for quicker assistance and direction to boats to avoid strainers.
We try to ensure that every boat on a river section with strainers has a competent stern paddler. Big, broad sections are good for learning. Tight, windy rivers call for a stern paddler with a J stroke.
We have boats call out danger to the boat behind them. “Strainer right!” This way the information gets conveyed to the whole group.
I carry a pin kit, including a 75′ line with 2,500 lb breaking strength, slings, 2 carabiners, and a pulley. Recovering the boat is not a safety issue, but it’s always good to finish with the same number of boats you start with.
Since we have made these changes, we have completely avoided strainer incidents. The most effective of these changes is the first: making the scouts aware of the danger. On the rivers we canoe, strainers are pretty easy to avoid if the paddlers are paying attention.
I don’t want this post to scare anyone from taking kids canoeing. River canoe trips, particularly multi-day trips, are some of the very best high-adventure options for scouts. But a deliberate focus by the adult leaders on the specific risk of strainers will significantly improve the safety of the trip.
I don’t understand the continued use of white gas stoves, such as the iconic MSR Whisperlite, on wilderness trips. White gas stoves are the standard at Philmont, Northern Tier, and among many scout troops. As far as I can tell, there are only two advantages of white gas stoves:
They work at temperatures below zero, when invertable remote cannister gas stoves stop working.
Some bush planes will fly in white gas containers, but not isobutane canisters.
Outside of these rare scenarios, canister stoves, like my favorite, the Kovea Spider, are flat-out better.
They are lighter. The Kovea Spider weighs 6 oz, compared to 12 oz for the Whisperlite.
They are cheaper. The Spider is $75, the Whisperlite is $140.
They require less maintenance. The Spider takes zero maintenance because isobutane does not clog up. White gas stoves come with a maintenance kits because clogging is an inherent part of the design.
They are easier to use. With the Spider you just open the gas, light it, and start cooking. If you want to invert it, just wait a couple of seconds and turn the cannister over and adjust the flow of liquid gas. With the Whisperlite, you have to pump it up, allow the fuel to pool, light it into a big flame and smoke ball, and hope that it primes the stove, then turn on the stove.
They are faster. If I just want a cup of tea, using canister stove is a quick affair that takes less than a minute to get it going. You need 15 minutes to do the same thing with white gas.
They are cleaner. White gas burns dirty, with carbon building up on the burner. In addition, white gas can be easily spilled on people, gear, and the ground. Isobutane burns clean, without smoke, and cannot be spilled on people or things.
Most importantly, they are safer. I have seen multiple incidents where people receive minor burns from the fireball of priming white gas stoves. The complexity of the operation creates multiple potential failure points, which can lead to accidents. Can accidents happen with canister stoves? Yes, but as long as you (1) properly screw down the stove to the canister, (2) do not overheat the fuel tank, and (3) make sure the stove is stable, it is pretty much impossible. The potential for anyone, but particularly kids, to make a mistake that could lead to injury is way higher with a white gas stove.
In summary, unless you are camping below zero or cannot obtain isobutane cannisters, don’t use white gas stoves.
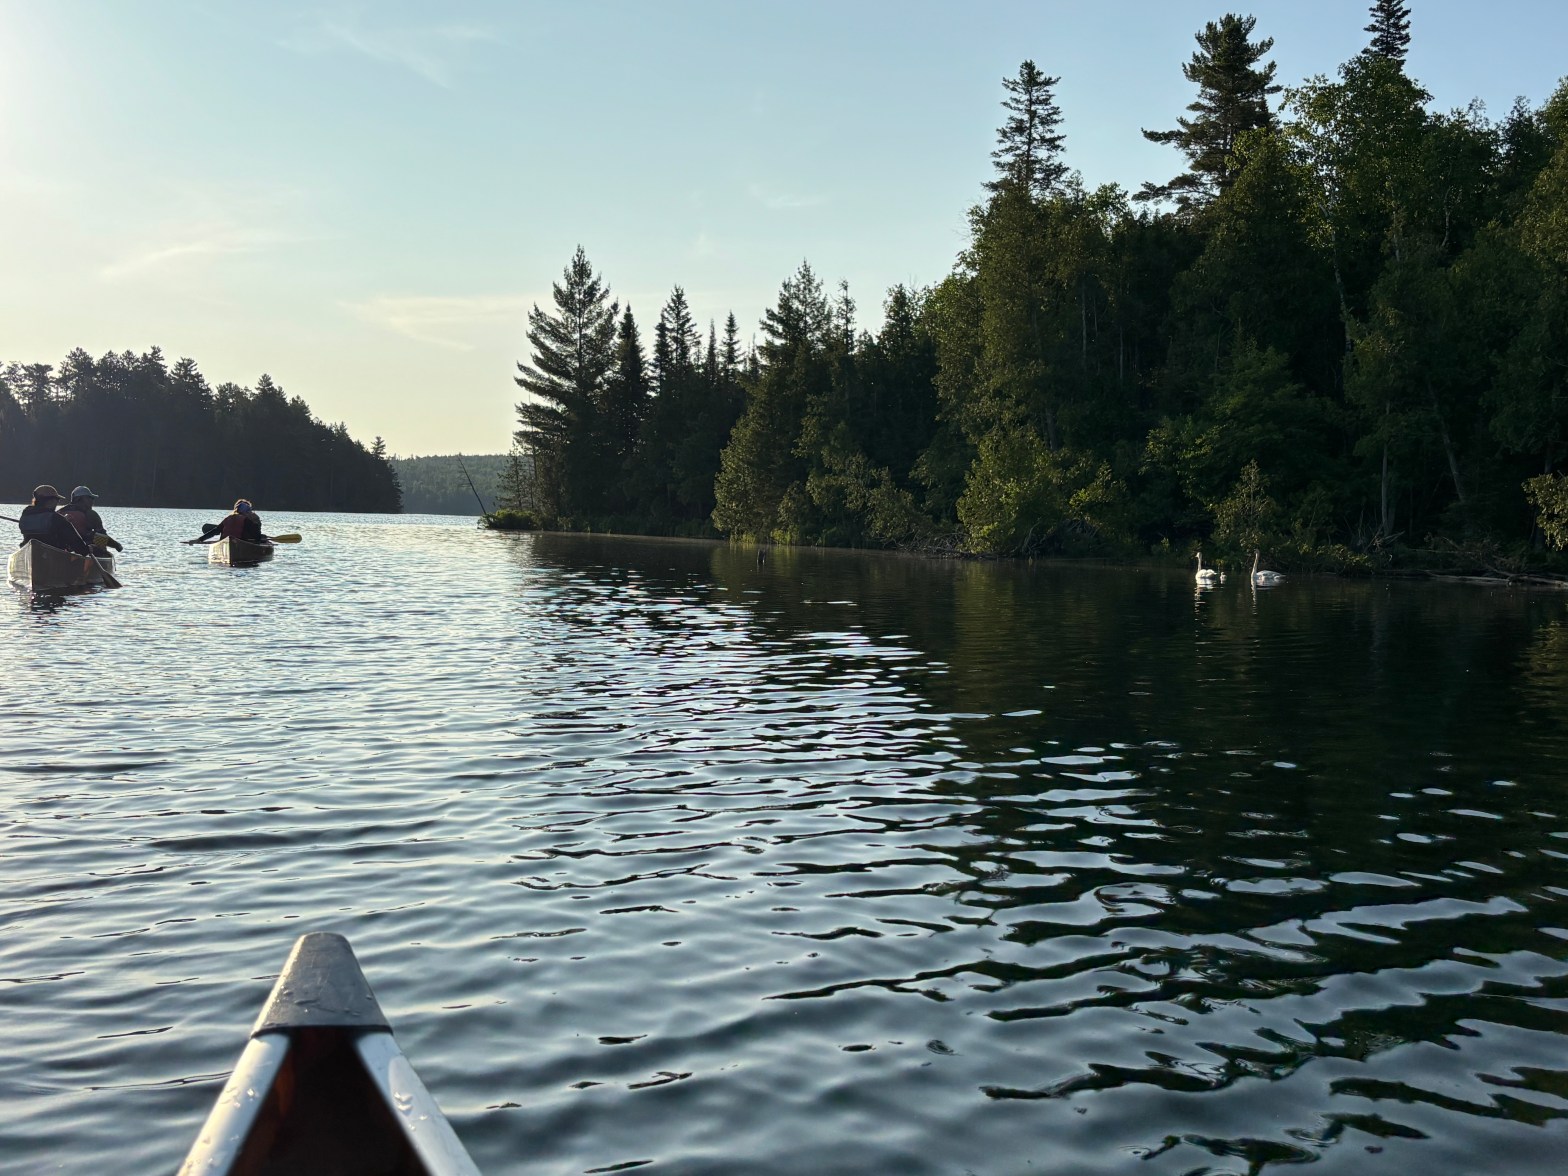
For me this is the summer of scout canoe trips. Last week my oldest daughter and I went on a week-long canoe trip in the Boundary Waters of northern Minnesota with a crew from Troop 19 in Austin. Instead of using a private outfitter, we booked our trip with the Northern Tier High Adventure Base.
The Northern Tier base is located approximately 20 miles east of Ely, Minnesota. It is about four and a half hours of rolling time from the Minneapolis airport. Travel was pretty simple with a direct flight from Austin then renting a minivan for the drive.
Like the other hight adventure bases, Northern Tier has its own check in procedures. We arrived late in the day and our “Interpreter” – the young person who would accompany us on our trip – started moving us through the process. We had a tasty dinner in the dining hall that evening and slept in cabins on site.
Smallmouth bass
Gear
The first thing we did was take a crew picture and conduct a gear shakedown to ensure everyone had the required equipment. Those equipped for backpacking trips likely already have most of the equipment. One item of note is that Northern Tier requires boots or shoes with ankle support during the trek, and sneakers or other closed-toe, closed-heeled shoes for camp (no Crocs, flip-flops, etc.). Some of our crew did not have these, but were able to purchase them at very reasonable prices at the Northern Tier camp store.
After a week on the water, I have some thoughts about what is genuinely needed for clothes. It’s a short list.
One “wet” outfit for the week consisting of high-top shoes, synthetic socks, lightweight, quick-drying long pants, and a long-sleeved synthetic shirt. I wore this every day, and each day went swimming in this outfit. The long sleeves are vital for sun and bug protection.
Waterfall between lakes, wearing our wet outfits.
One dry camp outfit consisting of lightweight pants, a long sleeve shirt (mine was lightweight merino which helps with odor), light trail runners. You could also include socks, but I generally went sockless at camp to let my feet dry out.
One set of sleep clothes consisting of lightweight shorts and a merino t-shirt.
One lightweight fleece and one lightweight warm hat.
Ultralight rain jacket. Note: I only used this in camp, as a rain jacket would be too hot while paddling and would be irrelevant since I was already wet anyway.
Sun hat, buff, and headnet.
That is it for clothes – there is no need to bring anything more. I treated my clothes with Pemetherin before leaving home, and I think it really helped with the bugs.
For other personal gear:
Headlamp – I never used this as it was light until 10 pm and dawn was just after 4 am. Still bring one for nightime emergencies.
Small battery pack and cords to recharge my GPS watch and phone.
Travel toothbrush, floss, deodorant.
Ultralight travel towel.
Sunscreen and Deet.
Backpacking sleep pad and 30 degree or warmer lightweight sleeping bag, and an optional pillow.
Ultralight backpacking chair or sit pad for camp.
Personal PFD. The provided PFDs are perfectly fine from a safety standpoint, but I like having a PFD with pockets so I brought my own.
For crew gear, we used what Norther Tier provided, including tents. Each adult was in their own 2-person Alps tent and the scouts shared a 4 person Alps tent. The tents are high quality, but heavy compared to backpacking tents.
The Northern Tier equipment is generally heavy and old school, but functional. The stoves are MSR Whisperlite white gas stoves, and the pots include heavy items, such as steel griddles. The food and crew gear are transported in two cube-shaped robic sacks lined with heavy-duty plastic bags.
The “Grey Whale” bag and food box in the canoe. These are heavy.
The personal gear and tents were carried in large “grey whale” robic sacks. Each canoe had two of these big bags. The bags are frameless and heavy (probably 75 lbs on average) and are much, much less comfortable than a backpacking backpack.
I have been to the Boundary Waters before with a private outfitter and was given similar equipment, so I think it’s a regional outfitting trend, not a Northern Tier-specific one. For a first trip, I suggest just accepting what they provide and going with the flow. The only exception to this is that crews with adults who appreciate coffee, tea, and hot drinks multiple times a day should bring an ultralight canister stove or JetBoil, as using the MSR Whisperlite white gas stoves is a pain.
Choosing Our Route
Northern Tier took care of obtaining the required Boundary Waters permit, which simply authorized us to enter at the trailhead on Moose Lake, which is the site of the Northern Tier camp. The permit does not specify campsites – they are all first-come, first-served, and each crew has the freedom to plan its own route anywhere in the Boundary Waters. We told our Interpreter that our priorities were: (1) getting away from lakes where motor boats are allowed, (2) solitude, (3) wildlife, and (4) fishing. As for the level of challenge, we were open to a route that involved portages and some difficulty. The evening we arrived we planned an itinerary that would take us to the northeast of the base, generally following the US-Canada border on a series of larger lakes, with a return trip through a chain of small, remote lakes accessible only by difficult portages. We purchased maps and a waterproof map case at the camp store, obtained our permit, and went to bed.
The Trip
The Boundary Waters are a unique region comprising thousands of interconnected lakes, linked by waterways and portages. Over six days and five nights, we covered 50 miles with 19 portages. We saw bald and golden eagles, baby loons and baby swans, and even a baby beaver. The US Forest Service has established campsites, each with a fire pit and “grumper” pit toilet in the woods. The scenery was spectacular, and every campsite is on the shore with awesome views. Water temps were in the 60s, and I swam every day.
Nice view from my tent!
The physical demands of a Boundary Waters trip should not be underestimated. A challenging Boundary Waters route is harder than most anything at any other high adventure, including Philmont, due to the portages.
The portages we took ranged from a few yards to a half mile over mud, slick rocks, and mosquito-filled forest. To avoid double portaging (making two trips), the other dad and I had to each carry a heavy pack and a canoe. We had paid extra for kevlar canoes, which at 40 lbs are lighter than the aluminium canoes, but were still a challenge as our total weight was over 100 lbs. Much of that weight was directly on our shoulders becase the packs are frameless. Shoulders and backs feel the burn. Were I to go again, I would include farmer walks (carring heavy dumbells) and lots of shrugs in my training regimen to specifically target the traps.
The view from under a canoe on a long portage, with the lake in the distance.
The Northern Tier is challenging enough that I would hesitate to take adults or scouts who cannot carry at least 75 pounds on the trip. I would not go with any adults or scouts who are mentally weak or shirk from hard things and don’t know how to hustle. Northern Tier is not a good fit for mentally soft people. This trip is for those who are willing to embrace Type 2 Fun, those who love paddling into 30 mph wind with rain, those who love the struggle of carrying a heavy load for what seems like an eternity. Fortunately, my crew embraced the challenge, and the scouts had a blast in dealing with the worst of the conditions.
Interpreter
The Interpreter is really a guide to help crews plan and execute their trips. Our Interpreter pushed us to be at camp by late morning or mid-day. We were usually up early and on the water by 5:30 or 6 am. Given how early the sun rises, I did not mind the early starts. However, I did not like the “rush” to get to a campsite. On several days, we passed through interesting areas, and I would have liked to slow down to appreciate the lakes and fish. Particularly in the more remote areas, there were tons of open campsites. Even in the popular areas, campsites were available as late as 4-5 pm. So I think the rush is unnecessary as long as crews understand they may not get their first choice.
The role of the Interpreter is interesting. I can see how an enthusiastic interpreter might be helpful for some crews. But for us, our Interpreter ended up creating some personal conflicts and injected some challenging dynamics. Our crew was also experienced with wilderness trips, with every scout and two of the three adults having been to Philmont, and I having previously visited the Boundary Waters. I would have preferred to get route advice before we left and then take the trip with just our adults and scouts.
Will I go back?
Yes. With three other younger kids in scouting, I am confident that I will be back in the Boundary Waters soon. However, when I return, I don’t think I will do a standard Northern Tier trek, but instead will just rent the canoes, PFDs, and paddles and bring everything else. Northern Tier offers à la carte equipment rental to crews with an adult who has participated in a traditional trek in the last three years. Private outfitters offer similar options. A trek planned this way is cheaper the crew will be lighter and faster.
A multiday canoe trip is one of the best high-adventure options for scout troops. River canoeing can involve excitement, the fun of getting wet, fishing, wilderness, and freedom for the scouts to learn skills without a strict itinerary or program requirements. This post describes two awesome multiday trips reachable from central Texas. Although the discussion is framed in terms of a scout troop, these trips would also make great family trips.
What is special about a multiday river canoe trip?
A troop-planned canoe trip has several advantages over attending national or council high adventure bases. First, there is no age limit. Most programmed high-adventure programs require scouts to be 13 or 14. Even without official limits, most 11-year-olds are too small to carry their own gear for a multiday backpacking trip or take a flatwater trip with portages. But even small scouts can participate in a river trip where the current helps move the boat downstream. For our trips, we even allow newly crossed-over scouts (rising 6th graders) to participate, provided they can pass the swim test and earn the canoeing merit badge before the trip. Pretty much all scouts can go on these trips.
Troop-planned multiday float trips can also accommodate large group sizes. Most programmed high-adventure trips are limited to 8-12 participants. The rivers below allow large groups of over 20 people to participate, presenting an excellent opportunity for a “whole troop” trip with both new and older scouts. Seeing the mentorship and leadership that occurs when experienced scouts teach new scouts is awesome.
The cost of participating in a troop-planned river trip is also a fraction of any formal high adventure program. The trips below cost $500 or less per person, including transportation, equipment rental, and all camping meals. Including travel, national and council high adventures are usually cost $1,500-$2,500 per person.
Finally, wilderness river trips are simply fun. These are some of the most fun times our scouts have had in scouting, even compared to the national camps like Philmont and Sea Base.
River experience is, of course, a prerequisite.
I will do a separate post on the planning process, but these types of trips require adult volunteers with experience to safely manage the trip. That means adults who can read rivers, identify river hazards, teach others to avoid them, and implement a rescue should an emergency arise.
Where to go?
Several Texas Rivers offer fun multiday experiences. However, I don’t recommend them as a first option for scout troops or young kids because they can be difficult for beginners (Devils River), have very unreliable flows (Rio Grande), offer limited outfitter services or really long shuttles, and have limited camping due to riparian properties being privately owned (almost all Texas rivers).
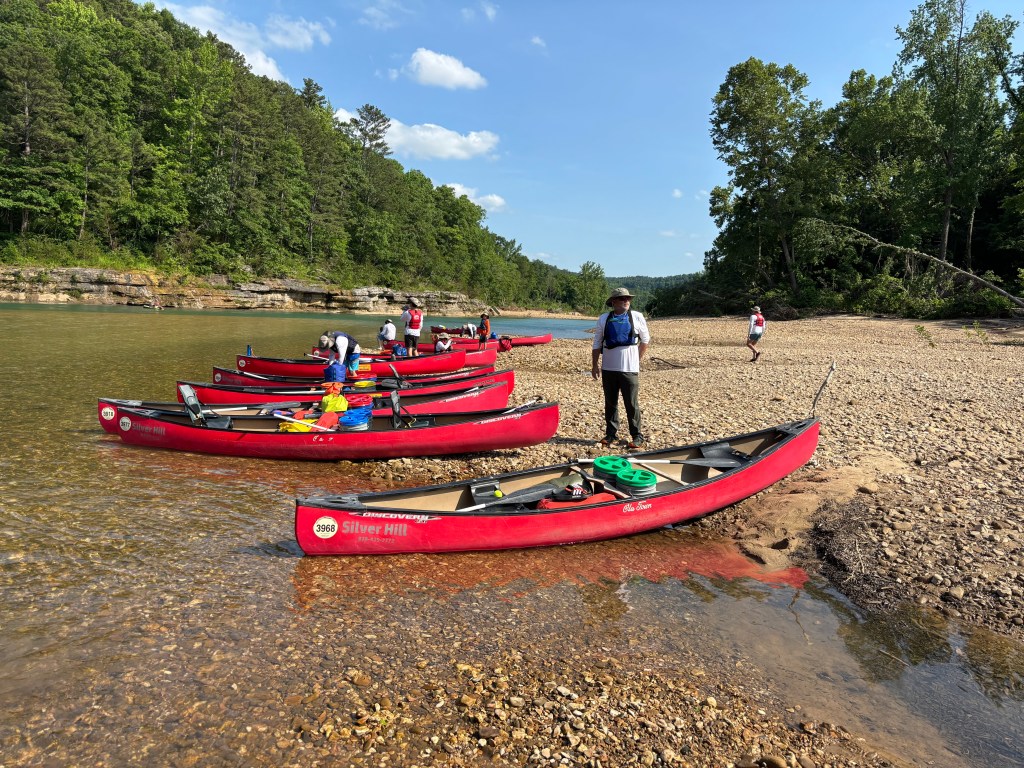
Just to our north, however, are the Buffalo River in Arkansas and the Current River in Missouri. These rivers are managed by the National Park Service, serviced by several outfitters, have great gravel bar camping, and, at most flows, provide an appropriate challenge.
The Current River
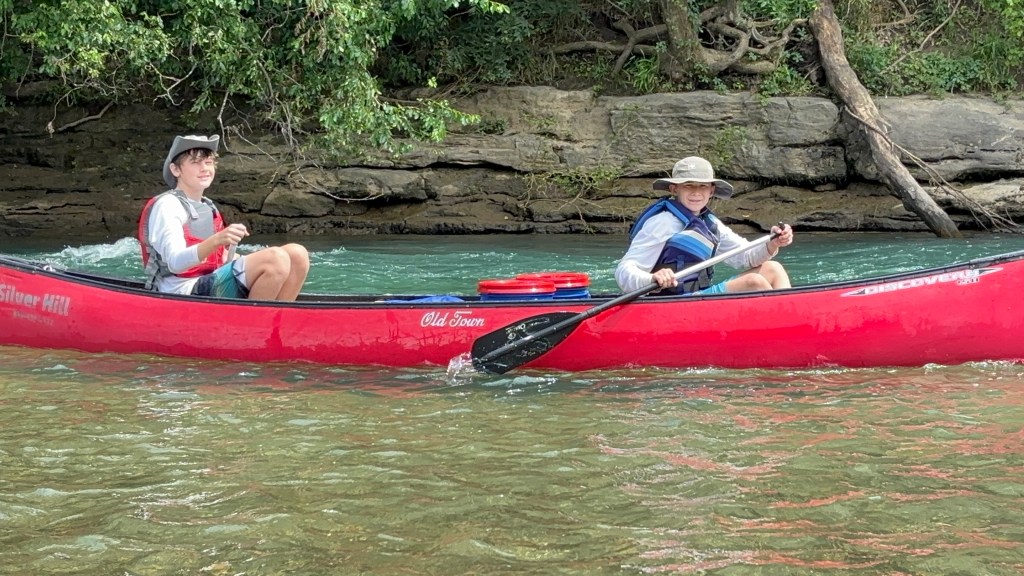
The Current River and Jack’s Fork River (a tributary of the Current River) are part of the Ozark National Scenic Riverways. They are located in southern Missouri, about a 13-hour drive from Austin. Troop 33 covered 54 miles in four river days on the Current in 2022.
Cave on the Current River
The Current River is unique in that much of its flow is fed by several very large springs. The water is cold and clear, and the river is spectacular. The river is mostly Class I with some Class II rapids. The most significant danger is not rapids but strainers (trees in the river that can hold canoes and people). Unlike the Buffalo River, the springs discharging into the Current River make the flow reliable in summer, as river flows are not dependent on recent rainfall.
One of the big springs discharging into the Current River
A river trip on the Current provides interesting side hikes to springs, a cave you can canoe into, and the convenience of passing several developed campgrounds with bathrooms. Living up to its name, the river moves, making covering miles relatively easy.
The Buffalo River
The Buffalo National River in northern Arkansas was established in 1972 as the first national river. Troop 33 covered 41 miles in 2 1/2 river days in June 2025. The Buffalo’s fishing and wildlife are comparable to the Current’s, but the scenery is more dramatic on the Buffalo, as there are high bluffs all along the river. The water is also warmer on the Buffalo.
Floating the Buffalo. Note the color of the water!Gravel Bar on the Buffalo River
The rapids on the Buffalo are Class I and small Class II, but there are many trees and root balls to avoid. The Buffalo and Current have many gravel bars, but the Buffalo’s gravel bars are generally bigger and have more spacious campsites. Like the Current, the Buffalo has several developed campgrounds that are convenient for bathroom breaks.
Current River vs Buffalo River
These are similar rivers, and both provide an excellent experience. I would be hard pressed to say which was more fun; they are both great. But there are some differences.
For travel, Scouting America’s safety policies limit us to driving 10 hours per day. This means that for those of us in central Texas, the Buffalo River is a one-day drive, but the Current requires three more hours on a second day. This logistical inconvenience makes the trip to the Current longer.
From a float trip perspective, the main difference between the Buffalo and the Current is that the Buffalo is entirely rainfall-dependent, while the Current is not. The Buffalo tends to flood suddenly, then drop over a few days. This means that when the upper section of the river has ideal flows, the middle and lower sections may have high water from the previous flood, which makes paddling unsafe. Or that the upper section is too low when the middle and lower sections are ideal. The Current, located in rolling hills rather than steep bluffs, is not quite as prone to flooding and retains a base flow all summer. In practice, this means that the floating window for the Buffalo is significantly less reliable than the Current. When we floated the Buffalo in early June 2025, the week before and after our trip saw high water that would have caused us to cancel.
The Buffalo is also better suited for shorter trips, in terms of mileage, while the Current may be better for those seeking lots of miles, particularly those aiming for a 50-miler. This is due to the unreliable flow issues described above and how the National Park Service has awarded concessions to outfitters. On the Buffalo, there are different outfitters for the river’s upper, middle, and lower sections. When we floated the Buffalo, our outfitter (serving the middle section) agreed to take us to a put-in at Pruitt (on the upper section) to give us a 41-mile float. But I get the feeling that is unusual and that the Buffalo outfitters stick to their sections. On the Current River, the outfitters did not appear to be geographically limited, and finding an outfitter for a 50+ mile float was easy.
The big takeaway is that a summer trip on the Buffalo River may require a backup plan or flexibility if the flows are not ideal, while a trip to the Current River requires less backup.
Go float
I can’t emphasize enough how fun these little float trips are and how much camaraderie they inspire among the scouts. They are incredibly dollar- and time-efficient compared to the other high-adventure options. Incorporating these types of trips every few years into a troop’s high adventure plan makes high adventure experiences accessible to everyone, even those with limited means and time. So go get on the water.
Just after the New Year, the Smith family went on a two-night backcountry trip to the High Chisos in Big Bend National Park. This was our first family desert trip, and it was a lot of fun.
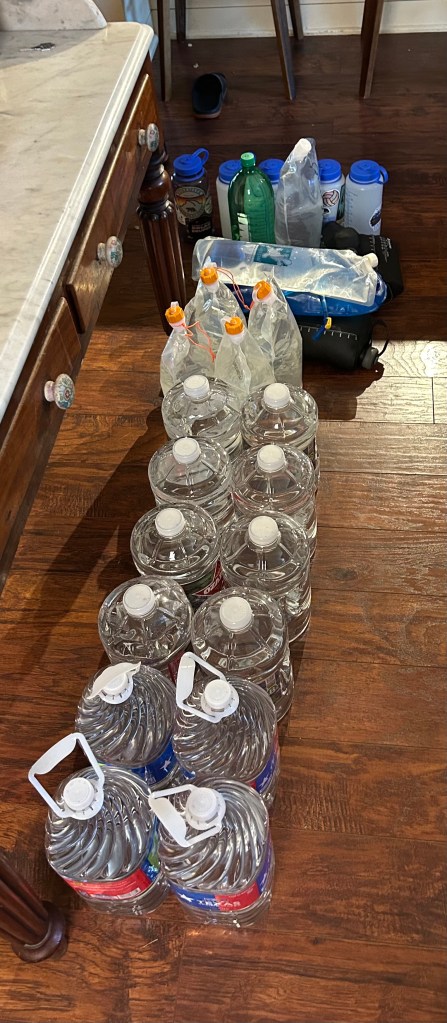
Most Big Bend backpacking trips are challenging because you must carry your own water. There are a few springs, but their flow is unreliable, and even when they flow, it takes a long time for a big group to fill bottles. With cool weather in the forecast, we carried 4L per person per day, which equaled 48L total. Collectively, this amounted to over 105 lbs of water! We are generally “lightweight” backpackers, but all our packs were heavy initially.
Lots of water!
For food, we packed snacks for breakfast and lunch and carried two big cans of Mountain House freeze-dried meals for dinner. We slept in the big Oware pyramid tent, for which I made a Tyvek floor, and everyone had an air mattress and sleeping bag for expected temps in the low 30s.
I packed all the backpacks in the minivan the night before we left, and we rolled out of Austin at 4:30 am, heading west. After brunch in Fort Stockton (Rosita’s Café is not bad), we reached the park around 1 pm. The drive from the Persimmon Gap entrance to Panther Junction is always long, with the 40 mph park speed limit. We skipped the Visitor Center and headed right for the Chisos Basin. Rangers held us for a few minutes on the Basin road because there were too many cars and insufficient parking spots. We grabbed a parking spot opposite the convenience center, made last-second bathroom stops, loaded up, and hit the trail by 2:30.
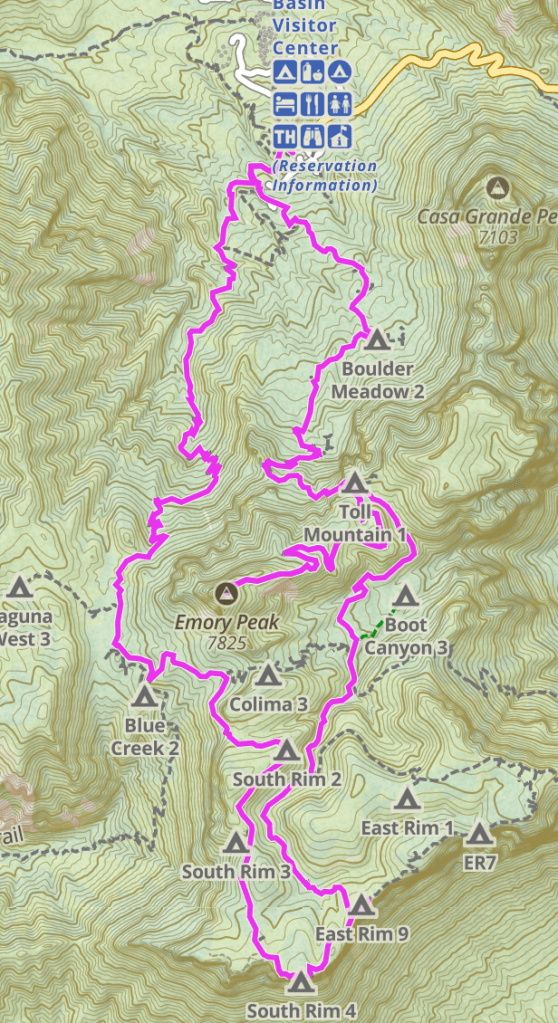
Our first night’s campsite was LM (Laguna Meadows) 2. Although it was only a four-mile hike from the parking lot, it involved over 2,000 feet of climbing. The site included four bear boxes, which provided plenty of room for our food and water. We set up the tent, fired up the stove to boil water, ate dinner, and watched the rocks on Emory Peak change color as the sun lowered in the sky.
Dinner in Laguna Meadows
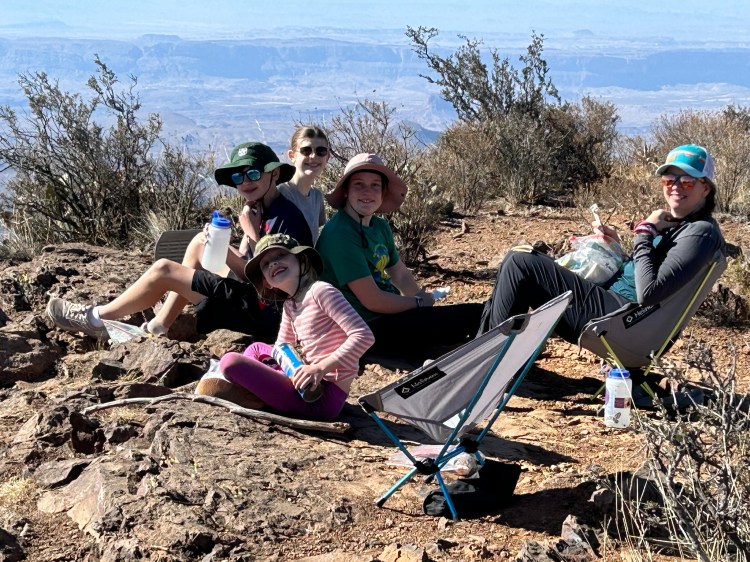
The following day was cool, and as we only had to hike a few miles, we had a lazy morning. Michelle and I enjoyed coffee and ate Mountain House Breakfast Skillet breakfast tacos. The hike to the South Rim was pleasant, and we saw a few deer.
Blue Creek Canyon in background, on the way to the South Rim.
Although I have been to the South Rim several times, each time, it is spectacular. We dropped our packs and had a long snack break at the South Rim overlook.
Lunch on the South Rim.
After the break, we walked about a mile to our campsite, ER (East Rim) 9. I initially chose this site because, on the map, it appeared close to a bathroom. However, my map did not reflect that the bathroom burned up in the 2021 South Rim fire. Since that time, anyone camping at a South Rim or East Rim backcountry site has been required to carry wag bags, and you have to haul out your poop. This was a slight complication, which we managed okay, but it is something to be aware of.
ER 9 is set back about 75 yards from the East Rim, and is relatively exposed because many of the trees there burned in the fire. It also has small tent pads, but we got the Pyramid set up and the camp established.
ER 9 Campsite
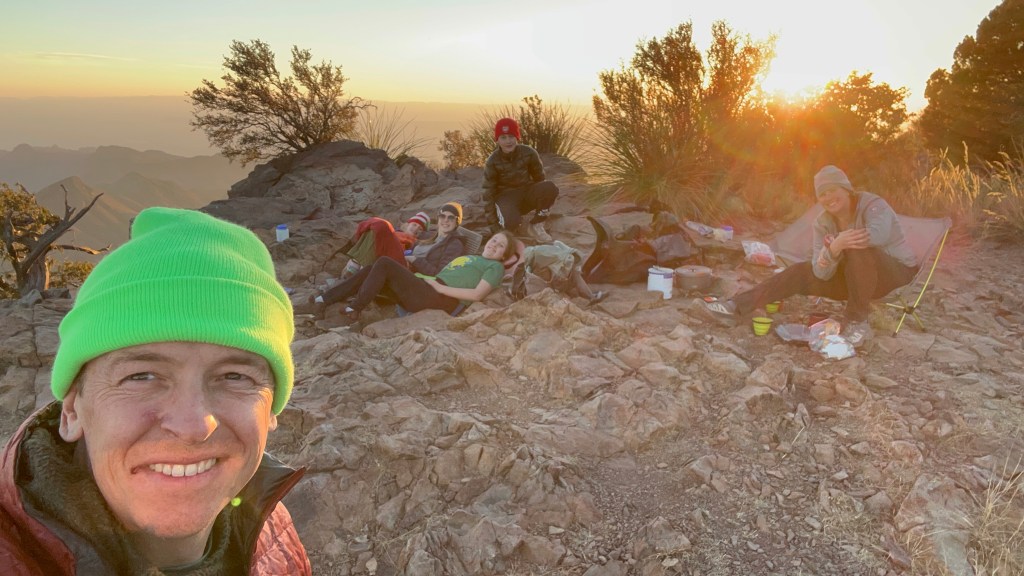
For the rest of the afternoon, we took a short hike without packs to the East, where we found a sheltered, shaded area to eat and play a few hands of Uno. About an hour before sunset, we grabbed dinner food and hiked about half a mile east, back toward the South Rim, where we set up on a promontory for a sunset dinner.
Sunset dinner.
By the time the sun was down, the wind was picking up, and the temperature was dropping. Back at camp, we watched the stars come out – there is nothing like the West Texas sky – and turned in.
After a windy night, we got up early and were mainly packed to watch the sun come up.
We spent the morning hiking back north, got a good view of the Boot, and reached the top of the Pinnacles Trail by about 10 am.
Now you know why its called Boot Canyon.
From this point, a 1.5-mile trail heads up to Emory Peak. The NPS has placed a few large Bear Boxes here, and we stashed our packs and headed up. The wind was blowing, but it was a fun hike. The last 50 feet are a Class III rock scramble with some exposure. All four kids reached the summit, with tremendous views in every direction.
Windy on Emory Peak
We climbed back down and high-tailed it back to the Pinnacles Trail junction, where we ate the rest of our food for lunch. From that point, it is about 4 miles down the Pinnacles Trail to the car. Those four miles always take longer than I think they should, but we made it down around 2 pm. I bought everyone an ice cream in the general store, and we piled in the minivan, heading for an Airbnb in Marathon, about 90 minutes away.
In Marathon, we had a nice dinner at the barbeque restaurant and chilled—literally—because the hot water at the Airbnb went out. The following day, we got up, rolled, and returned to Austin before 2.
Whenever we go to Big Bend, Michelle and I say, “We should come out here more often.” These short trips are great, low commitment, and something I want to do more of.
Planning Notes:
Suitability for Families – My 8-year-old did not have a problem but did not carry anything for most of the hike. My older three (12, 15, 17) carried their stuff and some group items easily. The biggest challenge is the water, which is just heavy. My pack included my stuff, my 8-year-old’s stuff, 18 liters of water, and some food. It weighed over 60 lbs at the start. Adults with backpacking experience who understand ultralight techniques should be fine doing this hike with kids. Taking kids on this trip with a traditional approach (heavy boots, heavy pack, heavy tent, bring a bunch of stuff) would probably not be very fun.
Campsites—All Chisos backpacking sites are reserved on recreation.gov and sell out for holidays. I booked ours in early October, when there was still good availability. You can book six months in advance.
Duration – I enjoyed taking two nights for this trip. We could have done it in one night, but the second day would have been long. It was nice not being in a rush, particularly with kids.
Route – From the Basin, hikers can choose between two trails to reach the South Rim: the Laguna Meadows Trail and the Pinnacles Trail. I prefer using Laguna Meadows for the outbound journey and Pinnacles for the return, as Laguna Meadows is less steep.
Chisos Basin Closure—The NPS plans to close the road into the Chisos Basin in May 2025 while rebuilding the restaurant. The project is scheduled to take two years, but a Ranger I spoke with was optimistic that access to the campground and trailheads may be restored earlier. Until the road reopens, the only ways to get to the South Rim are via the Blue Creek Trail or the Juniper Canyon Trail.
Recently, I have been perusing the American Whitewater Accident Database, which includes data on whitewater river accidents in the US and Canada. I have been thinking about river-related risks for my personal trips (mostly Class III) and for trips where I may lead other adults and youth (Class II). The data are interesting and not necessarily intuitive. Below are some observations of the data from the 20 years from 2000 to 2020.
A quarter of all fatalities are clearly avoidable:Not wearing a PFD (15%) and getting caught in low-head dam hydraulics (10%) cause a quarter of all fatalities. All of these deaths could have been avoided by using basic common sense and situational awareness.
Flush drowning is the largest single cause of fatalities (19%).Flush drowning occurs when a person aspirates water, typically after swimming through rapids. A paper looking at AWA data on flush drowning concluded that flush drowning is slightly less common on Class I-II rivers, but is by far the leading cause of death on Class III-V rivers – which itself is not surprising given the potential for repeated dunkings and long swims on bigger rapids. The paper describes several contributing factors, including having an inadequate float plan, cold water, and lack of fitness. Another factor is having the proper gear, including a PFD with adequate floatation for the conditions, which might be more than 16 lbs standard in many PFDs.
Getting pinned in a boat against something (strainers are 12% and rocks are 4%) is a significant cause of fatalities. Getting pinned is not just inconvenient; it’s dangerous. Pins can happen quickly, even on Class II rivers.
Swimming into something (strainers are 9% and sieves are 5%) is another major cause of fatalities.The ability to self-rescue by swimming aggressively away from danger is important.
Foot entrapment (2%) and equipment entrapment (3%) are less common than I thought. Entrapment is talked about quite a bit in every boating class I have taken. But statistically, it is more rare than many other causes.
Possible conclusions to draw from these data:
Swimming ability and fitness are essential for boating safety. A strong swimmer has a better chance of avoiding flush drowning, strainers, and sieves than a weak swimmer. Someone who is not a good swimmer or is uncomfortable in the water is less likely to take aggressive action to self-rescue. Someone who is out of shape may tire quickly before they reach safety. Cold water shock, which can lead to flush drowning, is exacerbated by poor fitness.
We should emphasize aggressive self-rescue over foot entrapment avoidance. I have seen this teaching scouts: when they go for a swim in a river, they are generally quick to put their feet up (as they have been taught), but they don’t always swim to safety without being prompted. We have over-emphasized foot entrapment in training and failed to prioritize self-rescue. We also spend lots of time practicing throw ropes – which is admittedly fun – but it is a skill unlikely to be used in many on-river scenarios. For example, when canoeing with scouts on Class II rivers, we rarely set safety with throw ropes. Instead, boats flip in rapids or get swept toward strainers and sweepers where no safety is set. In those situations, aggressive self-rescue is more valuable than a throw rope.
Be extra careful around cold water. The flush drowning reports on the AWA database typically involve someone falling out of a boat and by the time they are recovered, they are dead. Reading the accident reports, it is evident that this often happens in cold water. We need to think about water temperature when planning our trips. A flipped canoe in 48-degree water is a lot more dangerous than a canoe flippped in 78-degree water.
PFDs need to fit and have adequate floatation. With drowning as the number one cause of death on rivers, having a PFD that will float a person high is important. We have all seen situations where someone shows up with an ill-fitting PFD, or where people (often adults) refuse to wear PFDs. We have also seen very large people wearing standard PFDs with insufficient floatation.
In sum, there are no shocks in the AWA data, but they make me think about prioritizing my thoughts of risk. Fitness, self-rescue, good PFDs, and awareness of cold need to be top of mind on the river.
Years ago, when our oldest turned 5, we went to Walt Disney World in Orlando. Somehow, that precedent turned into a tradition. We have now been to WDW four times, most recently in January 2024,
I am not a “Disney” person. I hate crowds, abhor waiting in lines, don’t like hotels, and like to be in nature. While Disney does not check these boxes, it is undeniable that our kids loved each trip. Disney, like going to a popular national park, is a place that rewards people who plan carefully and take a strategic approach. Disney is not relaxing or really even a vacation, and because everything at Disney is expensive, we tried to maximize the opportunities on each trip. As I hope to not go to Disney again, at least until I have grandkids, I wanted to share the lessons learned with other families planning a WDW trip.
Pick 1 or 2 parks and max them out. A day at a WDW park (there are four: Magic Kingdom, EPCOT, Animal Kingdom, and Hollywood Studios) is exhausting. On park days, we are up before 6 am and don’t go to bed until after 11 pm. Two activity days are about as much Disney as we can tolerate on one trip. If you want to do more than 2 parks, I recommend inserting a rest day, meaning the trip lasts 5 days. That is a lot of Disney time. Here is how I rank the parks based on kids’ fun levels.
Magic Kingdom – the classic, stuff for all ages.
Hollywood Studios – the most roller coasters and Star Wars. The best park for older kids.
EPCOT – my favorite and a combination of tech-themed rides and the world lagoon. The best for adults.
Animal Kingdom – fun but smallest park.
Stay at a WDW hotel. Staying on WDW property has two huge benefits. One, you can enter the parks 30 minutes before everyone else. This means you can usually do one or two of the most popular rides before general admission. Two, because WDW has a convenient transport system, you can leave the park after lunch when it is packed and go back to your hotel to take a nap or chill, then come back in the evening. A third, smaller benefit is that because there is a bus from the Orlando airport to each WDW property, there is no need to rent a car unless you are planning to go somewhere off WDW property.
As for specific hotels, on our first trip, we stayed at the Wilderness Resort. It was pleasant but pricey. On our last three visits, we stayed in one of the Disney All-Star Resorts, the cheapest on-property hotels. The rooms are simple but can sleep 6 and come with a kitchenette. Each All-Star Resort has a pool, an arcade, and a cafeteria/fast food-style restaurant.
Bring your own food and drinks. Eating at WDW is expensive and, most of the time, requires reservations. On the plus, Disney lets you bring food into the parks. For each of our trips, we packed a suitcase with microwaveable breakfast food and sandwich ingredients or similar lunch food. We would take our lunches to the park in a backpack and eat them on a bench (the best picnic spot at the Magic Kingdom is to go on the Liberty Square Riverboat, which takes about 20 minutes and is never crowded). For dinner, most nights, we would eat at the hotel restaurant. The money you can save on food can be applied to buying Lightning Lane passes.
Dealing with crowds. Before having high-school-age kids, we would just go during low-demand parts of the year, like mid-September or late-January. The last two times we went were in early December (crowded) and right after New Year’s (super crowded). Obviously, if you can go during off-peak weeks, do that. On our low-season trips, we rode many of the most popular rides. During the last 30 minutes, we rode some rides back-to-back-to-back without getting off. A casual approach to a WDW park can work during these times of the year.
Going to a WDW during crowded times (summer, Thanksgiving, winter break, spring break) is entirely different. You can still do the rides, but it will take lots of planning, hustle, and a willingness to pay money to avoid lines. To give specific examples, on our last trip (Jan. 3 and 4, 2024), we did every ride the kids wanted to do at the Magic Kingdom and every ride they wanted to do at Hollywood Studios except for one that we missed because the kids instead voted to do the Rockin Rollercoaster (one of the most popular rides) twice. But to do this, we had to hustle, be on top of the Lightening Lane system, and be strategic.
Research Tools: There are a bunch of websites specifically focused on planning for Disney with up to date information. The most useful ones I have found are:
Mouse Hacking – Excellent articles explaining how Genie+ works and rope drop strategies.
Touring Plans – Good explanation of the various attractions at each park. I did not pay for the subscription and just reviewed the general pages, so I cannot comment on whether the subscription is worth it.
Thrill Data – Aggregator for data on the wait times at each ride. Useful for predicting crowds.
Research the Rides/Experiences
Each park has rides ranging from incredibly popular to not popular and with different experience based on the ages of kids. Little kids are more likely to want to meet characters. Big kids are going to want to do the roller coasters. Disney roller coasters are generally mild, but research the height requirements to avoid potential meltdowns.
Learn how to use Lightning Lanes and Genie+
Disney always has a program that allows you to skip the line on some rides. This used to be called Fastpass but is now an app called Genie+ and Lightning Lanes. The rules are always changing, so you will need to research before you go. But, the basic principles of crowd avoidance remain the same:
Research the rides and which ones are the most popular at specific times of the day.
Download the app and learn how to use it ahead of time.
Pay $ to do the absolute must rides like Rise of the Resistance, Seven Dwarves, or TRON. These will have an hour plus wait right at opening.
Set alarms to remind yourself to enter lotteries or buy Lightning Passes.
Be prepared for a long day. Strategically, I break up a day at a WDW park into three stages:
Morning: Get up early and hit as many rides as possible before it gets crowded. Find out when the first bus from your hotel to your park arrives and be outside at the bus stop at least 15 minutes early.
Once in the park, be strategic about what rides you want to target. I recommend not trying to run to the most popular rides (Seven Dwarves Mine in Magic Kingdom or Rise of the Resistance at Hollywood Studios) but focus on the slightly less popular rides. This strategy is explained in this article.
For our day at the Magic Kingdom, the first bus was at 6:30 am, which meant we were up at 5:30 am. We got into the park around 7:10 am and then walked to the Tomorrow Land Bridge, where we waited for park staff to drop the rope at 7:30. We bee-lined to Space Mountain, where, after a bunch of people tried to cut the line, a Disney staffer laid down the law, and we were the very first people on Space Mountain.
Afternoon: Once the parks are jammed with people, return to the hotel and rest. On a crowded day, by noon, every ride has an hour’s wait, and all of the Genie+ available spots will be for the evening. At that point, we take the bus back to the hotel and rest. Literally, we make the kids nap. If we don’t rest, we will not have the energy to hustle at night’s end. I used this time to catch up on work stuff. During the rest time, set alarms to book Genie+ spots as they become available for slots at the end of the night.
Evening: Return to the park when everyone else leaves for dinner and stay until closing. Around 4:30 pm, we eat dinner and then head back to the park. On our last trip, we used all our Lightening Lanes, and we realized that if we wanted to do Tower of Terror, we were going to have to suck it up and wait in a 70-minute line. So we grabbed burgers and fries from the hotel restaurant and ended up eating dinner in the line. Lines are also shorter near fireworks times and in the last 30 minutes before the park closes.
Is WDW worth it? It is not my cup of tea, but kids love it. I will close with a cautionary tale. We were at the Magic Kingdom, packed around 11:30 in the morning. We had already done most of the rides we were targeting and were headed back to the hotel to chill. A mom with three little kids was having a complete meltdown because she did not understand how to use the Lightning Lane system – by this point in the day, all Lightning Lane spots were gone until evening, and every ride had a wait of at least 75 minutes. She had paid hundreds or thousands for her family to go to the park but would only get to ride a few rides after waiting hours in lines with little kids. That type of experience is definitely not worth it. So, if you go WDW, go in with a plan.
I took my Gnarwal on our family trip to Costa Rica this summer to paddle a few miles of the Rio Chirripo Pacifico near San Gerardo de Rivas. On this trip in the middle of the rainy season, the section of the Rio Chirripo I intended to run was way above my skill set to run solo, so I bailed. But later on the trip, I got a fun afternoon run on the much tamer but still fun Rio Uvita, located on the southern Pacific coast. I parked at the bridge in the town of Uvita and walked about 3 km on back roads to the river, where I floated back to the bridge. This is primarily a Class II section with a few large holes and ledges that could flip a boat:
Warning: Large (14-foot) crocodiles live just downstream of the bridge, where the river slows as it nears the ocean. Anyone trying this run should take out at the bridge or above.
Day 0 (travel day): We flew from Austin on an early morning flight to Colorado Springs, where we caught a charter bus to Philmont. The bus ride was a little more exciting than we had hoped, but we made it safely. After registering, we toured Villa Philmonte, ate dinner in the dining hall, and chilled. Cell phone reception at Basecamp was 1-2 bars with T-Mobile, nothing with Verizon.
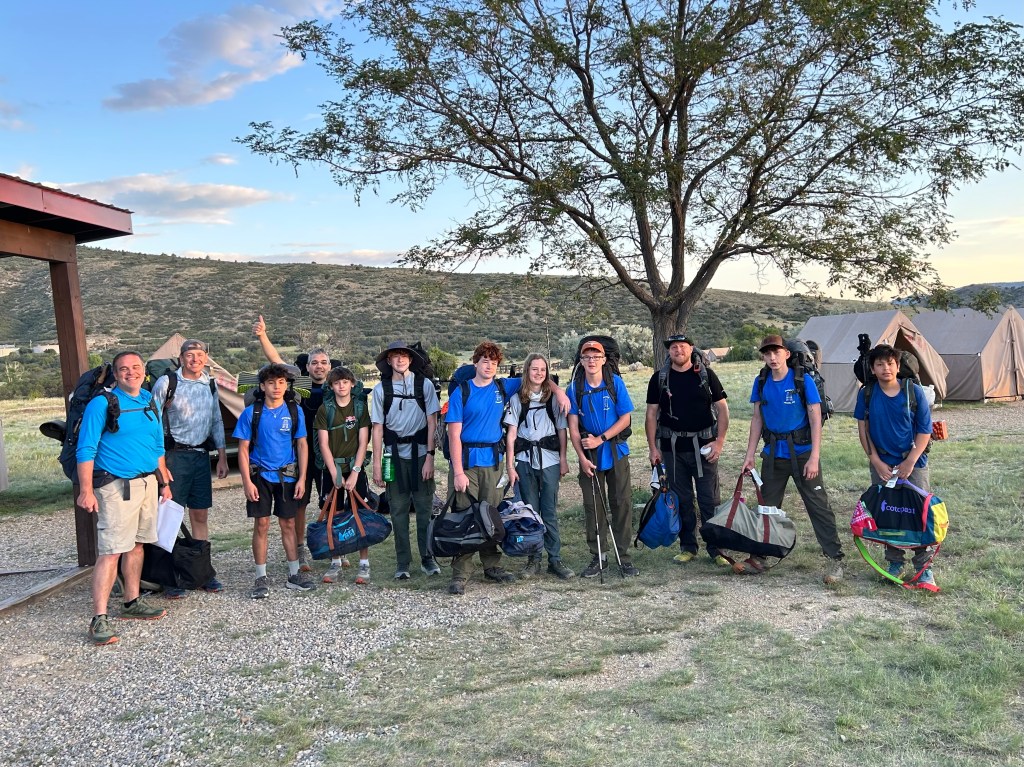
Crew Leaders for both Troop 33 crews being briefed at the Welcome Center, while the rest of us, including adults, look on.
Day 1: After breakfast, we met our Ranger Lance, who led us through a medical recheck, logistics, gear checkout, our official crew photo, and a brief equipment shakedown. This ended up taking most of the day. After dinner, we hiked with all the other crews departing the next morning to the Trailbound campfire.
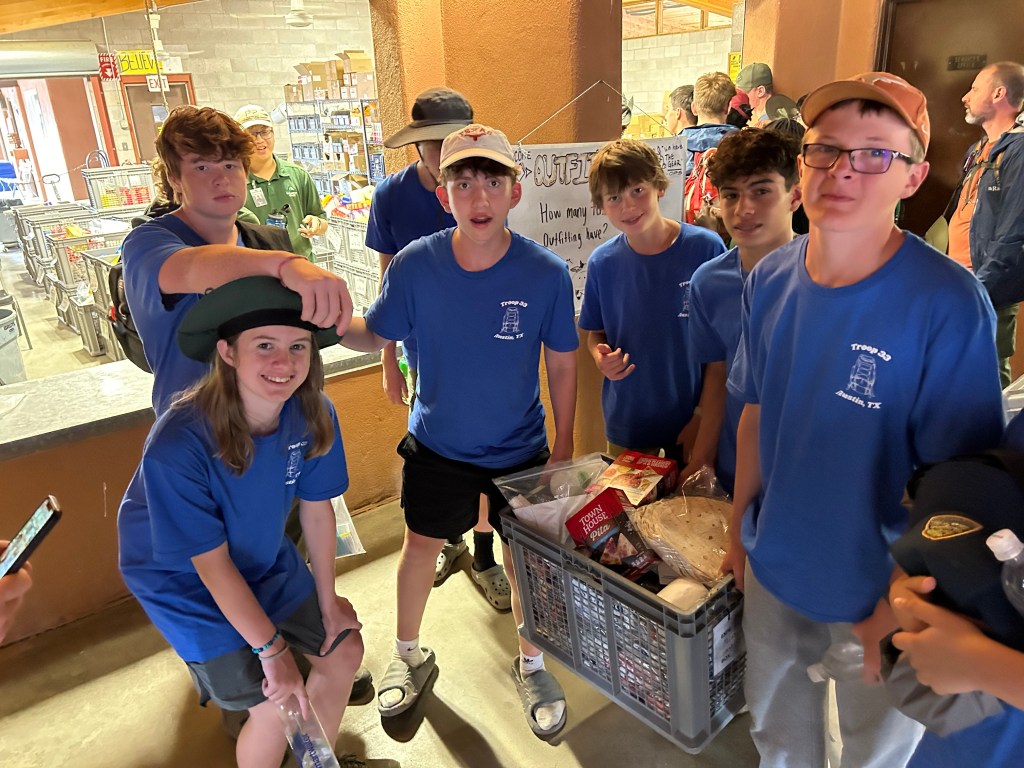
Picking up crew food.
Day 2 (first day on the trail): We packed up early and were bussed to the Poneil trailhead on the north side of Philmont.
Rolling out of Basecamp (we stored our duffels in lockers while on the trail).
On the trail, Lance provided quick lessons on backcountry hygiene and navigation. We then hiked a couple miles to Poneil, where the scouts enjoyed the cantina, which served two flavors of root beer: Crunchy or Creamy.
Our Ranger Lance instructs the scouts over root beer.
The scouts then branded their hats and crocs, and everyone took a turn learning to lasso.
In the afternoon, we hiked another mile to our campsite, Sioux, where Lance instructed us to hang bear bags and prepare and clean up dinner the Philmont way.
That night, we returned to Poniel for a pioneer-themed evening program with great music and storytelling. Poniel was the original Basecamp when the property was donated, and it was a fun visit.
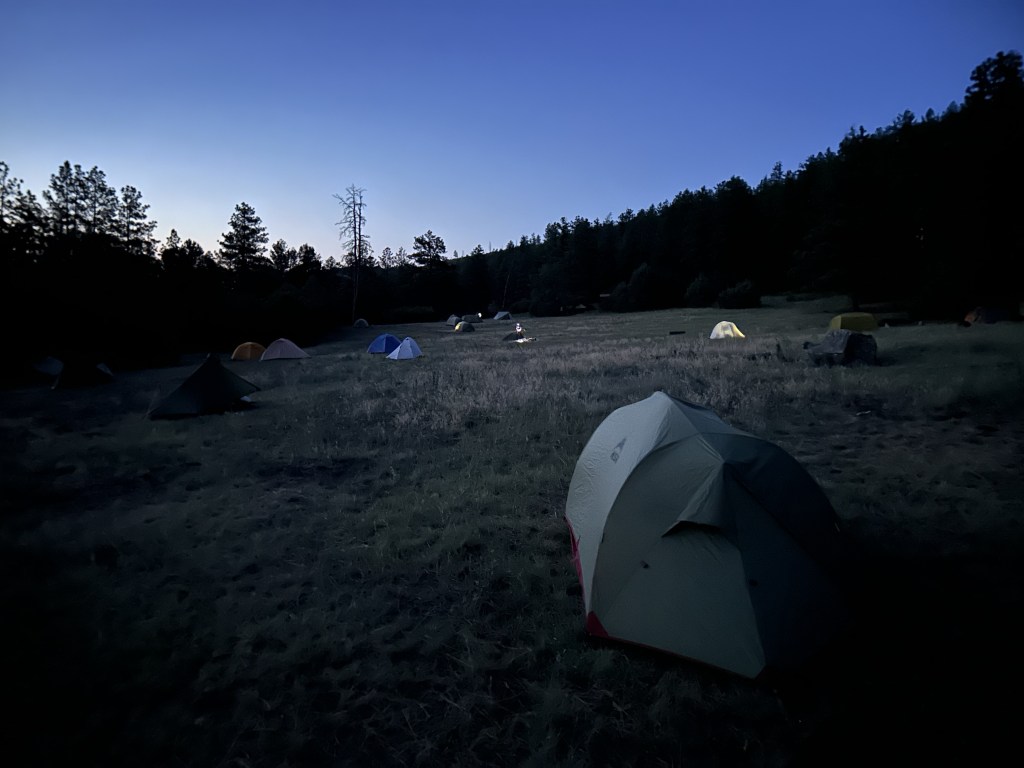
Dawn at Sioux.
Day 3: We spent the morning building a trail on the hill above Sioux. Overall, it was fun, but I wish it had been scheduled on a slower day.
After the conservation project wrapped up at 10:30, we still had a five-mile hike to our next activity at Poblano, which meant the afternoon storms arrived before we climb spar poles. This was the only activty we missed on the trek, but was one that some of the boys were really looking forward to doing. The campsite at Poblano was beautiful in the trees, and we were treated to another great musical program by the staff that evening.
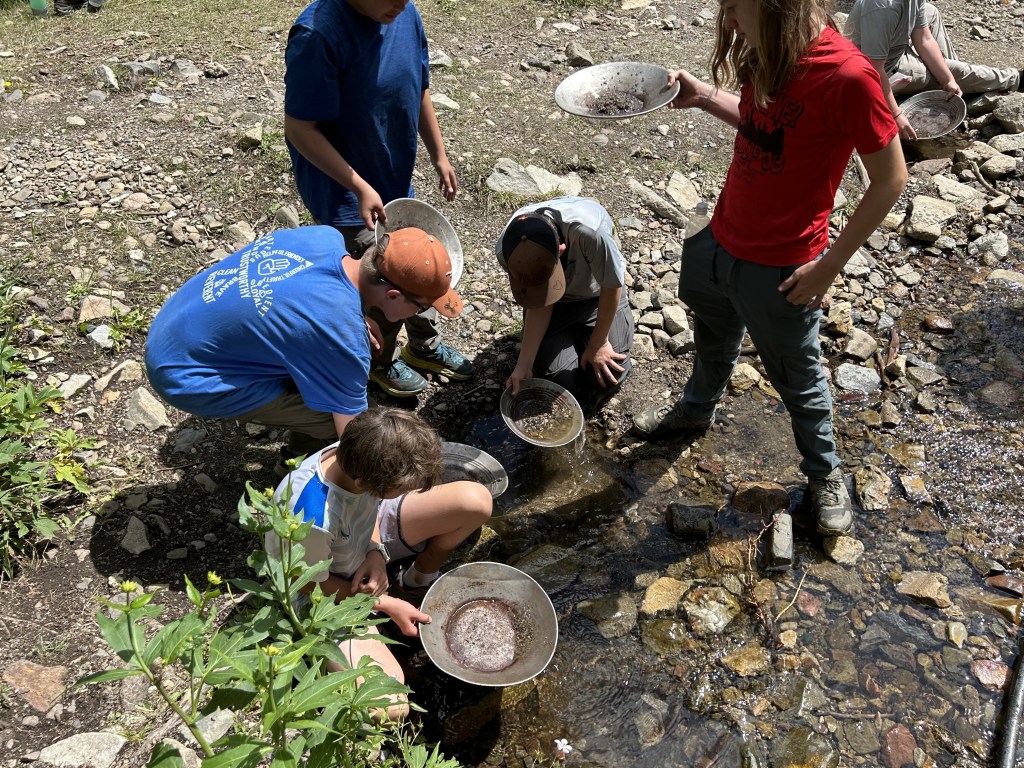
Day 4: This was an 11-mile day. Our Crew Leader made the tough but correct decision to abandon spar pole climbing at Poblano in favor of an early departure. This put us at French Henry, a cute mining-themed staff camp, by 1000. The scouts participated in a mine education program, panned for gold (found a tiny amount), and then made a butter knife at blacksmithing.
On the hike from French Henry to Baldy Town, we were hit with our first hail storm.
At Baldy Town, one scout bought a new pack cover after the hail storm demonstrated that his original was too small, and we went to the commissary and reloaded on food. Our packs were full as we headed out from Baldy Town in another rainstorm for Miranda, a fur trading-themed camp, which we reached mid-afternoon. Our itinerary officially called for us to hike another 0.7 miles past Miranda, but the staff radioed logistics and got us permission to stay at Miranda. We quickly set up camp and participated in an hour-long hatched throwing activity.
Day 5: The scouts were up at 0300, and we were on the trail by 0400 for a 10-mile, 3,000 feet up and down Baldy summit hike. We made good progress and were on the summit by 0800. The top was windy, and temps were in the 40s, but we could fit our entire crew behind one of the rock walls that hikers have built over time. Out of the wind, we were comfortable, and we shared a pound cake and a can of apple pie filling that Lance had left us, spread by the butter knife the scouts had made. Of course, the adults had coffee.
After about an hour, we headed down, reaching Miranda around noon. It was a beautiful day in the 80s, so I took a trail shower (pots of cold water dumped on my head), washed clothes in a ziplock, and dried things. It was at this moment that the Philmont gods decided to teach us a lesson in the form of a 30-minute hail storm that left the campsite covered in inches of ice. The temps dropped into the 40s, and we spent the rest of the day walking on ice.
That evening, our scouts and adults competed in a hatchet throwing contest, and then we attended a comedy show put on by the staff.
Comedy hour at Miranda.
We loved Miranda; it’s a great meadow! (This is an inside joke for those who have been there)
Day 6: With only a 5-mile hike, we had a lazy morning drying everything out as we hiked to the Baldy Skyline trail camp.
Backcountry camera tripod to take this crew shot:
Of course, after a sunny hike, it started to rain as soon as we set up camp. At this point we were running light on isopro gas, so two of our scouts made a tripod, and we boiled our dinner water in a pot over the campfire.
The scouts spent the afternoon playing football in a field.
Day 7: We had a short morning hike to Head of Dean, where we ran into our other Troop 33 crew. After a short visit, we participated in a challenge course which was really fun.
We then took the long way to the Dean Cow campsite to gain some miles and get a few more views of the mountains. We arrived at Dean Cow with plenty of time to spare and had a slow afternoon hanging out. Just before bedtime, we saw a black bear, which caused the scouts to recheck their tents for smellables, producing several unaccounted snacks for the Oops Bag.
Day 8: This was a 10-mile downhill hike to the Cimmaroncita staffed campsite. After setting up camp, we did 3-D archery and took an ecology and history tour.
While trying to cook dinner, we were hit with a gusty thunderstorm, which required a temporary retreat to the tents. After the storm passed, we finished cooking and dished up ramen noodles in the chilly weather.
Day 9: We had another slow morning to dry things out, then briefly hiked to the bus.
We arrived at base camp shortly before lunch. After returning the equipment, we all showered (and bought soap for the boys to ensure they used it) and visited the National Scouting Museum. The Museum has a large 3D map of Philmont and is worth a stop. That evening, we attended the closing campfire program, which was special.
Day 10: After breakfast, our charter bus picked us up at 0900, and we headed to Colorado Springs for an uneventful flight back to Austin.
This trek was fun and something I am sure I will remember. All the boys had a great time, and they are already talking about coming back for the more advanced treks. As for me, I don’t know if I will be back, but I certainly would not mind running it back with another one of my kids.
No. 1: Start Early: The activities are first come, first served, and thunderstorms occur almost every afternoon in July. The Crew Leader should set an early start to ensure that the crew gets to complete activities and to avoid setting up camp late in the day in a storm.
No. 2: Tie sticks directly to trees when hanging Bear Bags: Philmont does not allow ropes to be wrapped around live trees. Instead, dead sticks must be placed under the ropes to protect the bark of the live tree. Every time you release the ropes to lower a bag, the sticks fall to the ground, making raising and lowering the bags a pain. Bring a couple of lengths of paracord and tie the sticks to the trees before wrapping the bear rope. This way, when you lower a bag, the sticks don’t fall to the ground; you simply re-wrap the rope around the sticks.
This is the Philmont with sticks under ropes. All these sticks will fall to the ground when the rope is removed, unless held by a separate cord.
No. 3: Master rigging a dining fly high. We spent time under the dining fly every day. Because we had a giant fly and lots of paracord, we could pitch it to trees and high enough that everyone could fit. The Philmont issued flys, and pitching style is more of a small A-Frams that is much less practical.
High pitched fly using 6-foot sticks, trekking poles, and trees.
No. 4: Ask for Extra Sanitizer and TP: At some points, we ran low on both. I suggest everyone have their own small sanitizer in addition to the troop sanitizer.
No. 4: Have a conversation with your crew on timing bathroom breaks: Multiple times, after a long 30-45 minute break, our crew leader would call for packs on, and inevitably, a scout would say that they needed to go poop. Do not assume that 14 or 15-year-old boys will think: “I’d better go to the bathroom now to avoid delaying the whole group.”
Philmont “Red-Roof Inns”.
No. 5: Have the same conversation on filling water bottles first thing during a break.
No. 6: Force scouts to put on sunscreen and lip balm: They likely will not unless directed by adults.
No. 7: Address foot problems early: The blister prevention and protection kit is the most used part of a crew first aid kit. We used K-T tape to great success. Encourage the boys to address hot spots early before they become blisters. Keep the blister kit in an easily accessible area on the trail and in a central location at camp.
No. 8: Carry the appropriate amount of water: The Philmont logistics department has information on availability at every campsite, which they will share with the Crew Leader. Assess each hike to determine what is appropriate. Philmont is highly conservative in the quantity of water it says to carry. Yes, one generally needs a lot of water in the dry climate of New Mexico, but 4 liters for a 2-mile hike is overkill. Just carefully plan it out.
No. 9: Take a photo of every camp map. These maps are posted on every trail as you enter a camp. Some of the camps are pretty large. The image will help you navigate the camp, identify campsites, locate water, and find the all-important red-roof inns. When you get home, the maps will help to mentally reconstruct the trip.
No. 10: Be able to do laundry. Backcountry laundry requires a gallon ziplock and a few safety pins. You wash the clothes in the ziplock using camp suds, then pin the wet, clean clothes to your pack. Most clothes will dry as you hike in the morning before the storms. With this approach, you will have clean socks and underwear every day.
No. 11: Bring a small (12in x12in) camp towel. Condensation and blowing rain got in everyone’s tent. A small camp towel is nice to have to get things mostly dry. Do not bring a big towel.
No. 12: Always, always store your pack with its cover on or under a tarp. We had multiple scouts have their packs soaked due to leaving packs uncovered when a storm hit. Just assume it’s going to rain.
No. 13: Bring a football or frisbee. The scouts ended up breaking out into games at every camp.
Tossing the old pigskin.
No. 14: Philmont allows open-toed shoes. Philmont is a pleasant exception to BSA’s irrational prejudice against open-toed shoes. Cheap flip-flops are way lighter than Crocs, ventilate better, and make awesome camp shoes.
No. 15: No scout phones in the backcountry. Addressed in a prior post, but phones are a distraction.
This concludes the “how to” part of my Philmont posts. I will have one more post that is simply a trip report. In the meantime, ask any questions in the comments section below.
From the first step off the bus upon arrival to the step back on the bus to leave, the youth Crew Leader, not the adult lead advisor, is responsible for leadership.
The three “official” Philmont leadership positions are Crew Leader, Chaplain’s Aid, and Wilderness Pledge Guia. Of these, Crew Leader is, by far, the most crucial position. In consultation with the other scouts and with appropriate advice from the adults, the Crew Leader makes decisions for the crew. We encouraged our Crew Leader to rotate responsibilities for the various jobs between the scouts. For example, each scout was the navigator for a day. This worked well for us as it gave all the scouts ownership in the crew’s success or failure.
This is not to say that adults are just spectators. As crew members, adults owe a responsibility to everyone else and must pitch in to help the crew achieve its goals. On our trek, this meant that I helped hang bear bags, cook dinner, clean dishes, and hang the crew dining fly at various times.
Most adult advisors I observed and visited with understood their role appropriately. But I know from visiting with staff and other advisors that this is not always he case. The most common problem is adults who fail to allow the youth to lead. Adults should not decide when a crew will take a break, where to set up camp, what route to take, or what programs to attend. Of course, adults can advise the crew leader on these matters, but adults should be prepared to abide by the crew leader’s decision even if the adult disagrees (unless the decision is unsafe).
Indirectly, adult advisors also play an essential role in setting the tone for the crew. If adults are laid back, laughing, and positive, chances are the scouts will take that cue and be positive. If adults are critical of each other in front of the scouts or overly critical of the scouts, a negative vibe will likely take hold of the crew. On Day 1 of the trek, the Philmont General Manager held an advisors meeting, where he advised each of us that we would be confronted with a situation where we would need to force ourselves to smile when we did not want to, but for the sake of the crew, we had to. This was great advice.
A Note on the Importance Advisors Coffee
The staffed camps usually hold an “Advisors’ Coffee” in the evenings, where the adults from different crews can visit with each other and staff. This is an excellent opportunity for adults to recharge and share perspectives. My crew’s adults also held our advisors’ coffee at the unstaffed trail camps. We were not compelled to limit advisors’ coffee to once a day! Sometimes, we would have an impromptu advisor’s coffee under the tarp during an afternoon rainstorm or around a campfire; other times, we would have it during a long trail break. We even had advisors coffee on top of Baldy. These on-trail breaks allowed us to joke around, maintain our sanity, and give space to the scouts to own their trek. So make sure you bring your mugs and coffee.
Adults, working on knots after afternoon advisors coffee.
The foremost rule for gear is to go as light as possible and not take unnecessary stuff. Your base weight should be 21-22 lbs or less, equating to 30-35 lbs once loaded with food, water, and crew gear. If your pack is more than that, it is too heavy.
Our crew had to load this huge pile of food into our packs after a backcountry commissary pickup.
Philmont recognizes that people bringing too much stuff (compounded by participants being out of shape) is a problem, and, to their credit, going lightweight is discussed in the prep material Philmont sends out. But in this regard, Philmont is fighting the “be prepared” headwind of BSA, which has traditionally encouraged an antiquated – by that, I mean heavy – approach. Large packs, leather boots, heavy pants, thick socks, white-gas stoves, multiple Nalgenes, huge multitools, and knives are all common at Philmont. Over the past few decades, the light/ultralight backpacking movement has proven that all that stuff is unnecessary, particularly in a benign Northern New Mexico summer environment. Yes, it thunderstorms many afternoons, and it can be chilly on some mountaintops, but these are not conditions requiring an extreme amount of gear. A fleece or light puffy under a raincoat will suffice even when cold.
Unfortunately, at Philmont and scouting in general, the least physically prepared individuals are often the ones who show up with the heaviest packs. It’s not a problem if an in-shape 165 lb sixteen-year-old varsity athlete wants to carry a heavy 65 lb pack. It will likely be a disaster for the crew, a 105 lb fourteen-year-old or an overweight 50-year-old to try to carry the same pack. Thus, the slowest hikers should be the most concerned with limiting pack weight.
Comfortable pack weights are possible.
The average pack weight for our crew with food, 2-3 liters of water, and crew gear was about 30 lbs (mine was 33), with a few packs under 20 lbs and one pack over 40 lbs The scout with the heavy pack had unnecessary items like a full-sized beach towel and a 2 lb hatchet so should have been lighter, but it ended up not mattering because as a high school cross country runner he spent most of the hike waiting on us geezers anyway.
Philmont has an official packing list, which is generally good. Below are some of the strategies we used to have light packs, as well as observations on gear that was/was not necessary.
Items on the Philmont Packing List
Backpack – One can rent a large Osprey backpack from Philmont for $18. Most, however, will purchase a pack for training and other uses. Philmont says the pack size needs to be at least 65 liters. Most of our crew had smaller packs in the 55-liter range, which worked. If you have a smaller pack, you should have a way to strap on or attach a bear bag to hold food at a significant resupply. Get a pack that is 3 lbs or less. Sam and used the following, but we had a wide selection of packs in our group from ULA, HMG, Osprey, Granite Gear, and REI.
REI Flash 55 – Sam used this one and his pack weight when we hit the trail was 19 lbs. This is a good pack for a small person, and is probably on the small end of what you can get away with. He often carried a crew hear between the lid and pack body.
ULA Catalyst – This has been my workhorse for over a decade and was more than large enough at Philmont.
Backpack Rain Cover—This is mandatory for the July Monsoon. I used a light ULA one. Others used Osprey, REI, and cheap Amazon ones (which do not have a grommet and collect water). Make sure to get a large size to cover bear bags and other items you strapped on the outside of your pack.
Waterproof stuff sacks—Trash compactor bags and Gossamer Gear pack liners are the lightest options and are sufficient, and waterproof stuff sacks also work well. The main advantage of stuff sacks is organization for those who dislike stuffing everything in thei but slightly her pack.
Sleeping Bag – If you are going to spend money, a sleeping bag or quilt is the place to splurge. Something light (2 lbs or less) and comfortable in the 30s (which means a 20-25 degree rating) works. Western Mountaineering, Feathered Friends, and Enlightened Equipment make nice bags; other options are cheaper. I slept in shorts and a T-shirt every night and was warm in my WM Terralite 25 degree bag.
Tents—We had three scout tents: a 4-man REI shared by three scouts, a 3-man Alps Mountaineer shared by three scouts, and a Philmont Thunder Ridge shared by two scouts. They all worked fine. If I had to do it over, I would just encourage all the scouts to share the Philmont tents, which are not that heavy if split. The adults all had lightweight one-man tents. We never had a problem finding a place to pitch the tents.
Clothes
I never used gloves or long underwear. Otherwise, the Philmont clothes list is pretty good. One could drop a shirt from the list and be fine. Most days I hiked in quickdry Patagonia shorts and a merino shirt or light sun hoodie, but some days the activities required pants.
One suggestion when picking clothes is to make sure that each item is the lightest possible version. A postal scale is helpful, as I was surprised to find a large variation in the weights of shirts and pants. Some items are surprisingly heavy, which is bad not only for the weight but also because light clothes dry quicker. Merino shirts are nice because they are light and don’t smell nearly as bad as synthetics.
If you are concerned that things will get too dirty, trail laundry is an option. One sunny morning, I washed a shirt, socks, and underwear in a ziplock using trail soap. I pinned these to my pack with safety pins, and they dried out pretty much on the hike to our next camp.
Puffy – A lightweight down jacket is nice but unnecessary if you have a fleece. Mine weighs 8 oz and doubled as a pillow.
Raingear—I wore my rain jacket daily and rain pants about half the days. Make sure your rain gear is light. Frog Toggs work but are not durable. The Montbell Versalight jacket and pants are pricy but super light and nice for adults. REI has decent cheap rain pants that worked for Sam. I also carried a 6-oz umbrella, which was helpful in sun and hailstorms.
Trailname: M.F. Poppins
Shoes—Only one scout brought proper boots, and that scout had the worst blisters. Trail runners, even high-top trail runners, are the way to go. Half the group had blisters due to not training in their shoes before the trek.
Socks– Lightweight merino socks are the way to go.
Camp Shoes—Not necessary, but nice. Most brought Crocs. I did not bring my flip-flops but I should have, as Philmont is not a closed-toe shoe area, unlike most BSA camps.
Headlamp – Mandatory and extra batteries, as most summits require a pre-dawn departure.
Not on the Philmont gear list but worth bringing:
A Jetboil—A shared jet boil for adult coffee is mandatory for a civilized trek. We brought three cans of Starbucks instant coffee and a box of Chamomille tea, which worked well for four adults over seven trail days.
Nothing like a hot cup of coffee on a mountain morning.
Chair – For adults, the 1 lb penalty for a camp chair is worth it. There is significant time in camp, and afternoon everything is wet.
Hot sauce– We went through 4 small bottles of Yellow Bird in 7 days.
Battery—I took one Nitecore 10000 mAh power bank (6 oz). With my phone mostly in airplane mode/low power, I had plenty of power for seven days in the backcountry. I spoke with others with solar chargers, including my wife, and I don’t think they are worth the weight penalty.
Crew Gear:
Dining Fly—We brought our own dining fly, a 12×12 Equinox tarp. This tarp is bigger than the Philmont-issued dining fly, and we rigged it using paracord so it was pitched high. We spent a lot of time sheltering under the fly in the storms and were happy we had it.
“Our tarp is too big” said nobody ever.
Stoves—We brought two Kovea Spider canister stoves (we only used one). Many troops bring white gas stoves, which are less reliable and messier than canister stoves. It does not get cold enough to impair the use of gas.
Pots – We brought our own pots, which are the same model as Philmont rents. This was useful as two nights, the boys built tripods, and weowever, this blackened the pots, which heated water on the campfire. We don’t mind the pots being black but Philmont might.
Putting those Pioneering skills to use boiling water the old-fashioned way.
Bear Bags and Kitchen Stuff – We used the Philmont-issued spoon, scraper, bear bags, and bear rope. I don’t see that bringing these from home is worth it.
A note on Phones
My primary use of my iPhone was as a camera, with a secondary function of double-checking navigation using Gaia. Cell phone reception was limited, but I could call and text home a few times from high areas, including on my daughter’s birthday. While on Baldy, I took pictures of each scout and texted their parents, which was appreciated.
I regret that we allowed the scouts to carry phones. One scout started watching Netflix when we were at a camp with reception. The phones were a distraction. I recommend requiring all scouts to store phones at base camp, as there are enough photographers with adult phones.
Steps to ensuring a lightweight pack: Now that you have an understanding of what is useful and what is not, here is how to dial in weight:
Assemble and weigh everything on the Philmont packing list.
Remove anything you think you will not need (gloves, long underwear, maybe a shirt).
Go do a big hill hike with your pack, include 2-4 liters of water and 10 more lbs to represent food and crew gear.
Only if the pack weight feels fine, consider if you want to bring an optional item.
These steps will ensure a comfortable pack weight, which will make for a safer, more enjoyable experience and better cohesiveness with your crew.
This is going to be a short post. While some backpacking experience helps, one does not need to know any Philmont-specific skills or procedures before arrival. A Philmont Ranger accompanies every crew for the first few days of the hike and will teach these skills—even if the crew already knows them. A physically fit crew with light packs, good attitudes, and zero skills but a willingness to learn will be fine at Philmont.
So, don’t spend time practicing skills unless you are absolutely sure that (1) everyone in your crew is in tip-top shape, (2) you have good crew dynamics, and (3) every member of the crew has an appropriately light pack.
Even though you will be taught all the necessary skills at Philmont, I recommend at least one pre-Philmont shakedown hike to reinforce the need for packing appropriately. Everyone should carry full packs and at least 4 liters of water. The shakedown should be difficult enough to punish those with heavy packs and cause those with new boots to get blisters. Bring a scale to weigh the packs to reinforce the importance of packing light.
Again, don’t sweat the skills. You will learn skills at Philmont. You can’t learn fitness.
The two most important things for a successful Philmont trek are:
A high level of physical fitness.
The personalities in the crew getting along.
Everything else – gear and backcountry skills – can be bought or learned after you arrive at base camp. But showing up at Philmont out of shape or with an a-hole in your crew cannot be remedied.
Need to be in shape to get to the top of Mount Baldy.
On Fitness: Philmont does not allow crews to split up, which means the entire crew moves at the speed of the slowest person. In extreme cases, one person’s failure to adequately train can cost a whole crew the opportunity to participate in activities and achieve crew goals. Nobody gets to summit the mountain if 11 crew members want to, but the twelfth person cannot. Therefore, failure to train adequately is a failure to be a good teammate. This concept – that failure to train is a failure of accountability to others – must be explained to the whole crew well before the trek to give everyone adequate time to prepare.
The adult leader of the crew needs to assess the crew participants early and identify members who will need extra help and encouragement getting into shape. Roughly speaking, crew participants can be divided into four categories:
Physically active youth play competitive, year-round, rigorous sports requiring running or high exertion (martial arts, football, soccer, basketball, cross country, track). They require little if any, extra training. These scouts are not overweight, eat with a hollow leg, and are the workhorses of the crew.
Less active youth are not heavily involved in sports. These scouts lack the physical work of regular sports practice and the mental strengthening that comes with tough workouts and competition. Some of these scouts are just plain soft, while others are surprisingly tough. These scouts need to attend crew workouts regularly.
Physically active adults who already train. This category includes adults who are not overweight and who legitimately train (i.e., more than just walk around the neighborhood) over 7 hours a week. Good metrics: Can comfortably run 10 miles, can comfortably bike 30-40 miles, can comfortably swim 1-2 miles, can do 10 pull-ups, or can easily deadlift more than one’s body weight for reps. This group will find a Philmont trek easy.
Less active adults are the most common adult group and struggle most on the trail. This group lacks an endurance base, strength, or (most commonly) both and carries too much weight. Adults in this group cannot run even 5 miles and cannot do a pull-up. This group needs extensive training, at least 7-10 hours a week for a year.
The best way to convince crew members of their need to train is to require an early, mandatory workout involving hill repeats with a full (30-40 lb) pack, which exposes weakness. For this test, I prefer to let everyone hike at their own pace (scouts as buddies) and see how everyone does after 2 hours. Here in Austin, we have the Hill of Life, about 300 feet of climbing over half a mile on a rough trail. This workout separates the youth and adults in shape (that was easy/not too bad) from the ones out of shape (very slow, out of breath, taking lots of breaks, gassed).
After the initial test, the crew leader (for the scouts) or lead adult advisor (for the other adults) should regularly check in with each participant who is not in one of the “physically active” categories above and confirm they are executing a training plan of 7 to 10 hours. The most efficient workouts are those with vertical components like hill repeats, inclined treadmills, and the Stairmaster.
Be blunt and tell your crew: Don’t go to Philmont if you are unwilling to do the work. Philmont is a physically demanding adventure. Most of the problems on treks result directly or indirectly from participants who are physically or mentally weak. When forming a crew, it is essential to communicate the expectations for fitness and training. The lead-up to the trek is over a year, which is more than enough time to get in shape. With positive encouragement, everyone can be physically and mentally at Philmont ready for success, but everyone must commit and be accountable.
Crew relationships. Besides a lack of fitness, internal conflict is the most likely thing to blow up a crew. The adult advisors in a crew should be familiar with the youth and have a plan for encouraging positive behavior. I was fortunate to have three other laid-back dads as advisors in our crew with great senses of humor. While there were occasional tensions within the scouts, there were never adult conflicts, and we were able to help the scouts resolve their conflicts.
Crew 714-9B-1 scouts happy about halfway to the summit of Baldy after a 4 am start.
As mentioned in the prior post, having an asshole adult as one of the advisors will be disruptive and is likely to result in a bad experience for everyone. An overbearing, conflict-seeking, or bossy adult can be a cancer for a crew. I would be particularly wary of adults in troops who like to pretend they are in the military (if you are involved in scouting, you know what I mean). These are the adults with ribbons all over their uniforms who like to give orders rather than empower others to lead. I would not participate in a crew with such a person nor allow my child to participate.
Physical fitness and a great crew are the keys to a good trek. Take care of those two issues and the crew will likely have an excellent experience. The following post will deal with the less critical but always fun topic of gear.
Warning: this is a paperwork and planning post, not an adventure post.
Philmont offers 7-, 9- and 12-day treks of varying difficulty. This post outlines how to choose the appropriate trek for your crew and get through the registration process. This explains how the process works for individual scout units, not council contingents. In summary, the steps are:
Identify your crew of 8-12 participants, including 2-4 adult advisors per crew.
Figure out what duration of trek you want to take.
Pick dates that work.
Register in the Philmont lottery in October two years before the trip.
December before the trek, pick your itinerary.
Forming your Crew
Crews are 8-10 participants, with the majority being youth. Philmont counts ages 18-21 as a youth. Officially, the limit on adult advisors is 4 per crew. Unofficially, Philmont grants exemptions to crews of 13 with an extra adult or youth if one emails the registrar.
When a troop is meeting to assemble a crew, the organizer should discuss expectations for crew members, particularly adults. Two things make crews succeed or fail: (1) physical fitness and (2) attitude. It is easier for an out-of-shape person to get into shape than for an asshole to learn how to not be an asshole. For this reason, I would be hesitant to allow an overly bossy, argumentative, or controlling adult to join a crew. It is better to have a difficult conversation at the early stage than have acrimony on the trail that ruins the experience for the rest of the crew.
(Note: I have always had great adults on my trips with Troop 33, but I have heard horror stories through the grapevine. Follow the no-asshole rule, and your crew is unlikely to be a horror story.)
When forming a crew, also have a discussion of the costs. Specific costs are listed on the Philmont website. Ballpark, each participant is looking at around $1,500 in program fees + travel + equipment.
Figuring out the trek duration.
Calculate travel time. Understanding the travel time is essential as it affects the total duration of the trip as well as the cost. Philmont is not convenient to get to. Crews drive, take the train to Raton, NM, and then a short shuttle, or fly into Albuquerque, Denver, or Colorado Springs and then take a bus. We elected to fly via Colorado Springs and then take a 3-hour Charter bus because the drive from Austin exceeds the 10-hour BSA driving limit, and our adults were already limited by missing work, so we wanted only one day of travel. Our travel cost was about $600 pp.
Calculating travel and base camp days. Crews sleep at basecamp on the first and last night of the trek, meaning they spend two fewer nights in the backcountry than the official duration (i.e., on a 12-day trek, crews camp ten nights in the backcountry). The first day of the trek involves hours of medical checks, registration, gear checkout, and talks with a Ranger. Speaking with staff, the latest a crew could arrive and still complete everything is mid-morning on Day 1. For most crews, this means either arriving a day early or spending the night somewhere within a few hours of Cimmaron. Crews leave base camp the morning of the day after the trek ends. Thus, those flying or within a 10-hour drive can get home the day after the trek. Other crews take two days to get home. These constraints mean that two or more travel days must be included in calculating the total trip duration.A seven-day itinerary means at least nine (and possibly more) days away from home, work, and family.
Deciding on Duration – The primary time constraint for many crews will be the adult advisors’ ability to miss work. Longer treks have more opportunities for activities. We picked a nine-day trek because we wanted more than five days in the backcountry, but our adults could not afford two weeks away from work. This decision worked out for us. We had many fun activities but were ready to be home after seven days with 14-year-old boys. I think we would have been rushed on a 7-day trek.
Registration
Once your crew decides on a trek duration, you need to enter the Philmont lottery. To do that, a lead adult must create an account on the Philmont Camping Gateway. The lottery opens on October 1, two years before the trek. (i.e., on Oct. 1, 2024, the lottery will open for 2026 treks). In the lottery, you can reserve multiple crews for your unit and select various dates for the trek. The lottery drawing occurs in mid-October, and you will be informed of your trek date. The initial deposit is $150 per person, and the balance payments are made in the fall and spring before the trek.
Selecting your itinerary difficulty.
Philmont releases the descriptions of the coming summer’s trek itineraries in December. It is worth reviewing prior years’ itineraries to get a flavor of the options. Philmont has four classifications of the trek in ascending difficulty: Challenging, Rugged, Strenuous, and Super Strenuous. The tradeoff for doing a more challenging trek is that crews are less likely to be able to participate in programs, even if programs are officially part of an itinerary. This is because program availability at the backcountry staffed camps is first-come-first-served. A crew that arrives at a camp late in the morning or afternoon risks having all the program slots taken by earlier crews. In addition, during the July monsoon season, afternoon programs are often canceled due to thunderstorms.
Because the programs distinguish Philmont from other backpacking trips, crews should carefully assess fitness and hiking speed and choose a less difficult itinerary. We chose a ” Rugged ” itinerary, and most of our participants found it easy. We had plenty of time for programs, and the boys had plenty of time to play around. I have spoken with many adult leaders on crews who selected ambitious itineraries and who missed many of the unique activities.
I would not have had time to make this 40-yard shot at the Cimarroncita 3D archery course if we had been still on the trail that day!
At first glance, the itinerary selection process can be overwhelming. The 2024 Itinerary Guidebook is over 200 pages. Fortunately, each year, Sid Covington, a passionate volunteer from Austin, creates Excel tools to assist with itinerary selection. Sid’s spreadsheets include a survey asking the scouts to rank the activities. The spreadsheet then identifies the itineraries that most correspond to the crew’s preferences. We used Sid’s tools to narrow the list to a few itineraries we discussed at a meeting. Once we had a final choice, I entered our list into the Philmont Camping Gateway, which lets you pick up to 4 itineraries.
Enough of paperwork. The following post will discuss how to prepare a crew for the trek.
I just returned from a nine-day trek at Philmont Scout Ranch with my son’s scout troop (Austin Troop 33). It was great fun. This is the first in a series of posts on what to expect, how to prepare, and vital tips for a successful Philmont trek. At the end of the series, I will summarize our specific trip and the pros and cons. This post is a basic overview explaining how Philmont works and how it differs from other high adventure opportunities.
What is Philmont?
Philmont Scout Ranch covers approximately 140,000 acres in the Sangre de Cristo Mountains near Cimmaron, New Mexico. Elevations range from about 6,000 to over 12,000 feet, and the terrain includes open grasslands, pine forests, burn scars, and alpine tundra. Oilman Waite Phillips donated the property to the BSA in the 1930s. The base camp area includes a training center, museum, and tent city where participants begin and end their treks. The majority of the property is backcountry with a well-developed trail network.
Philmont offers seven-, nine-, and twelve-day backpacking treks, cavalcade (horseback) treks, and several longer treks. For the traditional treks, participants are organized in crews of 8 to 12 participants, consisting of four to eight scouts (age 14 and up) and two to four adult advisors. A little-known, unadvertised fact is that Philmont will authorize increases to these numbers on a case-by-case basis. I will focus on the traditional backpacking treks in this series, but much of the advice applies to all treks.
What makes Philmont unique?
While the hiking is fun and the scenery fantastic, there are more challenging and stunning landscapes for a backcountry trip than at Philmont. What sets Philmont apart are the staffed backcountry camps. Each of these camps has a theme and programs. The staff are mainly college-age kids who play period characters and run activities. Most of the staffed camps focus on an aspect of the American West. Thus, camps celebrate native peoples, early pioneers, railroads, logging, fur trapping, and mining. Most camps are set in a specific historic year – for instance, one of our favorite camps, Miranda, is a fur trapping-themed camp, and the year is always 1829. In addition, there are camps with modern activities such as climbing, challenge courses, archery, and shooting. Most staffed camps also offer evening programs, including songs, traditional tales, and skits.
Philmont is more like a fun summer camp where one must backpack from activity to activity than a wilderness trip. The program/backpacking combination is excellent, particularly for teenage youth. For this reason, I advise crews to focus much more on what programs they find interesting than mileage—save those big mile days for other trips.
Philmont logistics.
Philmont employs over 2,000 staff, and each day, hundreds of people head out and return from treks. The Philmont logistics department tracks each crew and ensures that food and other supplies are provided to each crew in the backcountry. The operation is impressive.
This is the logistics office. Each column is a backcountry campsite on the wall, and the rows are the days in a two-week period. Every crew is listed on the wall, so logistics knows where each crew is each night (if they did not get lost).
One anecdote about Philmont logistics comes from our other Troop 33 crew, hiking on a different itinerary than my crew. Over the first two nights of their trek, one of the adults discovered that her sleeping bag was not warm enough. She bought a new sleeping bag from the Tooth of Time Traders at basecamp, and they sent it to the staff camp where the crew was camping that night, so she was warm for the rest of the trip.
Philmont has its way of doing things, and that’s OK.
Philmont is likely the most used backcountry area in the United States. Thousands of scouts and adults hike in the backcountry daily during the summer. Each year, 15,000 to 25,000 people participate in Philmont programs, which has led to the development of unique procedures to protect the land and wildlife. A Philmont Ranger teaches every crew these practices during the first days of a trek, and they are mandatory, including:
Stringent procedures regarding food and smellable materials.
Unique bear-bag hanging processes.
Tents only; no hammocks or tarps are allowed for sleeping.
Patrol-method cooking in a large central pot.
Specific dishwashing practices.
Many find these practices to be cumbersome and inefficient. To that, I say get over it. There are reasons for the Philmont procedures, and, in any event, the private property owner, Philmont, sets the rules. Implementing modern lightweight backpacking at Philmont is possible, but some accommodations must be made to comply with the regulations.
Philmont focuses on the youth, not the adults.
I will post more on this later, but Philmont emphasizes youth leadership. Adults are there for safety and support, but everyone should expect that scouts will be the primary decision-makers and leaders of the trek. I have heard scouting referred to as a tremendous bait-and-switch in that scouts think they are learning outdoor skills while learning more critical leadership and teamwork skills. The same applies to a Philmont trek. Each crew will have challenges, highs (hopefully literal highs on mountaintops), and lows, but dealing with these circumstances will instill leadership and teamwork lessons. For adults with a proper perspective, observing the scouts go through this sometimes-rough process is very fulfilling.
The proper role for adults: drinking coffee, enjoying life, and letting the kids lead..
Why go to Philmont?
Despite a background of not entirely uneventful activities, I found Philmont to exceed my expectations. I treasure the chance to spend a week with my son while he has a blast with his friends. What Philmont offers is something that, to my knowledge, is not available anywhere else. Anyone with a kid in scouts should at least consider going on a trek.
Last week I attended the Class III Rowing School put on by Northwest Rafting Company. The school involved 5 days on the Rogue River in southern Oregon where I learned basic oar boat whitewater skills. Here is a short highlight video. My detailed review of the trip is below the video.
Why did I sign up? Multi-day whitewater trips on the great rivers of the West are awesome opportunities for family adventure. But I don’t have any experience behind the oars in whitewater. So, I needed to start somewhere and professional instruction seemed like the most efficient route, particularly if I am going to be taking the kids along. Plus, it sounded awesome.
Students and Instructors: To my knowledge, this is the only whitewater rowing school where each student can row their own boat for five days. This “time on the sticks” proved essential to learning and I would not have had the same experience sharing a boat or spending less time on the water.
The class had 12 students, each in a 12-14 foot raft, three instructors who spent the days on the water with students, and two guides and one guide in training who ran the trip gear boats. For most of the time, we were split into three pods; each with four students and one instructor. We rotated instructors each day, so that every student had a chance to learn from each instructor.
We had a diverse group of students from late 20s to 75. I was either directly or indirectly connected with five of the other students. While everyone had their own personality, the overall vibe of the group was very positive and lighthearted.
We also had different experience levels from total beginners to people with some river experience in other craft, to a student who owned a raft and had spent many days behind the oars. I rowed a lightweight 13’ Sotar Rogue Tyee raft for the first two days then switched with my brother to row an older Sotar 4×4 for the rest of the trip.
Me in the Sotar Rogue Tyee entering Black Bar Rapids.
It was nice to feel the difference in the super light Rogue versus a more traditional raft. Other students rowed Sotars or 14’ Wing boats. Each student boat carried the student’s personal gear in a big dry bag in the bow plus a smaller dry bag for items needed during the day. Each boat had oarlocks that could be released if the rower preferred the ability to feather the oars (I kept them locked as I had enough to think about already). The oars were heavy duty, which makes sense given that they took a beating. All of the boats were in good shape, although the Sotar 4x4s required some air each morning.
What I learned: The goal of the class is to teach basic skills to allow safe navigation of Class III whitewater. We had short lessons three times a day on various topics including reading rivers, scouting rapids, gear, multi-day trip planning, and safety.
Morning lesson with ropes and webbing depicting eddies. We discussed how to pick a line and eddy out as a group using models first and then on the river.
On the water, the instruction focused on defensive rowing: setting the proper ferrying angle with respect to the current and then pulling. We were encouraged to get stable, determine what angle was needed to maneuver away from an obstacle or to cross an eddy line, pivot to that angle, and only then pull on the oars. This sounds like a simple skill, but once behind the oars in a rapid with varying water velocities acting on the different parts of the boat, it is not that easy – and is not instinctive. Specific skills and lessons that I learned:
Downstream oar management – This skill is one that I was not really focused on prior to the course as it is not that relevant to canoeing or packrafting, which is most of my river experience. Multiple students hit downstream oars on rocks during the class, but fortunately no one was injured or ejected from their boats. I avoided any problems, but learned to keep my downstream oar out of the water in rapids unless I was making a move and even then to be cognizant of water depth.
Using Eddies – The instructors emphasized identifying and entering and exiting eddies and using eddy boundary lines to safely control speed. This was the main focus of one entire day; essentially spending hours trying to catch almost every eddy. When I ran the bottom half of Blossom Bar on day four, I was competent enough at this skill that I played a game of ferrying across the river, catching an eddy and stopping, then picking my next eddy ferrying over and stopping. The ability to be moving fast down a rapid and then cross the top of a strong eddy line and come to a complete stop in seconds provides a great sense of control.
Boat Spacing – Another emphasized skill was proper boat spacing and boating as a team. On the first day, it was a disaster as we were bumping into each other or were way too spaced out. This situation significantly improved by day two, and by day three each pod did a good job of maintaining boat spacing. By the end I felt very comfortable maintaining proper spacing and maintaining the use of both oars even in close quarters.
Angles/Efficiency – My biggest takeaway was learning how to use the varying currents to control the raft efficiently. One day an instructor challenged us to put our rafts very close to obstacles and then to pivot off the obstacles and away from danger using only our upstream oar to change the boat angle in the current. This game allowed me to understand the concept of pillowing and to feel how the faster current in the middle of the river could grab the stern of the raft. Once I understood this concept, it was like a light went off. Now looking at rafting videos on YouTube, I can see how whether a raft makes or misses a move is largely determined by whether the boater has the boat on the proper angle to the current.
Skills not emphasized: This is a defensive Class III rowing course with a focus on fundamentals. We mainly avoided obstacles and did not play in big holes or waves. While more advanced skills were discussed, they were not part of the core curriculum.
Downstream Ferry – I had some opportunities to practice the downstream ferry on the last two days of the course. Timing was challenging for me hitting the top of an eddy while ferrying downstream.
Pushing Rapids and into Eddies – This was discouraged by our instructors most of the time. However, I did push a few eddies toward the end of the trip, particularly when I could judge that the eddy lines were relatively weak or when parking a boat with only a bowline in slow eddies.
Surfing Holes – There were a few chances to surf holes on the last two days, which I tried but had difficulty fully burying the bow of my raft. The best one was accessible by pushing up an eddy. I can see why this is fun.
What rapids did we row? Each student rowed every rapid between Galice and Foster Bar except the Rainey Falls Fish Ladder and the upper half of Blossom Bar. For the Fish Ladder, the instructors shuttled our rafts while we portaged mainly to avoid oar breakage. For the top of Blossom Bar, we sat in the back of our boats while an instructor rowed and narrated the move.
Confidence level after the class: Based on what I learned and practicing in actual river conditions, I am confident that I can: (1) read a Class III rapid (via scouting if necessary), (2) identify the obstacles and hazards in the rapid, (3) identify a line, and (4) navigate my line using defensive rowing techniques. I would go on a private trip on the Rogue or similar Class III western river.
I would not be confident on a Class IV rapid without a guide or other knowledgable person with experience on that river. But I would attempt a Class IV rapid under certain circumstances. For example, Blossom Bar is a Class IV rapid. After being in the boat with an instructor talking me through the move, I would be willing to run it on my next Rogue trip as I think catching the eddy is within my skillset and I understand the danger of going into the Picket Fence. Of course, different river conditions like high water might change this assessment.
One of the big things that this class opened my eyes to is knowing what I know and also knowing what I don’t know. Not just identifying the line, but understanding why the line is where it is given the current conditions what might happen if I miss the line. There is a difference in taking a calculated risk and getting in a dangerous situation without even realizing that it is dangerous. This class helped me think of rapids in a way that minimizes risk, which I like.
Camping/Food: The food was amazing, and all of our guides and instructors were a ton of fun. I had never been on a multiday commercial trip and coming from an ultralight backpacking background, I was blow away by the glamping. Simply outstanding.
Wildlife: We saw Bald Eagles, Osprey, deer, leaping Sturgeon, and snakes, including one intrepid Rattlesnake that climbed in my buddy’s boat. Exciting!
Scenery: The whole course is on the Wild and Scenic Rogue River.
Side hike to a natural water slide.
Travel: From Texas it takes an entire day to get there and a day to get home. The trip starts at the Galice Resort, which is about a 2 ½ hours from Eugene and 1 hour from Medford. We flew in/out of Eugene because Medford’s flights were limited. Once you drive to Galice, you can store your vehicle there for the duration of the trip as participants are shuttled back at the end via a 2 ½ hour drive over the mountains.
What did I not like? Nothing. They have the class dialed in. It is not cheap, but it is a high value. I learned more about safely rafting whitewater in five days that I would have in five years of DIY trips in a safer manner and at lower cost.
Suggestions: This type of class is a blend of education and fun which I find very appealing, and I wish there were more opportunities like this. I don’t really have a desire to go on a raft trip where I am not on the oars. This may be an untapped market and I hope Northwest Rafting and other outfitters consider offering similar trips on other rivers.
What is next? Will likely enter some Class III river lotteries for next summer and try to run a 3-4 day family trip. The course instructors gave us a list of rivers appropriate for our skill level and for a first private trip, including the Rogue.
In sum, this was a very very fun time and I cannot recommend it enough if you have interest in learning how to handle a whitewater oar boat. If you have any questions, please leave them below. More info on the class is on the Northwest Rafting website.
The world of outdoor clothing is dominated by large companies with questionable manufacturing practices. But fortunately, there is a whole ecosystem of small companies making great gear. One is Minnesota-based Superior Fleece.
I have no connection to this company other than as a customer, and I only discovered them from a mention on a Reddit forum for ultralight backpacking. I own two of their hoodies: a Brule Alpha Direct in 90 gsm (grams per square meter) and an Amnicon Power Wool Hoodie. This is the Brule review.
What is Alpha Direct? Alpha Direct is an ultralight, high-loft fleece manufactured by Polartec and designed for “active insulation” – wearing while you are moving. The material has a fishnet-like skeleton with high loft fibers in between. At the 90 gsm weight, it is partially transparent, particularly when you hold it up to light. This structure allows moisture to easily dissipate and provides almost zero protection from wind. Even walking in my house I can feel the air moving under the Brule. However, in the absence of wind, the loft of the material provides a very high level of insulation.
The 90 weight is almost transparent.
How does it Feel? Alpha Direct has no spandex or other stretchy components, which means it absorbs very little water. You can almost wring it dry. Compared to other fleeces it is not flexible, but the open weave structure does provide some freedom of movement. The material is soft and comfortable against the skin, but it is relatively delicate compared to traditional fleeces. I have read reports of Velcro and brush causing tears, but I have so far avoided any issues by not wearing it while bushwhacking and generally being careful. I have not experienced any abrasion from pack straps.
How light is it? Super light. Superior Fleece lists the Brule size large at 137 grams or 4.8 oz, and on my scale it is 138 grams. For comparison, my Patagonia R2 jacket (no hood) is about the same warmth (under a shell) and weighs in at 414 grams. My cheap, REI Co-op 100 wt fleece (no hood) is not as warm and is 219 grams.
How warm is it? The Brule is highly air permeable. You can feel even a slight breeze through the material. This is nice when you are hiking and sweating but can be cold if you are just sitting around in wind. In non-windy conditions or under a shell, it is very warm. This characteristic means that the Brule is not great as a stand-alone layer in cold windy conditions but is awesome if combined with another layer with which you can manage wind.
How is the fit? This is a very simple, no frills hoodie. There are no zippers, pockets, drawstrings, or elastic. There are two options for the hood: cross (i.e. normal hoodie) or scuba). I chose the normal hood.
As to the fit, I have a hard time finding clothes that fit well. I am 6’2″ and 190 lbs with long arms. Often a medium is too short and a large has way too much material around the waist. The Brule large fits great in that it is not too baggy but has long arms that do not pull up even when I am moving. The Alpha Direct material does not stretch, so a super trim fit would be overly restrictive compared to running fleeces with a spandex weave. I usually wear just a light t-shirt underneath. The cut makes this one of my most comfortable fleeces. The workmanship is good, with no odd seams or threads.
Best use? The Brule is my go-to mid-layer when I will be active and when weight is at a premium and when I might get wet from perspiration or rain/river. When combined with a windshirt or light shell it has about the same warmth as a sweater weight puffy but is more versatile and lighter. In January I wore the Brule over a lightweight T-shirt and under a Patagonia Houdini Jacket to climb Guadalupe Peak. Temps were in the 30s and the wind was gusting over 60 mph, and I was totally comfortable and was able to manage moisture by unzipping the Houdini. For comparison, my Montbell Superior Down Jacket (size large) is 250 grams (8.8 oz). The Bruce Fleece + Houdini Jacket combo weighs 198 grams (7 oz). The Montbell is very slightly warmer for just sitting around, but the Burle/Houdini combo is close for static warmth, two ounces lighter, and way more flexible.
Value? For $80, the Brule is a good value. It outperforms fleeces that cost three times as much, at a fraction of the weight.
Downsides? Alpha Direct is delicate. If one ignores this fact, I can see durability issues. The fishnet also looks a little weird but is kind of cool if you like the way the characters dress in Star Wars or Dune.
How to order? The company accepts orders only for a couple of hours per month, which you can check on the website. It took a few weeks to fulfill my order, and I have had no reason to interact with the company’s customer service.
Take Away: The Brule is about function over style and is the opposite of an outdoorsy jacket one would wear to Starbucks. Based on my experience so far the hype about Alpha Direct being very light and still warm is accurate. We will see as to durability as the years go by. For now, this one is going to be in my pack for most backcountry trips.
Twice in the past few years our family has gone to BSA Sea Base. My wife and daughter went to St. Thomas in 2022 and my son and I went to the Bahamas in 2023. This post describes the things I have learned about Sea Base that may be useful to other scouters.
Overview
For Sea Base sailing adventures, each crew sails on a privately-owned boat with a captain (or captain and mate in the case of married captains). There is no “base” in the form of a land-based camp. Instead, each crew meets its captain at a marina or dock and is then ferried to the boat via dinghy. You then sail around for a few days and explore uninhabited cays, postcard beaches, and cute island communities.
Registration opens in January the year before the trip. We reserved early to ensure we could get our target week. This means you register about 18 months out. The cost varies by location and year but expect to pay around $1,500 in fees per person. Our flights to Marsh Harbour, Bahamas were about $800. We also paid for a hotel for the first night, and many participants purchased snorkeling gear and other supplies. Ballpark, I recommend budgeting $2,500 to $3,000 per person. It’s expensive.
Sea Base is also more of a “roughing it vacation” than a true high adventure. Provided you are in decent shape and a good swimmer, there is no need to train. While you may be uncomfortable at times, Sea Base is not physically demanding.
My top 12 Tips for Sea Base:
Make travel plans early. For the Bahamas adventures, you will fly in and out of Marsh Harbour, which has limited commercial flights. We investigated flying to Miami, Ft. Lauderdale, or Nassau and then trying to take a small plane to Marsh Harbour but found those options to be more expensive. We ended up booking directly with American Airlines through its group reservations from Austin to Miami to Marsh Harbor. Start calling airlines a year out. Also, make sure everyone has a passport or has applied for a passport at least 6 months out.
Build in time for delays. We arrived in Marsh Harbour about 24 hours before our departure to account for possible flight delays. Surprisingly, our flights were on time. We had a good lunch at Colors Restaurant and then some of us took our snorkeling gear and hiked about a mile to Mermaid Reef. The reef is a few hundred yards offshore, and it was a great opportunity for scouts to practice snorkeling before we got on the boats. We stayed at Island Breezes hotel, which was affordable with room sharing. On our departure day, we were able to book an afternoon flight that got us back to Austin that night.
Have your paperwork squared away. It would not be BSA without copious paperwork. I had a 3-ring notebook with each required form separated by tabs. This greatly expedited the review.
Leave the Class As at home. (This may not apply if you are going to Sea Base Florida). Sea Base Marsh Harbour is super, super casual. Not the place for lots of epaulets or patches. Our scouts decided to all buy $20 gaudy Hawaiian shirts with sailboats for our travel days, which created quite the scene in the Miami airport.
No Class A uniform, we are on island time!
Bring sun-protecting shirts and hats. We all bought the long sleeve technical Sea Base shirts, which made great snorkeling shirts. Many boys brought wide-brim troop hats. My preference was a Patagonia sun hoodie with a hat. One of our scouts with very fair skin brought lightweight tights to protect his legs. Adults need to be diligent in ensuring the scouts apply sunscreen to avoid burns. We still had some get sunburn.
The only footwear you need are flip flops. Seriously, no need for sneakers or socks.
You don’t need much in the way of clothes either. A bathing suit, dry set of clothes, and set of sleep clothes is pretty much it. A light travel towel dries much faster than cotton beach towels. If all your stuff does not fit in a 24” duffel, then you have too much stuff.
All the fun activities are in the water.
Practice snorkeling. By far the best activity is snorkeling and playing in the water. Everyone should have a quality mask and snorkel and know how to use them. We held a few meetings before the trip at Barton Springs pool in Austin to practice diving with a snorkel. The scouts all had earned the snorkeling award before the trip. You do not need to bring fins as the Sea Base-provided fins were fine, but you can if you want to. I brought my freediving fins and a weight belt because I like to dive deep (FYI – The Guide to Safe Scouting allows the use of weight belts for people with SCUBA certifications. I brought my card just in case it came up, but our captain did not ask). We were never in water deeper than 35 feet. Be prepared to wear a BSA-required inflatable vest for snorkeling. Deflated they are easy to ignore, and some participants liked the ability to inflate them to rest on the top of the water.
On our daily snorkeling expedition. Note the vests.
Someone in your crew should have a GoPro or similar underwater camera. iPhone cameras worked great for above water and shallow water, but to get underwater and body-surfing memories it helps to have a Go-Pro. We also took a small drone for aerial shots. Being able to make a movie of the troop trip was great.
Expect the sleeping situation to be challenging. To keep costs down, Sea Base puts many more people on a boat than a comparable private charter. Our boat was a 53-foot monohull, and we had the captain and mate plus 4 adults and 8 scouts – so 14 people total. There was room only for a few people to sleep inside where it is hot, with most of us sleeping in the cockpit or on deck on backpacking air mattresses and a sheet. The deck is not level in most places. In the event of rain, people will get wet. We were not entirely unprepared for this as we had read other scouters’ reviews, so we brought tarps and a few backpacking bivys. One night when storms threatened, I rigged some tarps off the boom over the main deck area where the boys were sleeping, but had it really rained they would have been soaked. The bivys were sweatboxes. There is not really a good solution to this problem, but I do recommend brining a few small tarps (5×7 or smaller) that could serve as waterproof blankets in the event of a downpour at night. Mainly, people just need to be prepared to get wet. Fortunately, it is not cold.
Jury rigged tarp over the deck sleeping area.
Understand that personal dynamics greatly affect the experience. When my wife and daughter went to the USVI, they were assigned to a grumpy captain who clashed with some of the crew members. This created a negative experience for many people. Our crew got along with our captain fine. Crews should be aware that for the captains, the boat you are on is their home so really pay attention to instructions. I would not want to go to Sea Base with a person in my crew who is abrasive or hard to deal with or likes to argue. If you have someone like this in your crew (particularly an adult), consider strategies to mitigate this problem before the trip. Remember, you are going to spend days within 50 feet of everyone in your crew!
Our captain giving the scouts a briefing on navigation.
Get a conch. I am not really a souvenir guy, but you can buy a conch made into a horn for $10 at Man-O-War key. Nothing like everyone standing on deck blowing their conchs at sundown!
Our crew bugler at sundown.
If you have specific questions please leave them in the comments below.
This summer we spent a few days in Yosemite Valley. It was our second trip to the park, but the first in the middle of summer. This year the park did away with the reservation system instituted for COVID, which made park mornings resemble the 1889 Oklahoma Land Rush except instead of claiming homesteads people were claiming parking spots. When we visited in late June, Tioga Road and Glacier Point Road were closed, further concentrating everyone in the Valley.
Despite the crowds, we managed to have a great time. The sights of the Valley are worth it, even though at times it may feel like you are at Disney World. Here are my Yosemite Valley middle of summer tips for families.
Get a place to stay in the Valley. The best option here is the Ahwahnee, but for those with lots of kids and finite money, you will want a campsite. We ended up getting a great spot in North Pines campground through the early season lottery. All of the sites in the Valley are reservable on recreation.gov. Apparently there are apps that scrape the website for bookings. The small cost of those apps may be worth it. If you are driving in for the day in July, you should enter the park by 6 am to get a parking spot. Personally, I don’t think I would visit without a place to stay in the Valley.
Our campsite in North Pines Campground – right on the river!
The only way to tour the Valley as a family is on a bike. Once you park your car, you are not going to move it unless you want to spend hours looking for another spot. To get around the Valley you need to either (a) walk, (b) take the free shuttle, or (c) bike on the paved bike-paths. Walking is feasible for adults and kids who can handle 6-10 miles with no problem, but not realistic for many little kids. The shuttles work well in the off-season. In the summer, they are a shit show with people waiting hours. Which leaves biking as the only reasonable option. Even if you can walk, the bikes are way more fun! Bikes are available for rent at Curry Village and Yosemite Village. We got ours at about 10 am, and got the last few. The bikes are beach cruisers, and the trails are flat. They have lots of adult and kid bikes, and a smaller number of tag-alongs. A whole day rental lets you keep the bike until 7 pm. I had heard stories of people stealing the rental bikes and riding them around, so I brought some paracord to make taking our 6 bikes for a ride a pain. Riding around and exploring the classic Valley sights like Lower Yosemite Fall, the Merced River, the Visitor Centers, and Mirror Lake make for a nice first day.
Hike the Mist Trail all the way to the top. Yes, this is one of the most popular trails in the National Park System. Yes, it’s got some climbing. Yes, if the snowmelt is going, you will get completely soaked and the kids will have a blast. Don’t stop at Vernal Falls, as the extra hike up to the top of Nevada Falls is worth it and probably 75% of the crowd stops at Vernal. Pack a lunch, get an early start, and descend the JMT in the afternoon to avoid the crowds. Our 6 year old was able to handle the hike, so kids can manage it as long as you take your time.
Getting blasted on the Mist Trail.
Hike Half Dome if you hit the lottery. Climbing the Half Dome chains is by lottery only. Unfortunately, we never got lucky. But had we won, I would have taken my oldest kids on this classic hike. Instead, Sam and I made a valiant effort to cut cross country a few miles above Nevada Falls to reach the Half Dome Diving Board. You don’t need a permit to reach this ledge where Ansel Adams took his famous photo of Half Dome. The route is very roughly marked with cairns, but we ended up losing the path through a field of large talus and thorny bush.
Thick stuff.This is where we decided we should have brought climbing shoes.
After some uncomfortably steep backtracks and a close encounter with a rattlesnake, we decided to head back down. Next time…
Don’t spend too much of your time in the Valley. The Sierras are fantastic. There are tremendous front-country and back-country activities in other parts of Yosemite and in nearby Sequoia-Kings Canyon. Two or three days in the Valley is plenty.
For Thanksgiving the six of us plus Michelle’s parents drove up from Austin to the YMCA of the Rockies Snow Mountain Ranch in Granby, Colorado, where we met my parents. For extra room, we rented a Ford Transit 15-person van in Austin. As we were going over Berthound Pass and taking in the winter wonderland of thousands of evergreens covered in snow, Michelle jokingly wondered aloud: “wouldn’t it be nice if we could have one of those be our Christmas tree.” Was that a challenge?
Sensing an opportunity for some whole-family Type II fun, when we got to the cabin, I did some quick research and discovered that in much of the Arapahoe Roosevelt National Forest, you are allowed to cut your own Christmas tree for $20. We took a quick trip to the Ace Hardware in Granby to buy our Christmas Tree Permit, a hand saw, and a couple of straps and rope to attach the tree to the roof of the van.
The official permit. You are limited to 6″ diameter trunk cut 6″ above the ground.
Most of the cutting areas are at high elevation on forest-service roads, requiring five to ten miles of driving on snow and ice and the Forest Service requires either a 4×4 or snow chains to access the tree areas. As we were rolling in a rear-wheel drive van with smooth highway tires, I bought a cheap set of snow chains from the Granby auto parts store. Luckily, these never left the box, and we returned them unopened for a full refund.
We drove up to the Meadow Creek cutting area in the Sulphur District of the National Forest and began our search for the perfect tree. It took almost three hours of walking through the snow. With the sense of Christmas adventure and enthusiasm in some of our crew waning, I finally found the Smith Family Christmas Tree at 9,134’ at the edge of a meadow about a 15-minute walk from the van.
Holding the tree while the kids take turns with the saw.
It took about 20 minutes to cut it down with all the kids getting a turn at working the saw, then we hauled it back to the vehicle.
For the drive to Texas, we wrapped the tree tight with twine, then attached it to the bare roof with a tiedown strap run through the front door frames, and the top of the tree held with paracord to two of the back seats.
Sure, that will fit in our 10-foot living room.
This setup held for the 996-mile drive back to Austin.
The tree secure to the roof in the parking lot of the Big Texan Steak Ranch (the only place to eat in Amarillo).
When we got home, I ended up cutting about 2 feet off the bottom to make it fit; we used the branches for greenery on the mantle.
Happy helpers with the tree installed.
We spent Sunday decorating the house, and putting lights and ornaments on the tree. I think this is my favorite Christmas Tree ever, even if the angel is smashed against the ceiling.
As astute readers know, I don’t go in for fancy watches. My resistance to the cult of the GPS watch is not solely attributable to my Luddite tendencies. My complaint with most GPS watches is that they are too expensive, too big, too complex, and with too little battery life.
The Coros Pace 2 fixes most of these problems. It is a GPS watch that just does the basics but does the basics well. Below is my short review of the Pace 2 after using it for a few months. If you prefer an ultra-detailed take, check out DC Rainmaker’s extremely in-depth review.
First, let’s talk about what the Pace 2 will not do.
Zero navigation functions. If you rely on a wristwatch to not get lost (a questionable idea), this watch is no bueno.
The Pace 2 will not play music or run apps. This is not a mini-phone.
Your special sport may not have a dedicated function. If you are into some niche sport and think you need a watch for that, fantastic, but look elsewhere.
If, however, all you want is a watch that will tell you how far you have gone, how fast you are moving, how many feet you have climbed, and keep working for a really long time, the Pace 2 hits the spot.
Cost: $200. One of the least expensive GPS watches out there.
GPS Battery Life: 30 hours. This mode takes one GPS reading per second and generates a high-quality track. I ran with a Pace 2 at Western States (using GPS/Glonass/Galileo/QZSS systems, see explanation below), and it still had 4% battery life after 30 hours, so this estimate is accurate at least when the battery is relatively new.
GPS Battery UltraMax Life: 60 hours. In this mode GPS comes on for 30 seconds of every 120 seconds. Algorithms calculate progress for the other 90 seconds. Coros recommends calibrating the compass on the watch before enabling UltraMax. I have had no need to test this mode, but based on the battery life on the regular GPS setting, I suspect it is pretty accurate.
Battery Life Regular: 20 days. I plug it in about once every 10 days, using the GPS a few times a week.
Size and Weight: Light at 35g with the silicone band and not obnoxiously big. Does not snag on clothes while putting on or taking off packs.
GPS Accuracy: The Pace 2 lets you use just GPS system run by the USA or GPS+Glonass (Russia)+Galileo (EU)+ QZSS (Japan). Coros recommends using all of them, but there is a slight battery savings with just using GPS. I use the “all of them” setting. The accuracy has been impressive running known distances around my neighborhood. My Western States track on the Pace 2 was 100.11 miles, while the “official” distance of the race is 100.2 miles.
Altimeter, barometer and vertical accuracy: The watch has a barometric altimeter, which slightly increases the accuracy in the vertical plane. Like all GPS devices, I can tell the Pace 2 is less accurate vertically than it is horizontally as more algorithmic smoothing (how many tiny ups and downs count) goes into calculating vertical. The official Western States vertical climb is 18,090′ while my Pace 2 calculated 16,476′. The barometer has a storm warning quickly dropping pressure.
Functions: Run, Indoor Run, Track Run, Bike, Indoor Bike, Pool Swim, Open Water Swim, Rowing, Indoor Rowing, Flatwater, Triathlon, Strength, Gym Cardo, GPS Cardio, Multisport, Walk, Custom Workouts, Training Plan. The only ones I have used in four months are Run, Bike, and Pool Swim. They work fine. I think one can upload specific training programs into the watch, but honestly, I am unlikely to ever bother.
Syncing: The sync with my phone is easy, and the app is clear and can export to Strava.
Display: Lots of options to customize the display, including big text for old guys who can’t see tiny things anymore. For running I display distance, time of day, elapsed time, current pace, average pace, and current elevation.
What else to say? It does tell time.
Face is bright and easy to read.
For the money and battery life, it will be hard to beat this watch for endurance athletes and backcountry adventurers.
This summer I managed to finish the 100-mile Western States Endurance Run in 29:43:16, less than 17 minutes before the 30-hour cutoff. Clearly, a close run thing. Here are my thoughts on the race and advice for those who get a chance to run in the future.
Saturday afternoon on the course high over the American River canyon.
Western States is a bucket-list race for a reason. The overall feel of this race is unique. There are faster and harder courses, but not many races that have the same vibe as far as history and hype. The only ultra in my experience that compares, atmosphere wise, is UTMB, but because Western States is capped at 369 runners, the race is much more intimate. The field is small enough that you make friends on the course.
All the organization, schwag, aid stations, and crowd support are top notch. The registration scene the day before the race was great with people from all over the world, professional ultrarunners mingling with weekend warriors, and lots of spectators. Thousands of volunteers, many of whom are race veterans, make the race something special.
Western States is an awesome race for us runners who are not professionals and not fast, but just trying to finish. At the mandatory race briefing, the organizers spoke about the “Golden Hour” between 29:00 and 30:00. The race celebrates the struggle of regular people to make it, and in fact more people end up finishing in the Golden Hour than any other hour of the race. As the race awards ceremony immediately follows the 30 hour mark, everyone involved with the race is at the stadium for the Golden Hour runners and the place is nuts.
The 30-hour cutoff is the crux. The course is not easy. It has lots of elevation and its very hot and exposed at points. In terms of difficulty as far as climbs and trail conditions, the course comparable to the Bear 100 and Run Rabbit Run. What makes Western States harder than those races is that you have six fewer hours to finish. This means that for someone like me there is no margin for error. Walking it in slowly is not an option. There are no extra hours on the board to get lost or change clothes or mess around in an aid station. The whole race is hustle, hustle, hustle.
Grinding on a typical section of trail – exposed and rocky.
Race volunteers do a great job of encouraging runners to deal with the time crunch. As an example, when I got to the Devil’s Thumb aid station at mile 47.8, it was 5:41 pm. While a volunteer was filling my water bottle, I sat down and retied my shoe. Another aid station volunteer, seeing me sitting, came up and said, “Just want to let you know that this aid station closes at 7.” I said, “Why are you telling me that?” – thinking I had at least an hour in the bank. He said, “You are cutting it close. If you are going to finish you need to move now.” I thanked him, and immediately got up and took off.
A few miles later, down a hot canyon, I rolled into an aid station and the volunteer captain said “What can we get you?” I said, “Just water. I am just going to grab a handful of oreos and keep walking.” He said, “I love it when runners say that. You are going to finish with that attitude.” At every single aid station the volunteers were helpful, positive, and reminded me that time is of the essence.
The heat is annoying, but not a big deal if you are prepared. Less daunting than the cutoff, but still a challenge, was the heat. Much of Saturday is on trails exposed to the sun, and the canyons in the afternoon were stifling. Many runners were dry heaving, unable to eat, and having other issues because of the heat. For me, the heat was a minor annoyance and not a serious issue. But I was prepared for it. Here are some of the things I did to deal with the heat.
No hot vest, just a Naked Band and handled kept me smiling in the heat.
Trained in the heat. I intentionally went for training runs at 4 pm, which in May in Austin is hot and humid. I bonked on a few of these training runs, but they helped me dial in salt pills and gear. Speaking of gear…
Lost the vest. I run almost all of my ultras with a Salomon running vest. The downside of a vest, however, is that it can act like a jacket, trapping heat. I made the switch to Naked Running Band, which worked excellent and was way cooler than a vest. There is no need for a vest at Western States.
Carried plenty of liquid. I carried an Amphipod 20 oz handheld (which I picked up at an REI garage sale for $8). In hot weather handhelds work great because I drink more often from a handheld than a bottle in a pack. For longer sections, I had two 17-oz soft flasks, which stowed in the running band.
Adhered to a salt pill schedule. I took a salt pill every hour until nightfall, when I backed off to every two hours.
Ice, Ice Baby. Every aid station had plenty of ice. I ended up running with ice carried around my neck in a device John and I have developed, and ice in a buff on my head. I had so much ice on that I would get ice-cream headaches as I left each station, but the ice would all melt before the next aid station. Advice for anyone running this event: have something to carry ice on your neck and head. I did not have them, but many runners had sun sleeves that they also packed with ice. Those are a good idea.
Used the Creeks. At one creek crossing in the heat of the day, I completely immersed myself. The water was shockingly cold, being fed by snowmelt. This 3 minute break dramatically lowered my temperature and it allowed me to eat a bunch of calories as I marched back up the canyon.
Just after I laid down in Duncan Creek.
Bottom line is the heat is something one can mitigate if properly prepared.
Goal setting: The only goal was a buckle. Unless one is really in contention for the 24-hour buckle, I don’t see any reason for setting A, B, or C goals. Just finish. As this was my 10th ultramarathon and 4th 100, I had a realistic picture of the challenges of the race and my limitations as an athlete. I knew that a 24-hour finish was not remotely in play, and that the 30-hour cutoff was right at the edge of the possible. I said back in December, my only goal was to finish. That never changed and informed my preparation and conservative race strategy.
The goal.
Realistic goal setting is vital for Western States because if things go wrong, there is not a lot of buffer time. My advice for recreational runners who are thinking they can run a 26-27 hour race would be to be careful. I ran portions of the race on Saturday with runners aiming for these times, many whom ended up having the wheels come off and either DNFing or just hanging on. For most of us this is a once in a lifetime chance. Don’t blow it by being dumb.
Crews and Pacers: I was lucky to have a great crew including my dad (who has been to all of my 100-milers), my mom (who has been to 3), my son Sam, and for the start my sister Liz. They met me at Michigan Bluff and Foresthill, and were able to walk me in the last mile from Robie Point.
My Crew at Registration.
Training: What is the least amount of training possible for a 100 mile race? I came close to finding out. Due to a seriously bum knee, I had to re-think my approach to training. The tried and true method of lots of miles and lots of vertical simply was not going to work. Instead, I employed a minimalist approach with light weightlifting 2x-3x per week and a tiny amount of very slow running and hiking. Only in May did I actually increase mileage to something approaching a typical training plan. Per Strava, my monthly mileage: Jan: 29 miles, Feb: 89 miles, Mar: 96 miles, Apr: 48 miles, May:142 miles, June – zero until race day. I did one hot 32 mile run in May as a prep long run.
By keeping the mileage very low, I was able to (mostly) keep my knee from flaring up. But the little I did run was intentionally designed to resemble race conditions. Usually I ran in the middle of a Texas afternoon, with temps over 100. I also practiced lots of fast, 14-15 minute per mile hiking.
I do NOT recommend my this minimalist approach , and if I had been healthy I would have done a regular training plan. For an experienced runner, training for Western States should include running (not hiking) lots of miles in the heat.
My race strategy was dialed in. Knowing that my fitness was going to be borderline at best, my strategy and in-race mental approach had to be close to perfect. My overall strategy was to take it very easy for the first 50 miles, focusing on hydration and nutrition, and saving my legs while trying to stay at or just barely ahead of the 30-hour pace.
At the start waiting for the shotgun.
I had two ways to gauge my pace. First, the race has its own pace chart and the 30-hour pace was on a sign at every aid station. These times ended up being relatively accurate. I started the race about 15 minutes behind the official 30-hour pace, then during the day Saturday slowly worked my way to 1:15 ahead of the 30-hour pace. Over the night and next morning, I drifted back to finish just under 30 hours.
Second, I ran with a total average pace (in mins/mile) on my watch. I knew I had to keep that number close to 15:00 min mile for the first day to account for the night-time slowdown. 18:00 min mile is a 30-hour finish.
While I had to run for probably 40 of the 60 miles, I never ran for long stretches at a time. Every 10 minutes I would stop and walk for a few minutes. This had the effect of keeping me very measured. In ultramarathons, the euphoric emotional highs can be dangerous, especially when one feels awesome 30 miles in. All day Saturday, I kept reminding myself that there was a whole lot of race to run.
Another key part of my strategy was to minimize time in aid stations. There are 20 aid stations. Five minutes at each aid station is 1:40 mins that I did not have to lose. I was in and out of almost every aid station in under 2 minutes, and many were less than 1 minute. Basically, the approach was to always be moving (slowly). During the day Saturday I ran for a few miles with runners who eventually pulled away. I did not push to stay with them even though I felt good, trusting the plan.
Mental, as always, is key. Beyond grit, which is required for every 100 mile race, at Western States I really focused on gratitude and trying to enjoy the moment. In most of my previous races, I viewed the race just as an obstacle to conquer, not something to be thankful for. Maybe it comes with getting older, but at Western States I was able to savor the suffering. I made an effort to talk to other runners and be positive. I thanked volunteers at every aid station. A few times I stepped off the trail and took 20 seconds to snap a picture and be thankful for the chance to be in beautiful mountains and canyons. I smiled and laughed.
Most importantly, I accepted that only a portion of the race outcome was within my control. This mental approach was novel for me because Western States is the first time I have toed the starting line not confident about a finish. When we started up the ski slope at the start, I put my chances of finishing under 50%. During the days before the race, I told my parents that there was a very good chance that I would not be at the finish line. Oddly, however, this realistic view of the race was liberating. The only thing in my control was to be smart, be tough, and keep going until either they pulled me off the course or I finished. And while I really wanted the buckle, I would have accepted not finishing provided I gave it my best. The only outcome that would have caused regret would have been me voluntarily quitting, which was the one thing I could control.
Staying positive
Aid-by-Aid Report
Olympic Valley to Escarpment to Lyon Ridge – At 10.3 miles, this is the longest stage and the one with the most climbing. I took my time up the mountain and took it easy on the downhills. I also ate 750 calories on this opening stage (the only non-aid station food) as I wanted to start nutrition out right. Other than some minor knee pain, this section was fine and I cruised into Lyon Ridge near the back of the pack in 269th place.
The starting climb (Olympic Valley in distance)
Lyon Ridge (10.3) to Last Chance (43.3)- This section took me from 7:47 a.m. to 4:01 p.m. on Saturday. There are 5 aid stations between Lyon Ridge and Last Chance, all relatively closely spaced. Lots of sun and relatively gradual climbs and descents. I moved pretty well through this section and kept hydrated and measured. Last Chance marked my lowest cumulative pace, at 15:15 per miles through 43 miles. From this point forward my average pace started to increase.
Last Chance (43.3) to Devil’s Thumb (47.8) – This is the first big canyon (Deadwood Canyon). Very steep descending switchbacks, which started to work the legs, followed by a slog straight up the other side. This section requires deliberate marching, and there is no way to avoid an elevated heartrate.
Bridge at bottom of Deadwood Canyon.
Devil’s Thumb (47.8) to Michigan Bluff (55.7) – This is the second canyon, with an aid station at the bottom where the trail crosses El Dorado Creek. El Dorado Canyon is longer but not as steep as Deadwood Canyon. I felt pretty good as I climbed into Michigan Bluff.
Feeling good at El Dorado Creek.
Michigan Bluff (55.7) to Forestville (62.0) – This section goes through Volcano Canyon, which is the smallest of the canyons, but was the worst. Darkness fell as I was going down the canyon, and I kept getting passed by runners cheerfully chatting with their fresh pacers. It was so dry the dust looked like fog in my headlamp, and I was in a bad spot as I climbed up toward Forestville. By the time I hit the asphalt I had about convinced myself that I was done, but then I recovered as I marched though the town. My parents and Sam were encouraging when I saw them at the aid station, but I told them that if I was going to finish it would be in the last 30 mins.
Forestville (62) to Rucky Chucky (78) – This section basically descends from Forestville to the river crossing. As I left Forestville, I saw that I was making 16:00 min miles on flat ground. Knowing that the worst part of the trail was behind me, doing the math I realized that a finish was possible but very tight. This section took about 5 hours (10:03 pm to 3:17 a.m) and was a fast night march with a little running. I managed to average 16-17 minute miles, which was great. This is the easiest part of the course.
Rucky Chucky (78) to Green Gate (79.8) – This where the race crosses the American River. The aid station was crowded with a whole bunch of end-of-pack runners trying to make it. The crossing was uneventful and there were plenty of volunteers in the cold water making sure we did not let go of the aid cable. After the crossing, the trail is up for two miles to Green Gate aid station. This was my slowest section at 27 min miles, mainly due to the delay in crossing.
Conga line across the river. Note the two headlamps (one on head and one on chest). Vital for running solo all night on rocks.
Green Gate (79.8) to Quarry Road (90.7) – This section is up and down a number of moderate hills – not easy but not that hard either. But this is where I really understood how close I was to the cutoff. I started running a lot. From here on the only thing I did at aid stations was fill a water bottle. I talked with other runners with experienced pacers, and they all said don’t worry there is plenty of time. But I was worried.
Quarry Road (90.7) to Pointed Rock (94.3) – This is the section where Jim Walmsley famously took a wrong turn, and I understand how that could happen. It is also a sneaky late-course climb that keeps going up far longer then it feels it should. The Pointed Rocks volunteers tried to get me to stop and eat, saying I needed to feel good for the lap around the track, but I was too worried and just took a Gu and some water and rolled. I had 2 hours and 20 minutes to cover the last 6 miles.
Pointed Rocks (94.3) to Robie Point (98.9) – This is a long down section to a bridge across the river, then a super hot exposed trail up to Robie Point in Auburn. I was running out of steam. As I climbed up through the woods, I could hear the race going on. I marched into Robie Point with 45 minutes to go, saw my parents and Sam, and for the first time knew that I was going to finish.
Looking rough as I cross back over American River at mile 97. Totally smoked at this point.
Robie Point to the Finish – The only other experience like this is walking through Chamonix the last mile of the UTMB finish. There were thousands of people out cheering. I walked with my family, and an enthusiastic volunteer with a megaphone who went in front of us yelling: “Lets hear it for Chris from Texas!” every 30 seconds. I was not in any hurry, and just enjoyed the moment.
Crossing the line in style.
Closing thoughts. The desire to get a Western States buckle started back in 2014 in a bar conversation with my buddy John. It was the genesis for signing up for my first ultra (Bandera 2015) and for going back to get a lottery ticket race all those years. In the last eight years I have run thousands of miles, including hundreds of miles racing on some of the most beautiful trails in the world, made great memories with friends, and had a blast. I would not change anything about those races, nor this race. Struggling to finish, nursing a chronic injury, and then making it with only a few minutes to spare and sharing the moment with loved ones, cannot be improved upon – it was a perfect race. I will treasure the buckle not just because it is a badass buckle (and it totally is) but because every time I put it on I think of all of the steps it took to earn it, the ups and downs (literally), the humbling of pride, the blisters and lost toenails, the early morning practice runs, the friends, the adventures and mishaps, and the journey to get here – and I know that I am truly blessed.
West Texas is my favorite part of the state. The crown jewels of Texas backcountry adventure, Big Bend and Guadalupe Mountains National Parks, are favorites of mine (and everyone else). Recently, I had the chance to explore a third, less popular but no less spectacular corner of West Texas: the Buffalo Trail Scout Ranch in the Davis Mountains.
6th grade scouts starting a 1,200′ climb up from the canyons to campsite on a ridge.
BTSR, as it is known, is a 9,000 acre property owned by the Buffalo Trail Council of the Boy Scouts. Situated in the steep canyons of the Davis Mountains, BTSR is home to winter and summer camp programs. During the year, its extended backcountry is open for backpacking to scout troops. Austin BSA Troop 33, my son’s troop, spent three days and two nights backpacking the BTSR backcountry over MLK weekend.
A look down Pig Pen Canyon, which we hiked up the first day.
On Saturday we left Austin early, rendezvoused at Balmorhea State Park for a last bathroom stop, then drove the final 30 minutes to BTSR. Total drive time was right at 6 hours 30 minutes. After a short meeting with the friendly BTSR ranger, the boys divided themselves into two crews and were off up the mountain, with the adults following.
View from up on top at about 5,800′.
That night we had a blue norther come in and it gusted to 35 mph while the temps dipped into the 20s. We all got to test whether the ratings on our sleeping bags were accurate. Or not. The next morning the boys planned a few easy miles in the morning along the rim of the canyon.
Boys navigating their way on rough trail.
Then after lunch they dropped down into the canyon, where our second campsite awaited.
BTSR has National Park-level scenery. The dry creek visible at the bottom is about 1,200′ below where I took this photo.
During this trip the scouts were learning and, in some cases, relearning how to use a map and compass, how to take bearings, and how to follow trails. BTSR contains a good mix of easy to follow trails, harder to follow trails, and basically no trails. It is an outstanding place for practical navigation experience. Getting lost – or at least losing the trail – happened to our crews multiple times.
Descending a steep slope with a very faint trail. Note the map in the scout’s hand. It took about an hour to go a half-mile while stopping many times to confirm where we were.
Water was a bit of a challenge on this trip. Up on top there are no springs, but there are muddy stock tanks. The stock tanks did provide water, but they repeatedly clogged our water filters. Down in the canyon there are pools of clear spring water.
The appropriately named Needle.
Perhaps the best thing about BTSR is that over the popular MLK weekend the only people in the 9,000 acres of backcountry were the eleven scouts and eight adults from our Troop. That is solitude (to the extent one can call hiking and camping with a bunch of 6th to 9th graders solitude).
Scouts leading the way hiking out on a glorious West Texas winter morning.
If you work with a scout troop in driving distance of West Texas that is looking for a great opportunity for a legitimate, uncrowded backcountry experience, BTSR should be on your list.
I first saw a Western States 100 buckle on a phone while drinking beer at a bar with John at a law firm happy hour back in 2015. Of course I wanted one and thought it a simple as signing up and running the race. Thus began my dabbling in the world of ultramarathons.
As anyone who has tried knows, you don’t just enter the Western States 100. You first have to complete either a 100k or 100 miler that is on a list within a specified cutoff, then you have to enter a lottery. The first year you enter the lottery you get one ticket. The next year you get 2, then 4, then 8, and so on. Prior to COVID, you had to enter the lottery every year or you lost all of your accumulated tickets. Every year since 2016 I have managed to run a qualifying race. This year a ticket with my name was pulled.
Normally, that would be a reason for pure excitement, but over the last half decade these wheels have seen a lot of miles. In the last six years I have finished two marathons, five 100ks, and three mountain 100 milers. The hundreds of hours and thousands of miles running have taken a toll. One of my knees has advanced cartilage degeneration and most of this year I have been sidelined with injury. On a backpacking trip this summer I was hobbled and for the first time ever was the slowest hiker in a group, struggling to keep up with my 11 and 13 year olds. I will turn 45 in May, and am confronted with the reality that things don’t heal like they used to.
These circumstance have forced me to think about athletic priorities. At the top of the list is maintaining the ability to go on big wilderness adventures, particularly now that my kids are just reaching the age where they can handle these trips. I want to take them to the Grand Canyon backcountry, to the top of Gannett Peak, and packrafting in Alaska. That is not going to happen if I can’t cover the miles. At the bottom of the list are road races. I have made peace with the fact that Boston was my marathon last act.
In between are very few, very special races, including the Western States 100. Is it worth the cartilage capital it will require? This week I was forced to decide.
On one side of the ledger are the challenges: I have 200 days to prepare, have not been running for months, am in the middle of physical therapy trying to rehab the knee, and have real doubts that I will be physically able to finish this race. On the other side of the ledger: I have experience, knowledge of how to prepare and a realistic understanding what I will face, and the mental toughness to walk for hours through pain. We usually regret the things we don’t do more than the things we do, so passing on my one (and probably only) chance to go get that buckle with the mountain lion is simply not something I am going to do.
It’s on, with no agenda, no expectations and no goals other than to finish. This may be my last ultramarathon ride, so better make it a good one. Let the suffering begin.
For car camping, we have had the REI Base Camp 6 tent for fourteen years. The current iteration is $470. It is bombproof and has survived storms with winds over 40 knots. Even after a decade of use, the only problem is that the plastic windows on the rain fly are shot, but this is not a real issue and the tent itself is still waterproof. I often recommend the REI Base Camp 6 as a family camping tent. But the problem with the Base Camp 6 is that it really does not fit six people comfortably. With four growing kids we began a search for a new family car camping tent. The only options at REI for bigger tents are well over $500, and they are not that big.
We ended up buying the enormous Guide Gear 18’ x 18’ Teepee Tent from Sportsman’s Guide for about $220. We have been pleasantly surprised with how well this cheap, big teepee has worked. (I have no relationship with Guide Gear or Sportsman’s Guide)
Each corner is staked and then there are 8 stakes for the tensioning lines and windows.
Its packed size is a cylinder about 32” long and about 11” in diameter. It weighs about 25 lbs. This package is compact enough to easily fit in checked luggage. Set up, the footprint is an octagon that is 18’ in diameter from corner to corner and 16’ in diameter from side to side. The height of the tent is 9’9” at the center pole.
The tent floor is polyethylene, very similar to “blue tarp” fabric. It has held up well to rough kids. The tent upper is a single wall 190-denier polyester with a P/U coating. There are two large screen doors and four screen windows, and four clear plastic window panels.
Setting up the teepee is easy and fast IF you have a site with good staking ground. The basic set-up process is to stake out the 8 corners, insert the 4-piece steel pole, then stake out the windows and tensioning lines with 8 more stakes. In soft ground, this takes me about 10 minutes. Where things get complicated is rocky ground. The stakes that come with the tent are crap. They are “L” shaped and rotate easily, causing the lines to slip off the stakes. They are also made of a mild steel that bends easily. As the stakes bend I am replacing them with stouter stakes. In some rocky sites that would not hold stakes I have ended up tying lines to heavy rocks and trees.
Other than the cheap stakes and the challenge of rocky ground, the biggest issue with the teepee is finding sites large enough. You need at least a 16’x16′ area to set up the floor. Many campground tent pads are not that big.
The stakes that come with the tent suck.
The teepee tent has kept us dry in the rain. The key to this is to stake out the doors so that water running down the doors does not come back in the tent. If you don’t stake out the doors water ends up inside. Do I think the teepee is as bombproof as our old REI Base Camp 6? No. The REI tent has a more sturdy design and better construction. That said, when it comes to car camping we don’t camp in hurricanes. For most of our car camping, if the weather is going to be bad we bail.
Window covers staked out in storm mode.
As with any single wall tent, we have experienced condensation with six people sleeping in humid conditions in the rain. However, the teepee is surprisingly well ventilated. The four screen windows have covers that allow them to stay open during rain and the large screened roof vent is waterproof. With both large screen doors open (when no rain) there is plenty of ventilation and no condensation. This is particularly good for typical Texas camping.
We have found having a blanket for shoes helps keep the tent clean.
The best thing about this tent is that it is HUGE. All six of us can sleep in it comfortably, regardless of how many bags or cots we have. There is plenty of headroom to stand up and change.
One of the fun things about this tent is that whenever we set it up people stop by and ask about it. It is really hard to overstate how huge it is. In sum, aside from the crappy stakes, the Guide Gear 18′ Teepee is a pretty good tent for large families seeking lots of space to spread out.
Nobody goes there anymore, it’s too crowded – Yogi Berra
The huge post-COVID increase in crowds is evident to everyone who spends time outdoors. My hometown of Austin is in the process of being overrun by crowds of new people. Gone are the days of being able to just show up at Barton Springs Pool on a Saturday (need an entry pass) or spending hours training on the Hill of Life (limited paid parking). These are not local phenomena. The National Park Service is experiencing record visitation, straining basic infrastructure to the breaking point. Many parks have already or are in the process of adopting day pass systems to preserve visitor experience. What is one to do?
As with any problem, acceptance is the first step. The crowds are not going away any time soon. So we need to adapt. Four tried and true strategies to deal are to go early, go far, explore something new, and plan ahead.
Go Early. People are lazy. Even the most crowded outdoor spots – like the South Rim of the Grand Canyon or Old Faithful in Yellowstone – are almost empty at sunrise, even in the middle of July. By 10 a.m. those spots are Disney World. I know, its hard getting up early. But it is the only way to see the famous bucket list spots and have those to yourself.
Sunrise on the South Rim. Only a handful of people. We got up at 4:00 am (no daylight savings time in AZ!) and drove an hour from a NFS campsite near Flagstaff. It was worth it.
Go Far. People are lazy. There are simply fewer people willing to through the effort to get to remote places. This summer I planned a small backpacking trip in Colorado for my older kids and their cousin. Rocky Mountain National Park was out because of red tape and crowds. Wilderness areas were on the list, but we avoided those within a 3-hour drive of Denver or I-70. We ended up going to a wilderness area (which shall remain nameless) with a trailhead down a 38-mile gravel road. We saw only two other parties in 5 days and caught all the naïve trout we wanted, in a place with scenery (picture at the top of this post) that compares favorably to the more famous destinations.
Over an hour on washboard then an hour hike through the desert to this awesome slot canyon. About 10,000 fewer people than the Zion narrows.
Explore Something New. People are lazy. They are much more likely to google Top 10 destination lists than explore an area for hidden gems. National forests, BLM lands, and state parks often have scenery and adventure potential on par with much more famous (and crowded) destinations.
Exploring a Wyoming canyon on a hot afternoon. This state park is not on any top 10 destination lists but was lots of fun.
Plan Ahead. People are lazy. More parks are moving to entry passes and reservations. This has the upside of improving the in-park experience if you are Johnny-on-the-Spot enough to get a permit. Recreation.gov and your analogous state park reservation systems are your friend. Better to have a reservation that you cancel than not have a reservation. Also, plan for off peak days and times. One can find solitude on the Barton Creek Greenbelt in the middle of Austin on most Tuesday mornings at 10 a.m., while on a Saturday there are thousands of people on the trail. Also consider visiting parks during shoulder seasons. If COVID has taught us anything it is that school is optional so take the kids on that trip in October! I kid. Kind of.
This is one of the more popular trails in Great Smokey Mountain National Park, the most visited Park in the country. But in November you can have it to yourself.
With crowds here to stay, at least until the cruise ships and Vegas get back to full capacity, a little creativity is all we need to keep finding those awesome experiences.
While watching my nephew’s YouTube report of his family’s vacation to a resort in the Bahamas my wife Michelle asked me “why don’t we do vacations like that?” I had to tell her it was because we only do Type II fun.
I did not come up with the fun classification system, but I love it. The system divides fun into three categories:
Type I Fun: Fun in the moment, not particularly memorable.
Type II Fun: Not very fun in the moment, very memorable.
Type III Fun: Fun in the moment, regrettably memorable.
Just about all the great fun is Type II fun, or at least Type I fun with some Type II spice. Occasionally, I like pure Type I fun, for instance a day at the beach. But if I am honest, I get bored with Type I fun in about two days. Hopefully, most of my Type III fun is behind me now that I go to bed by 10 pm.
Type II fun is the best because it is the most memorable, and the joy of the memories is worth the pain and frustration that comes in the moment of Type II fun. There needs to be some element of challenge or adventure or uncomfortableness to really have a great fun memory. A Type II fun adventure requires a plan that is a little (sometimes a lot) beyond the comfortable skill levels of the participants.
Tim and I deciding to canoe Barton Creek at 850 cfs when the only other people out there were kayakers with helmets. So we flipped and got worked. At least I did not lose my hat that day. Total Type II fun.
The key distinction between Type II fun and no fun is the word “almost.” Nobody likes an actual disaster. But an almost disaster is epic. Adventures involving bears, a raft full of camping gear going down a Class VI canyon, things catching on fire, marching through ice at 3 am on messed up legs – these are all great fun as long as everyone makes it home with life and limb. It can be a fine needle to thread.
Type II fun at mile 88 of the UTMB. Doesn’t V look like he is having fun?
Type II fun also involves some element of work, of effort. This can be physical effort, like a long day of biking, mental effort like mile 82 of a 100 mile race, or spiritual effort, like not going insane on the 18th day of a road trip camping with four kids.
But great memories require great effort.
Little ones with packs and PFDs for adventure down the trail.
The most Type II fun of Type II fun has been introducing my kids to appreciate Type II fun. It is a work in progress, but they are coming along.
Anyway, bravo to all the tough ones out there going out and having some Type II fun.
In the age of watches that can play music, send messages, and do all sorts of other fancy things, I am a still big fan of the Timex Ironman Classic. The Timex has been around pretty much unchanged since the 1990s. It costs $35 dollars and is basically indestructible, small, light, and runs for years on a single battery. It just plain works.
Basically the same since I was in middle school.
What I like most about the Timex is its simplicity. It only does a few things, but it does those very well.
Its screen is easy to read in almost all light conditions and even with polarized glasses.
Its stopwatch function is very simple. One button gets you to the stopwatch then starting, stopping, and laps are controlled by two big buttons that are easy to hit swimming or running on a dark track.
It has a basic countdown timer.
It has alarms.
That’s it.
One of the trends in newer watches that I do not like is that they are huge and have sharp angles. This hurts function as huge watches get caught on clothes (taking off a layer) and the big faces can get damaged by things like Kettlebell workouts. The Timex is light and tiny and survives everything I have thrown at it.
Oddly enough, even though I own a GPS watch I find the Timex superior for some types of workouts. Specifically, track workouts and hill repeats. For these workouts I don’t need mid-workout pace data; I just need a stopwatch with a great lap function. The simplicity and big buttons of the Timex watch function works better than my GPS watch chronometer.
The other situation where the Timex holds its own is long runs or races, like ultramarathons, where I don’t need or don’t want my live pace but where the overall time is vital. For these I always have my phone anyway. The phone records my track just as good as a GPS watch, has far superior navigation tools, has a bigger battery and is easier to recharge mid race. The GPS watch is superfluous to the phone and is less reliable than the Timex.
There are some circumstances where I don’t pick the Timex. If I want to record my track but I am not taking my phone, I leave the Timex at home and take the GPS watch. If I am doing a workout that requires live feedback on pace or distance – like a tempo run – I take the GPS watch. Finally, if I am running a mountain ultra or doing a big backpacking trip in the mountains, I sometimes leave the Timex at home in favor of a non-GPS watch that has a long battery life but also an altimeter and barometer as knowing real time elevation in the mountains is useful.
Obviously, GPS watches are amazing inventions, and they have their place. If you like yours, great. But with complexity comes downsides. Maybe I am a Luddite, but I like my Timex for what it avoids: a mental distraction of always checking miles, wondering whether I have enough battery life to complete a run, frustration when the battery runs out or when the GPS data is not very accurate or it can’t find satellites. I think I will keep mine for at least a few more decades.
Arkansas is a strong contender on the all-underrated states list. Over spring break, I was reminded about just how underrated and how close – in Texas distances – it is to home. Austin Cub Scout Pack 14 took 13 scouts and 12 parents on a two-night backpacking trip on the Little Missouri River Trail in the Ouachita National Forest. For all the boys and many of the adults, this was their first multiday backcountry trip.
At the top of the only climb on the trail.
Given the inherent complications of planning a trip in Texas due to limited public land and the need to be Johnny-on-the-spot to grab reservations months in advance for most destinations – the trip to Arkansas was refreshing. No crowds, no permits, clear streams, and miles of spectacular trail.
The Ouachita National Forest in western Arkansas and encompasses the ancient Ouachita Mountains and the largest stand of virgin forest in the lower 48. Outside of developed campgrounds, camping and hiking are free and require no reservations or permits. While there are hundreds of miles of trail in the Ouachitas, I was looking for something moderately challenging that a group of 11-year-old boys could complete camping two nights and carrying their own gear. The Little Missouri Trail fit the bill as it is relatively flat, has plenty of bail-out options, and includes its own entertainment in the form of a spectacular clear river.
First night camp in the morning fog.
The Ouachitas are about 7 hours from Austin, so comparable in driving time to a trip to Big Bend, Palo Duron Canyon, or the Guadalupe Mountains. Unlike those destinations where hikers must carry lots of water, water and shade are abundant and a single water bottle is sufficient.
River Crossings, Flood Risk and Alternatives – In June 2010, a flash flood on the Little Missouri killed 20 people camping in the Albert Pike campground, including many who were trapped inside their tents at night. Anyone considering an overnight trip near the river should consider the risk of flash floods, monitor the weather, and select campsites accordingly.
One of the many side streams.
Hiking the Little Missouri River Trail requires fording the river many times and crossing large tributary streams. Many have reported that if the USGS Gauge at Langley is less than 4.0 feet, the river crossings are safe. We found this to be accurate. During our trip, the gauge ranged from 3.5 to 3.8 feet and the river crossings were easy for adults and manageable for 11-year-old boys with packs.
The Little Missouri River
If planning a trip in the spring when thunderstorms are common, it is worth considering alternatives in case the river rises suddenly. For our trip, I had mapped out an alternate route on the Athens Big Fork Trail that we would have hiked had we deemed the river level unsafe. I also noted the locations of the forest service roads in the event we had to suddenly bail; most of the time reaching a road requires a bushwhack of ½ mile or less.
The Little Missouri River Trail (Green) with our two campsites identified. Our backup route is in red and avoids the river.
The Hike – For the most part, the trail closely follows the river. There is a hill of a couple hundred feet between Albert Pike and Winding Stairs with a great view, but otherwise its flat.
Elevation Profile
Campsites are informal and abundant.
Our second campsite near the Winding Stair trailhead. Plenty of room for a big group to spread out.
We walked through many old growth groves that, due to the ruggedness of the hills, avoided the axes of the last centuries.
This hike is great for beginning backpackers. Particularly if you hike with kids and a desert hike is not appealing, or you just want to get away from the crowds.
There are plenty of resources on lightweight backpacking for adults. But there is not much on outfitting kids, particularly late-elementary and middle school kids, for practical backpacking. As the den leader for a bunch of 5th grade Cub Scouts, this post explains the gear we have found to be useful for backpacking trips. Note that much of the gear is going to be more lightweight and minimal than traditional backpacking. Many of our scouts successfully used this equipment on a recent two-night backpacking trip in Arkansas, carrying 100% of their own gear.
Why Backpacking is Different for Kids
(1) For Kids Going Ultralight is a Necessity, not a Philosophy. While we all have different ideas about how much weight is “too much,” a starting point is the 20% rule which states that total pack weight should be less than 20% of body weight. For my 190-pounds, this equals a pack weight of 38 pounds which experience has taught me is pretty heavy for long days in rough terrain. My load-out weight for a five-night backcountry trip is usually 25-27 pounds. If anything, the 20% rule is pushing it for everything but short, mild trips.
Now apply the 20% rule to an 80-pound kid. That means total pack weight needs to be 16 pounds to be manageable and comfortable. Above that, there is a good chance that backpacking will stop being fun, and it needs to be FUN. Where “ultralight backpacking” is a philosophical point for many adults, particularly those with the stamina to suck it up and haul a heavy pack, it is a point of necessity for kids.
(2) Kids are hard on gear. A 5th grader will not appreciate the need to baby that dyneema composite shelter and may forget that the premium down sleeping bag needs to stay dry. He is going to set up camp and then start a game of tag with his friends. That means gear for kids needs to be simple, durable, and have a margin for user error.
(3) Kids bodies are growing. My decade-old pack fits the same as it did when I bought it. A 5th grader’s pack may not fit the same in six months. When shopping for kids’ gear, special consideration must be given to adjustability.
(4) Kids need affordable gear. Cost should not be a barrier for anyone wanting to get outdoors, particularly youth participating in scout programs. There is nothing wrong with a $300 ultralight tent, but I am not going to recommend that a young person needs to have one to get outside.
Specific Recommendations
Below I provide specific recommendations for the big-ticket items: packs, shelters, sleep systems, stoves, and water. I am sure there are many other products that work great, but these are the ones we have tested with 10- and 11- year olds. I have no affiliation with any of the companies below other than as a customer.
Pack: REI Tarn 40 Kids Pack ($100). This pack is great. It is a 40 L in internal frame pack weighing 2 lb. 10 oz. with an adjustable harness. The main compartment is top loading and hydration bladder-compatible, and it also has two hip belt pockets, two side mesh pockets, a large open topped back pocket, and a zippable top compartment. The main compartment is big enough to hold a synthetic sleeping bag, self-inflating pad, clothes, food, and stove. The back pocket is big enough to hold a light shelter.
My Scout with his REI Tarn 40. The back pocket is holding his shelter and a sweatshirt.
Unfortunately, it appears that REI may have discontinued the 40 L version and now only offers the 60 L version. The 40 L is far superior for smaller kids for a few reasons. First, the 60 L version has a listed weight of 4 lb. 5 oz; an increase of over 1.5 pounds in the pack weight alone. Second, and more importantly, the 60 L version is large enough that it encourages bringing more stuff than necessary, further increasing pack weight. On our den’s backpacking trip, every scout who hiked with the 60 L version had to have assistance from a parent at some point in carrying gear. Most 10- to 12-year-olds are going to have a hard time carrying 60 L of gear for anything over a couple of miles. Third, the 60 L version is significantly more expensive at $165. Once a pack is climbing north of the $150 price point there other, lighter options to consider. If the $100 40 L Tarn is not restocked, I would consider the following over any of REI’s kids packs:
ULA CDT ($145) – this is a 25 oz., 45 L top loading pack (size small). These packs are made in Utah. I have the larger version (the Catalyst) and its build quality and durability are outstanding.
Gossamer Gear G4-20 ($180) – this is a 25 oz., 42 L top loading pack (size small) and is time-tested lightweight pack.
Both the CDT and G4 are used by through hikers and have more than enough volume for a scout backpacking trip and are over 1.5 pounds lighter than anything REI offers.
Shelter:Oware Net Tarp 1 ($120). This is a 15 oz, 5×9 flat tarp with perimeter bug netting. There is no floor but the scouts use polycro or an emergency blanket as a groundsheet. Dave at Oware made our den a custom order in scarlet red. The only shelter option that keeps the weight close to a pound and the cost close to $100 are tarps. The perimeter netting is nice for Texas bugs.
Net Tarps pitched by 5th graders. There were no bugs here so some opted for an open lean-to pitch. Some are still working on the tauntline hitch.
The challenges of having kids use a tarp as a shelter are (1) the steeper learning curve on proper pitching and (2) the mainly psychological hurdle of camping in a shelter without an integrated floor. These challenges are not insignificant, however once a scout masters the tauntline hitch and can set up his net tarp by himself, he will have developed relatively advanced backpacking skills. It takes 10-15 field-realistic practices to learn tarp setup. One thing we noticed was that in a group setting all of the tarp lines can be a tripping hazard, and many scouts are replacing their lines with reflective glowline.
Net Tarp 1 pitched low, again all knots and stakes by an 11-year old.
If a tarp is simply not going to work or is not allowed (i.e., Philmont), there are other options, but they are significantly more expensive. I recommend the Tarptent Protrail ($229), which is a 25 oz. single wall tent with an integrated floor.
Sleep Pad:Thermarest Trail Scout ($55) This is 1 lb. 6 oz. self-inflating pad fits the sweet spot between cost, weight, compactness, and durability.
Sleeping Bag:REI Trailbreak 30 ($90) My son has slept warmly in this 2 lb. 8 oz. synthetic bag under a tarp in nighttime temps dipping into the 20s. There are many lighter, more compressible options, but those are all going to be twice as expensive.
Stove and Pot:Soto Amicus Stove Cookset Combo ($45) This gas canister stove comes with two pots; the kit is 11 oz but normally the little pot may be left at home.
Water Treatment:Lifestraw GoFilter 22 oz. ($40) Provided your trip has ample water sources, these bottles with incorporated filters are tough and easy to operate.
Scouts marching down the trail.
Scout Backpacking Checklist
Here is the checklist we used. With the recommended gear and adhering to this list (and not adding a bunch of other stuff) most of the boys were able to keep their packs right around the 16-18 pound range.
Backpack – < 3 lbs. and around 40 L capacity
One 18-gallon trash compactor bag to line backpack
Sleep Pad – < 1.5 lbs.
Sleeping Bag – < 3 lbs. and rated to at least 30° F
Shelter – < 2 lbs. and able to set up by scout
Water bottle and water treatment
Backpacking stove, pot, utensil, and fuel
Collapsible cup – for hot chocolate
Food stored in stuff sack or other bag
Bear/varmint hang: 50’ paracord and small carabiner
Personal first aid kit – (including moleskin for blisters)
Sunscreen
Bug Spray
Hand Sanitizer
Knife
Compass and Map
Whistle
Trekking Poles (optional)
Clothes in Pack
Raingear – this can be a poncho, rain jacket, rain pants depending on conditions
Insulating layer – fleece or light down jacket
Sleeping clothes – shorts or sweatpants and t shirt
Warm hat
Gloves (optional)
Camp shoes (optional)
Bandana
Clothes to Wear
Comfortable, broken in shoes (no Gortex because they do not drain)
Non-cotton socks
Hiking pants or shorts (synthetic, no cotton)
Synthetic t shirt
Sun hat
If you have other tips or questions on outfitting young scouts for the backcountry, please leave them in the comments.
With three kids in scouts, we spend a lot of time in the outdoors learning life skills through experience. One of the best things about the scouting method is that us parents are encouraged to let the scouts fail. Forget your sleeping bag once and you will remember it next time. This is learning to be prepared.
It’s not just the kids who learn that way.
With a year of COVID and a now a Texas snowstorm, we have had the deficiencies in our preparedness pointed out. Maybe even rubbed in our noses. I have learned that a little “prepper” is not a bad thing. Consider:
We need more food on hand than we think we need. Last year before the pandemic really hit, I started getting worried and took a metal (i.e. rodent-proof) trash can in my garage and filled it with rice, pasta, beans, backpacker meals, and other dehydrated foods. There are enough calories in my emergency trash can to feed the six of us for a month. We also have about a month of canned goods stored. My wife stopped asking me to go with her to Costco because I would always get another huge bag of rice and more canned tuna. Fast forward to this week: We have no more fresh food in the house and the line to get in the grocery stores that are reopening is hours long. We are fine on spaghetti and canned peaches. But lots of people don’t have food. Once we get out of this, I may double our stored food supply.
We need an emergency water supply. After the power went down things froze up and pipes started bursting all over the city. It is slowly coming back, but everyone remains under a boil water notice. Many people have been without water for days and do not have fresh water to drink. We should all have a few days drinking water on hand along with a plan for more extended outages. Ours is to use our hot tub as a water supply. LifeStraw, Steripens, and other backpacking water treatment systems are a good thing to have around.
Pets are part of the family. Bob the leopard gecko warming by the fire while it is 10 degrees outside and 40 degrees in the house.
We need a plan for our homes to lose all services. How long could you live at your home with no electricity, water, and gas? This is important because in an emergency you may not be able to leave. Things to ask: Do I have enough lights and batteries? Warm clothes and sleeping bags? How will I cook food? Do we have enough propane or firewood? Can I shut off the power/gas/water to my house? What if the credit card payment system is down, do I have any cash? What will happen to the cell phone network if everyone loses WiFi? (Hint: it won’t work)
More snow that Austin sees in decades.
Have a plan and the means to leave if necessary. For most of us, most of the time, our homes are going to be the safest place to ride out a crisis. But that could change. Things like a reliable vehicle with good tires and a full gas tank make it a lot easier to get out of Dodge fast if you need to. Also, give some foresight to what you will take if you must leave in a hurry. When the house is on fire is not the time to think about where the photo album is stored.
Trust your judgment, not lying and incompetent politicians. How often do leaders head to Mexico when things get uncomfortable? Surprisingly often. I’m looking at you Cabo Steve and Cancun Ted. But seriously, who remembers just two weeks to flatten the curve? Or what about being warned to prepare for 40-minute rolling blackouts, only to then be told by your electric utility in the middle of the storm, just kidding we don’t even have the ability to implement rolling blackouts so your power will be off for days? These things happen. There is a whole realm of disasters that could last months and for which there is basically zero preparedness. Google the Carrington Event of 1859. To trust that the government is going to ensure your family’s safety is not a good plan.
Recognize that once everyone realizes there is a problem it’s too late to prepare. The time to get ready for bad times is during good times. If the infamous 2020 run on toilet paper taught us anything, it is this.
Have a plan to help others. While the best thing we can do is take care of our families, in any crisis there will be people who need help. In the Texas Snowpocalypse we had neighbors coming together to shut off water, dry out houses where pipes had burst, shelter those with no heat or water, and share supplies. Being part of a community is safer than being on our own.
The kids have thought this whole thing was a blast.
Do not despair. A scout is cheerful. A bad attitude in a crisis never helps. Despite the ever-present stress and uncertainty, focusing on thankfulness works. There are always fun memories to be made if we try hard enough.
Now I am going to the store to buy another trash can.
Most of us have been admonished at one time or another to focus on that which we can control. A year into the pandemic, we seem to have lost sight of this lesson. The narrative has focused almost exclusively on one element of risk control: limiting exposure to the virus through social distancing, masks, etc. But what about controlling the risk of developing a serious illness if we are exposed? What can we do and what role does personal accountability play? Perhaps quite a lot.
The greatest thing any of us can do to reduce the chance of developing a serious illness or dying if exposed to COVID-19 is to be healthy.
The CDC has data on cause of death for each person who died with COVID-19. (See Table 3 with data current through January 21, 2021). The CDC states: “For 6% of the deaths, COVID-19 was the only cause mentioned. For deaths with conditions or causes in addition to COVID-19, on average, there were 2.9 additional conditions or causes per death.” This means that about 19 of 20 people who die from COVID-19 die from COVID-19 plus some other condition and usually multiple other conditions.
The CDC has assembled a list of these underlying conditions and classified them based on the strength of the evidence supporting the link to severe COVID-19 illness:
Those with the “strongest and most consistent evidence” defined as consistent evidence from multiple small studies or a strong association from a large study.
Those with “mixed evidence” defined as multiple studies that reached different conclusion about risks associated with a condition.
Those with “limited evidence” defined as consistent evidence from a small number of studies.
Some of the conditions are uncontrollable; things like cancer and genetic conditions like sickle cell disease.
But many result from poor choices. The underlying conditions that have the strongest increased risk of severe illness include COPD (a lung disease preventable by not smoking), heart disease (preventable through diet and exercise), Type 2 diabetes (preventable by diet and exercise), obesity and severe obesity (preventable though diet), and smoking. Hypertension (preventable by diet, exercise, not smoking, reducing alcohol) is on the mixed evidence list and being overweight (BMI 25 and over) is on the limited evidence list. (Note: I acknowledge that in some rare cases some of these conditions may not be preventable, but for most they are)
These are not small problems. Take for example the issue of bodyweight. In 2018 9.6% of American adults were severely obese, 42.4% were obese, and 30.7% were overweight. Thus, over 80% of American adults have a preventable underlying condition that increases the risk of a severe illness from COVID, and which causes other conditions that also increase risk. And all we seem to talk about is masks and vaccines.
Maybe the reason the United States has one of the highest per capita COVID death rates in the world has less to do with shutdowns and masks and more to do with the fact that we have an already sick and vulnerable population.
Maybe the reason we hear nothing from our leaders about the importance of healthy living is that there are few corporate profits, no big government programs, and no bribery campaign contributions to be made. A chronically sick population needing hospital stays, expensive procedures, multiple specialists and a barrage of prescription drugs is so much more lucrative.
Maybe we should restart the conversation about health at the beginning, at the foundation and stop taking seriously anyone who claims to care about COVID but who avoids talking about the elephant in room.
It is certainly well past time for each of us, if we have not already done so, to do what is in our power to lead healthy lives.
As for me, I am heavier, slower, and weaker, than any time in the last five years, mainly because I have let COVID be an excuse to let it go a little. Time for some accountability. Time to clean it up, dial it in, and put in the work. COVID or no COVID.
Me at the YMCA today for first squats, presses, and deadlifts in a year.
For the past two years I have been using the Gaia GPS app on my iPhone for navigation and to record hikes and ultramarathons. I am neither a gadget nor app guy, but the utility of Gaia GPS is such that I felt compelled to write a review. Gaia GPS is the single most useful app for outdoor adventurers. (Disclaimer: I have no relationship with Gaia GPS other than as a customer).
What is Gaia GPS?
In a nutshell, Gaia GPS turns your phone into a GPS navigation unit that you can use without cell reception. If take your phone with you anyway on hikes and runs, as most of us do, it makes stand-alone GPS units obsolete and renders GPS watches unnecessary for many uses.
What is the cost?
While there is a free version, the basic $20 per year membership provides access to downloadable maps. This feature is key and is what allows for GPS navigation in the backcountry. The $40 premium membership provides additional specialty maps (backcountry skiiing, hunting, etc.), but I have found that the basic membership fits my needs perfectly. I have used the app on an iPhone 7 and iPhone SE.
Map Layers
The basic membership allows you to view either the Gaia Topo map, which is a simplified map, or a USGS Topo map. For sailors, the app also allows viewing on NOAA navigation maps. These maps are sufficient for everything I do. For those with additional needs, there are hundreds of other map layers to choose from.
Here is the Lawn Lake trailhead in Rocky Mountain National Park on the Gaia Topo mapSame trailhead (Lawn Lake RMNP) as it appears on the USGS map.
Download Maps
To download a map for off-network use, you simply open the app, click “+” and select “Download Maps.” A rectangle will appear on your screen and you can move the corners to select the area you need downloaded. You will then have an option to name the map and it is saved on your phone.
So, for example, if I were planning a trip to the Guadalupe Mountains, I would open the app, move the map to the Guadalupe Mountains, adjust the boundaries of the download area, and save the map:
The four corners of the download are are customizable. This is the area I would choose to climb Guadalupe Peak and a side trip to the Bowl.
Even though the Guadalupes are miles from the nearest cell tower, once hiking I can open the Gaia GPS app and see my location moving on the downloaded topo map. The display also uses the phone’s compass to show you what way you are facing on the map. This makes it almost impossible to get lost.
Download Routes
In addition to downloading maps, you can save routes and waypoints for use when off-network. Routes can be created in the app directly by clicking “+” and selecting “Create Route” then clicking the points on the map. The app automatically connects points along a trail if the two points are on-trail.
More often, I log in to the Gaia GPS website and create routes on my computer, which are then automatically uploaded to my phone. For example, here is a route I created for a trip to the Little Lake Creek Wilderness in East Texas. The route includes not only distance but an elevation profile:
Here is what it looks like on my phone using the Gaia Topo base map:
Or the USGS Topo base map:
Once I am out on the hike, my location will be a visible as an arrow moving on the map.
In addition to creating maps, you can also import routes as GPX files. Many races provide GPX files of the course which can be downloaded from the race website. For instance, when I ran the Run Rabbit Run 100 in 2019, I pre-downloaded the GPX file from the race website into Gaia GPS on my phone so I was always able to confirm that I was on-course.
Download and Create Waypoints
Like saving routes, the app makes it easy to save waypoints, including photographs for documenting a route.
Nice Fort on the Greenbelt – lets me tag my photo to a map.
For a Cub Scout orienteering event, I planted flags on the Barton Creek Greenbelt for the scouts to find using traditional map and compass methods. Here is what that looked like on my phone:
The waypoints marked. If you tap on the waypoints, you pull up waypoint lat/long and bearing and distance from current location.
When I got home, I logged into Gaia GPS and created printable maps for the scouts:
Recording Races and Hikes
To record a track, I just open the app, select “+” and “Record Track” and the app starts recording. Importantly, it runs in the background and uses very little battery life. For example, when I ran the Bandera 100k, Gaia GPS recorded for over 15 hours. My phone was on airplane and battery saver modes during the event and went from 99% charged to 65% charged.
Bandera 100k track (as seen through the website interface).
I am confident the app can record most ultramarathons with high accuracy on a single battery charge. Once recorded, tracks can be exported as GPX files to fitness platforms like Strava or as KML files to Google Earth.
One thing I have observed is that the vertical ascent and descent calculation in the Gaia GPS app is sometimes lower than other apps, particularly on rough courses. For example, the Gaia GPS app shows my Bandera 100k track with 4,383 feet of ascent. When I exported the GPX file to Strava, Strava shows 6,469 feet of ascent. This is because the algorithm Gaia GPS uses “smooths” the small vertical bumps compared to other algorithms. In any event, it does not affect the utility of the app for navigating or recording tracks because it exports the full GPX file to other apps (which then adjust the vertical data per their own algorithms).
GPS Watch v GPS Phone App?
While I am a big fan of Gaia GPS, I still prefer a GPS watch for some situations – mainly when I need to know my pace in the middle of the event, e.g., tempo runs and races up to marathon distance. For ultramarathons and backpacking trips, I primarily need to know where I am, the elapsed time and, in the mountains, altitude (which is best with a barometric altimeter). I almost never need to know my pace beyond ballpark calculations and most watches don’t have the battery life to provide accurate GPS distance and elevation measurements for most ultramarathons, particularly for a mid-pack competitor like me who is going to be out on the course for a while. Even if there was an affordable GPS watch with a barometric altimeter and with a battery life to accurately record a GPS track for 40+ hours, I would still carry my phone with me anyway for photos and music and would use Gaia GPS for navigating with a big bright phone screen.
Bottom Line
For those of us who spend significant time in areas without cell coverage, having a reliable navigation tool is a matter of safety. For actual functionality and aside from short distance (marathon or less) fast-paced running, its hard to beat this $20 phone app for GPS functions.
This weekend I ran the Hoka One One Bandera 100k with my brother Tim and buddy John. As I mentioned previously, this was a last-minute decision, and I am glad I did it. While it had all the normal suck of an ultramarathon including a short night march, it also was the first time in over a year that I had the chance to compete in a real race. Writeup below and Strava data here.
Let me Start with Kudos to Tejas Trails
In a time where a rational assessment of COVID risks is scarce, the race organizer Tejas Trails managed put on a relatively normal race. There were two main risk management strategies. First, in lieu of a mass start with 400 people, each racer was assigned a starting window and the race was chip timed. On a narrow course like Bandera where an initial conga line and hurried passing are always concerns, the spaced start was a major improvement. The race organizers should continue to use this start approach regardless of COVID.
Second, the aid stations were modified to promote social distancing. These changes included pre-packaging food in individual containers, the use of wands to fill water bottles, and asking volunteers and runners to cover faces when around aid stations. In all, minor inconveniences. There was less sitting around and stopping at aid stations than a normal race (no mass of runners with shoes off in the warming tent) but that is also an improvement.
Was COVID risk zero at the race? No. But with the above adjustments it was minimized, and I suspect that the risks were in line with or less than indoor activities like going to the grocery store.
Other Race Logistics
The race is held at the Hill Country State Natural Area, a little over two hours west of Austin. The course is two 31-mile loops. We picked up our race numbers on Friday night and then headed to our bed and breakfast for dinner. The weather forecast called for an overcast race day with highs in the 50s with possible showers in the evening. Other than the first 5 miles after starting, I ran most of the day in shorts and a t-shirt, and only needed to put on a fleece after dark. I carried a warm hat and Houdini jacked in case, but the rain held off and they stayed in the pack.
On race morning, we arrived just before our 7:00 am start window, picked up our timing chip, dropped a bag in the field by the start, and rolled. We were running within ten minutes of parking.
First light and ready to get after it.
Hydration and Nutrition
Unsure of how functional the aid stations would be, we made the decision to carry all our food and most of our water. I loaded up my Salomon ADV Skin 12 pack with a liter of water in a platypus and two half-liter soft bottles up front. For me, this was enough water for at least 20 miles and I probably could have stretched it to 31. I also carried plenty of salt pills as I had to be prepared to drink only water. I ended up refilling the soft bottles once on the first loop with Tailwind. After realizing that aid stations were fine, I dropped the platypus at the turn and ran the second loop with just two soft bottles and alternated water and Tailwind.
Regrouping after the first 31-mile lap. Note all the space to safely spread out.
For nutrition, I started the first loop with four PBJ sandwiches, two small bags of fritos, and some leftover Halloween candy. Every hour I ate half a sandwich and candy, which worked fine. But even PBJ gets monotonous after a while so on the second lap I relied mostly on aid station food, my favorite being a cup of ramen mixed with instant mashed potatoes.
The Race
Despite having finished in 2015, I had forgotten how flat the Bandera course is. The course is very runnable, with only short climbs breaking up the first half of each loop. The back half of each loop is entirely runnable except for a single short steep climb near the end. Dedicated vertical training is not really required for Bandera. The one variable that changes the nature of the course is mud. In 2015, all the runnable sections were slippery foot-sucking mud. This year, those sections were dry and fast.
Tim moving well up one of the climbs.
Our strategy was to go as fast as we could to be as far along as possible before sunset and to beat any rain that might turn the course muddy. We ended up completing the first 31-mile lap in 6:32. We made it halfway around the second lap before darkness fell and we were reduced to marching it in. The second lap took 8:43, so about two hours of slowdown compared to the first lap. My final time was 15:15, which is 4 hours and 31 minutes faster than in 2015.
Glad to get it done. John finished shortly after.
Final Thoughts
Two months is normally insufficient to train for a 100k. In November I ran about 160 miles, including a couple of runs over 20 miles. But in December the combination of IT band issues, the holidays, and family obligations kept me from training as consistently as I would have liked. Nevertheless, I felt confident at Bandera because I knew I had a good hydration and nutrition strategy and because the weather was good. The strategy to move as fast as possible until dark and then just accept that with the dark my pace would inevitably slowdown was the correct one.
I can’t overemphasize how refreshing it was to get back to racing. We cannot allow our fear of a virus to deprive us of opportunities to grow through challenges. I hope that 2021 brings lots more of those opportunities.
A couple of weeks ago I had a disaster workout. I took a hard fall on the rocks a few miles into a long run, then just muddled through. To describe it as an uninspiring performance would be charitable. As we walked to the car after, I told John that the last three hours had been just going through the motions. When I put the run on Strava Tim in Dallas posted an unprompted comment – “Go through the motions.” The suck level was obvious just from the numbers, but he meant it and I took it as a compliment.
Going through the motions is severely underrated. We are not always going to bring our A Game or feel motivated or be fully prepared for the challenge the day has in store. The choice we then face is:
(a) Do I go through the motions? or
(b) Do I not even go through the motions?
How we answer this question is often the difference between success and failure.
When we choose to go through the motions, we are choosing to be consistent. And consistency is the secret sauce for self-improvement. This is true regardless of what we are trying to improve. Racing, getting strong, building a business, becoming proficient in another language, learning an instrument, improving mental health, staying sober, achieving career goals, being a good parent; all these require consistency.
When I reflect on things I have failed at, the problem is not that I had a bad plan but that I failed to consistently execute the plan. That is the reason I can’t play the guitar or speak Spanish.
The truth is that for most things consistency in executing a plan is more important than the details of the plan itself.
For an example, let me bring it back to running. One thing I have often posited is that anyone who can walk can finish a marathon. (In point of fact, many people who can’t walk finish marathons). When I say this some people get offended or look at me in disbelief. But those people do not understand the power of consistent effort applied over time. The steps to finishing a marathon are simple:
Decide to finish a marathon.
Pick one of the thousands of beginner marathon training plans off the internet. It does not matter which one. They all work.
Do the training plan. Do every workout. Slow is fine. Walking is fine. Go through the motions.
Anyone who does this will finish and will likely find themselves to be a different and improved person at the end. Step 3, the consistent execution, is the hard step.
Its good to be a dreamer, good to set goals, and good to formulate plans for success. But all our dreams, goals, and plans are useless without consistency of execution. We must do. We must act. And sometimes that means we just have to through the motions.
For those without little kids, it may come as a surprise to learn that much has changed when it comes to school choice. With a current 7th grader and 5th grader, among others, I have learned that going to middle school is no longer “just go the middle school.” Instead, students in our district may choose to apply to one of two “magnet” middle schools, another middle school with a “Green Tech Academy,” or, if the student is a girl, a school for “Young Women Leaders” (“Young Men Leaders” are, apparently, out of luck). All these options have put pressure on the regular non-magnet middle schools to up their game and many now have impressive academic programs. For those with the means to send their kids to private school, there are even more choices. All this is great.
But the plethora of choice is not without stress. Among many parents there is an unspoken fear that if my kid is not in the “right” school from a young age, there go the hopes of educational and career success. That type of thinking is nonsense.
The one thing that distinguishes successful people is not smarts, or looks, or innate skill, or where the diploma is from, or certainly not where they went to middle school, but rather whether they can grind. Someone who grinds can set a long-term goal and consistently put in the work to achieve that goal. Grinders develop skills and expertise. Grinding is not checking boxes or putting in face time at the office or being content to be comfortable just because of the money, it is an unrelenting process of improvement. Grinders do not stand still; they are always moving up. People who grind are valued by employers and, after a while, the process of grinding imbues a sense of confidence that allows grinders to choose their own career path. Whether a plumber or a physicist or a pediatrician, grinders have options, and options equals power in the real world.
School needs to be interesting enough and challenging enough to keep students engaged so that they can learn how to grind. For some kids that might be a rigorous academic program with lots of homework. For others it might be a school with good athletic programs where the lessons of practice, teamwork, and winning and losing are learned on the field. For others it may be a school with a great drama teacher who brings out the inner thespian in a shy student who spends many nights staying up late memorizing lines. Point being, there are opportunities to learn the value of hard work at every school provided students push themselves, and parents push their children, to take advantage of those opportunities.
Parents who think a specific school is going to make their kid a success – or not getting into a school will limit success – are missing the picture. It’s up to us to teach our kids how to grind by example, by setting and enforcing expectations, and by helping them discover the interests that bring out their passions. Engaged and supportive parenting that demands accountability is way, way, way more important than any specific school.
There is a lot of pressure when it comes to instilling our children with the tools for success. But that pressure is not getting our kids into the magnet middle school (though if they do and want to go, great). That pressure is on us parents to be involved with our kids’ lives and teach them the value of hard work. After all, raising kids is a grind.
One can live for decades in the same place and yet be ignorant of awesome things near home. For me one of those things is Colorado Bend State Park, which is now my favorite Texas State Park.
Colorado Bend is located a little over two hours from Austin and San Antonio; just far enough to reduce crowd pressure compared to the more popular parks like Enchanted Rock, Guadalupe River, and Inks Lake. What makes Colorado Bend special is the diversity of things to do. Whether you like fishing and playing in a river, hiking, mountain biking, caving, or plunging into spring-fed pools, Colorado Bend has it all. I visited this week on a short backpacking trip with eight families from my son’s Cub Scout den – we had an absolute blast.
Fall is here. Elm tree showing color at Colorado Bend.
The River – The park is located on the last section of the Colorado upstream of the highland lakes. Although at high water levels Lake Buchanan backs into the park, often the river is free flowing over shallow limestone shelves. For a state chocked full of dams and lakes, the chance to play in a large natural river is rare. The bass fishing is supposedly good, but I failed to catch any in a half hour of messing around with my 3-weight fly rod. During non-COVID times kayaks may be rented but most of the river is shallow enough to walk across.
A natural flowing river – Rare in Texas.
Trails – There are 35 miles of trails ranging from rocky uplands to paths along the river. The trails have large areas of shade, which is important in the Texas sun and heat. Although we were on foot, almost all of the trails are open to bikes as well. One of the park highlights is a hike to Gorman Falls where springs pour over a cliff with delicate travertine formations. It is an oasis of lushness in the otherwise arid hill country landscape. The hiking was so good that in two days our group of 10 year-olds hiked over 17 miles and everyone had fun even with a couple of blisters and skinned knees.
The River Trail
Exploring Underground – The limestone cliffs along the river hold caves, including Gorman Cave. The cave is only open to the public for scheduled tours; you cannot just walk in because TPWD is trying to limit the spread of white nose disease for the resident bats. But during non-COVID times you can reserve cave tours. Our scouts explored some of the shallow unnamed caves. I am confident we will go back for the full wild cave tour.
Cold but refreshing.
Getting Wet – While swimming is not allowed at Gorman Falls, getting wet is part of the adventure at the park’s other spring system, Spicewood Springs. A 3.5-mile trail follows the Spicewood Springs creek from its junction with the river up to the high-country. All along this path are absolutely stunning pools and waterfalls with ferns and moss growing everywhere. This trail has some of the best swimming holes in Texas. Of course, the entire river frontage is also open to swimming. This makes the park a great hot weather destination.
So beautiful that it is hard to believe its real!
Camping – Colorado Bend camping favors real camping using tents and backpacks. There are only 15 sites that are drive in and RV friendly and even those lack electricity. The rest of the campsites are for tents only. This is a good thing. The backpacking sites are on the river with about a 1-mile walk, which is perfect for introducing kids to backpacking.
Overall Rating: A+. For a state park it does not get much better.
Last week I signed up for the Bandera 100k as insurance in case my main race set for August is cancelled. By waiting until late October to enter a January race, I left myself only eleven weeks to prepare. Not very long.
My preference is to leave plenty of time to train. Pushing to run a 100k with less than three months of dedicated training risks injury and poor performance. But sometimes living the vigorous life requires us to roll the dice. Here is my plan in case anyone out there is thinking of trying something similar.
The Race
The Bandera 100k is held at the Hill Country State Natural Area in Bandera, Texas. The course is rocky with lots of softball and baseball sized stones. There is a moderate amount of vertical, just over 100 feet of climb and descent per mile. There are no big climbs, just lots of hills. The flat sections are very runnable when the weather is dry; when wet they become mud pits. The setup is basically two convoluted 31-mile loops. Overall, it is a relatively easy 100k course.
To get my Western States lottery ticket I need to finish under 17 hours, but I would like to be faster.
The Last-Minute Training Plan: Eliminate Everything but the Necessities
With a taper and a couple of built-in rest weeks, I have seven weeks to train hard. Only race-specific adaptations are important. That means focus on endurance, nutrition, and terrain that simulates the rocky Bandera trails. Everything else, like road runs, speedwork, tempo runs, and hard hill repeats, must go. That is not to say that these workouts are not important; normally I include them even for 100-mile ultramarathon training. But there is no time left for electives.
Endurance
For endurance, I am going to build mileage but keep the pace at a very comfortable level. Hopefully, this will reduce the chance of injury and will better simulate race conditions. The bigger the mileage jump the more I will back off the pace.
One of the most important parts of endurance is training the body to deal with hills. The race has about +/- 100 feet of vertical per mile. I plan to train at an average of +/- 150 to 200 feet of vertical per mile. In other words, accustom my body to moving comfortably in more difficult conditions than I will likely experience on race day.
Nutrition
I also need to train to take in fuel during the race. Nutrition/hydration issues cause lots of DNFs and poor races. Even though I generally know what works for my body, I still plan on breaking out the vest and loading up with food (mainly PBJs), water, and salt pills during long training runs to make sure it all works.
One nutrition wrinkle this year is COVID. I don’t really have a good sense of how the aid stations will work. I don’t know how everyone will safely get food and water in cramped quarters and I have no desire to mess with masks during a race (which may be a reasonable requirement to protect volunteers). Right now, my plan is to carry everything I need for each 31-mile loop and having a single refill drop bag at the start/finish area. As I have never done that before, I will plan a couple of long shakedown runs to make sure this setup does not have unforeseen issues.
The Hill of Life on the Barton Creek Greenbelt. My training home for the next couple months.
Terrain
At the macro level the Bandara course is tame, but at the micro level the trails are rough. Other than nutrition, probably the biggest cause of ultramarathon DNFs is muscular/ligament pain and breakdown. The best way to avoid that is to train on surfaces that mimic the race. For Bandera, this means spending lots of time on the rockiest trails in town. I plan to do 90% or more of my training on rough trails. I will also do quite a bit of training in the dark as navigating rough trails under headlamp is quite a bit harder than daylight running.
Weekly Plan
With all the above considered, and knowledge of how I deal with training, my basic plan for work weeks is as follows:
Monday and Tuesday – Long slow hill repeats (6-10 miles @ +/- 300 feet per mile)
Wednesday – Flatter trail run, moderate pace (8-12 miles)
Thursday – Kettlebells
Friday – Short slow hill repeats (5 miles @+/- 300 feet per mile)
Saturday – Long run aiming to simulate course, including hiking breaks. (15-30 miles @+/- 100 feet per mile)
Sunday – Rest
The Die Is Cast
Will this work? I don’t know but my registration fee is gone so I am committed to finishing. There is nothing like a race on the calendar to ensure accountability. Whether it is a success or disaster, I will report back in January with a race postmortem.
For most of us COVID scratched the 2020 race season. There were a few early races that went off, as well as a handful later in the year in states that opened up or never closed (Way to go Bear 100!). But many of us haven’t raced since 2019 and are itching to get something on the calendar. Planning to race in 2021 is going to be different than past years.
Trails over Marathons
I am skeptical that many big city road races will be held in 2021. The number of runners and spectators and the density in corrals, aid stations, and finishing areas, plus the political situation in large cities, make these races unlikely. If you really want to road race, targeting the smaller races in rural areas may be the best strategy.
It is unclear whether the big bucket list races (Boston, NYC, Chicago, London) will be back to normal in 2021 or even 2022. Do I want to put in the effort to try and qualify for one of these only to have them turn into “virtual” events? No, running 26 miles around my neighborhood is not the Boston Marathon. For now, I am waiting until there is greater certainty before planning on road racing.
COVID issues can be easier dealt with in trail ultramarathons due to the smaller fields, greater spacing, and the fact that trail races generally take place in rural areas with more flexible regulations. There is a good chance that many trail ultramarathons go forward in 2021.
Sign Up Soon
Most of the races that were cancelled in 2020 gave runners the option of rolling entry to 2021. That means that many races are already more full than normal. Waiting until the last minute to register, or even until early 2021, may not be an option.
Consider Early Races
If 2020 taught us anything, it’s that things are unpredictable. We simply don’t know what things will look like next summer. Perhaps we will be in a lockdown. Races that are on for early 2021 may be a better bet.
Think Local
I love flying to interesting places to race. But, as we have seen, travel restrictions may be prevent us from even getting to a race location. If there is a race that seems fun within driving distance, consider signing up.
Ultramarathon Lottery Considerations
Western States, Hardrock, and UTMB were all cancelled. These races all allowed runners who were set to run in 2020 to roll over to 2021, or in the case of UTMB to 2021, 2022, or 2023. Hardrock changed its qualifying race window to allow races in 2019 to count for the 2022 lottery. Based on the backlog, I expect that the odds for each of these races, which were already poor, to get worse. I also expect that the demand for entering qualifiers will be up this year.
COVID Racing Strategies
I am not terrified of COVID but I don’t want to get it either. While I have not made any decisions, I suspect that my approach to racing will be more self-supported then in the past. I may carry most or all of my food and more water than normal to limit or eliminate aid station stops. Who knows, maybe this will make me faster. One positive side effect of COVID may be the reduction or elimination lots of crews crowding aid stations to pamper runners. With less support in aid stations and from crews, runners will may have to be mentally stronger than in past years. Harder is better.
What am I doing?
I am registered for the Castle Peak 100k in Lake Tahoe in August. My entry was rolled over after the race was cancelled this year. It looks like a fun, challenging event and is a Western States qualifier and UTMB 4 pointer. This is my main race.
However, I think there is a non-trivial chance that Castle Peak 100k gets cancelled again. This is because it’s in California, the state that seems to be most prone to shutting things down. This is also because its in the mountains in August and there is always risk of cancellation due to fire and smoke. I don’t want to be in a situation where my only race is cancelled.
So I also signed up for the Bandera 100k. I don’t really have a lot of love lost for the Bandera course, which was my first ultramarathon. I am looking at this as an option to exact some revenge for the 19 hour and 46 minute beating it put on me in 2015. But, more practically, its a Western States qualifier (17 hour limit), is close to Austin and is likely to go off in January. Now I just have to get in shape.
On a trip to visit family I found myself with an hour to kill in downtown Baltimore. Wanting to stretch my legs I consulted the map and saw a big square of green labeled Patterson Park. I was born in Baltimore and spent much of my life in the area but had never heard of Patterson Park. So decided to investigate. It’s situated on 137 acres on a high spot overlooking Fort McHenry. While Francis Scott Key was penning the Star-Spangled Banner as a prisoner on a ship in the harbor, American cannons on what is now Patterson Park fired on the British. Later, during the Civil War the site was used as a hospital for wounded Union and Confederate soldiers.
After the war, designers Frederick Law Olmsted, Jr., George Frederick, and Charles Latrobe redesigned the park in a “Late Victorian” landscape. The Olmstead influence is obvious and has a mini-Central Park feel. On a warm late October morning, Patterson Park was sublime.
I love exploring big urban parks – sometimes they have an almost magical aura that is simply not present elsewhere. As I wandered around Patterson Park, I thought about what separates those urban treasures from other parks that are fine, but not as inspiring.
For one thing, the great urban parks all have sufficient size. How big is big enough? I am not sure, but they need to be big enough so that you can get a little lost. Certainly, if you can stand in one spot and see the whole park, it’s too small.
Great urban parks must also have great trees and – this is key – great lawns. The kind of grass that makes you want to take off your shoes and run barefoot. The lawns need to be huge – hundreds of yards across.
The best urban parks also have interesting things to see beyond grass and trees. It may be a spectacular skyline view of the city, a water feature, a historical object, or interesting natural outcropping. Patterson Park, has cannons, monuments to old generals, big flags, and fountains.
It even includes a pagoda that was built in 1892 as an observatory.
Great urban parks are also practical. They have ball fields. Places to train. They are not botanical gardens but spaces to use, places for action.
They must also have good bones. By that I mean they must be designed with a light touch that accentuates the natural geology but does not replace what nature created. Great parks seamlessly incorporate hills, streams, and wetlands which beckon further exploration. Paths don’t plow in straight lines across the landscape but wander. A great urban park is clearly manmade, but you can still feel the nature.
Finally, and most importantly, great urban parks reflect lots and lots of time, money, and vision. Many of the great urban parks were established by community leaders of the past who wanted to create a sanctuary for generations to come. The designers knew that they were not going to even live long enough to see those parks come into full blossom. Many urban parks are supported by dedicated volunteers who continue to labor to build on what came before. The selflessness of parks is also reflected an opportunity cost; in every case some development money was “left on the table” to create something that benefits everyone.
I wonder how much of that civic spirit remains. If we had to do it all over, would we still decide to set aside a large parts some of the most valuable land in our cities to create parks, or would we focus on a what makes the most money now? And if we are not confident that we would make the right choice, what are we doing about it?
The next time I take off my shoes to run across the lawn in Central Park or Boston Common or Patterson Park or Zilker Park, I am going to feel the grass, listen to the laughter of families having fun, take in the beauty, and and appreciate those that came before who made the right choice.
Modernity has created comfortable pitfalls that prevent most of us from reaching our potential. Most of us train in the expensive, complex, and easy way. Only a minority really trains the simple, hard way.
What do I mean? I mean in every discipline only a small proportion of amateur athletes, usually the highest performers, train to maximize the performance of mind and body. Most people actively shy away from the things that work most efficiently and instead just “exercise” comfortably or conveniently. The acid test of competition and real-world experience exposes the softness of the latter approach.
To identify the hard way, ask whether it sucks to do and whether most people avoid it. If the answer is “yes,” then it’s likely the hard way. Here are “hard way” things: six hours of hill repeats in the heat, three hour rocky trail runs in 35-degree rain, 800 meter track repeats, long hilly road rides in the afternoon sun and wind, getting under a barbell and grinding a hard set of squats where you can barely do the last rep and then doing it again, and open-water swims. Hard way things are not just physically difficult, but they take mental concentration and effort. One cannot just zone-out and get through hard way workouts.
In contrast, the easy way involves training that does not make one tough. Things like easy runs with a friend where you talk, jogging on the treadmill in the AC because its hot outside, the spin bike, cable crossovers and bicep curls, and swimming in a heated pool are all easy way things. These things may have their place as an accessory to hard way training, but they should never take the place of hard way training.
For hard events one must train the hard way. That means if we are running a marathon we better be sucking wind during beatdown track workouts. For a mountain ultra, we better be running on rough trails in all weather and counting vertical feet and time more than miles. For a big bikeride, we better be going on real rides in the hills.
Failure to train the hard way often results in hilarity. Go to almost any road race, ultramarathon, or bike ride and you will hear people complaining about the weather or the course.
This is Allen Parkway in Houston. This hill represents about half of the vertical change for the whole Houston Marathon – one of the flattest marathons in the country. Lots of people complain about the hills on Allen Parkway.
News flash: you signed up for and paid good money to participate in an event takes place outside. People that complain about the wind or rain or heat or cold or rocks or hills or snow are soft, not because of anything inherent but because they did not prepare themselves for the event. Do not be that person.
Recently a friend new to running asked how often I replace my shoes. She had heard that they should be replaced every 250 miles and was surprised when I told her that some of my shoes last over 700 miles even though I do lots of running on rough rocky trails.
These trainers have 734 Strava miles and have worn like iron. The outsole is just starting to separate but with some Aquaseal repairs they should make it to 1,000 miles.
Throw out any “replace shoes after X miles” rule. Those rules were written by the shoe companies. Instead, look at the shoes to see whether they need to be replaced. Inspect:
The uppers (the cloth). After a while they will develop holes. Eventually they will fall apart. I usually keep running until they fall apart or until the holes get too big to keep rocks out.
The outsole (the tread). When you run through the rubber or run off the tread they are done.
The mid-sole (the foam). This one is trickier because it’s less visual. Some shoes simply get squashed over time but the uppers and outsole look fine. The shoe loses its ability to cushion. This problem is worst with shoes with soft foam. Some super soft shoes can be destroyed in one race. Mid-sole foam compression is often determined by feel. If your dogs are barking when they should not be, this may be the cause.
To increase longevity, use shoes for their specific purpose. For instance, one of my favorite muddy trail shoes is the Salomon S-lab Sense SG. It’s a lightweight, thin stack, trail shoe with huge lugs. If I took that shoe on a road run it would work but would needlessly wear down the tread.
These S-lab SGs have 437 miles on them according to Strava. They probably have at least another 250 miles in them but I don’t waste the tread on the road.
When I run on the road, I use my road shoes with more cushion and a road-specific flat tread outsole. Likewise, some light road shoes will fall apart early with heavy trail use as they don’t have robust uppers.
These road shoes have 581 Strava miles. The outsole is almost worn through in one spot, but probably still have at least another 100 in these. These light breathable uppers would get shredded on some rough trails.
When shopping for shoes understand that there is a lot of variability in durability. Although I like to save money, I generally run in expensive shoes (mainly the Salomon Sense Pro and Salomon S-lab Sense models). I do this because these models fit but also because they are durable. If amortized over 500+ miles the per mile cost of my Salomons is less than cheaper shoes that fall apart an a couple of hundred miles.
How can one tell which shoes are likely to be durable? Reviews can often be a good source of information on durability, but my rule of thumb is that if the shoe feels like a soft slipper when you try it on it is going to fall apart quickly. Shoes that are comfortable, but firm are more likely to last. That is why I usually go for shoes with harder midsole foam – they provide more long-term cushioning.
Finally, for races considering buying a dedicated pair of race shoes. For me, this is the exact same model as my primary trainer – so it a model that I have hundreds of miles in in the months right before the race. Other than a 10-mile break in just to make sure there are no defects, these sit in my closet and only come out when I am on the starting line of a big race. That way my feet have maximum protection, cushion, and tread for the event. It’s a good confidence booster to know that whatever goes wrong, I don’t have to worry about my shoes. And, of course, NEVER EVER run a race with a shoe model that is unproven through hundreds of miles of training outdoors, in the weather, on surfaces similar to the race or a shoe that has questionable fit.
The Salomon Sense Pro 3. This (and the prior models) is my all around go shoe. Good for everything from marathons to 100s to weeklong backpacking trips. This one has a small hole in the upper after 300 miles. I get a new pair for each big boy race.
As a follow-up to my recent COVID post, this weekend I came across a survey database of infection rates at schools in the US. It strongly suggests that schools are not impacting the spread of COVID and that in-person schools are not an elevated risk for teachers.
These data were collected by a company called Qualtrics and the survey responses account for over 200,000 students in 47 states. The survey responses were voluntarily submitted by school districts and therefore do not represent a true random sampling of schools across the country. But even with that limitation, the results are enlightening.
The database looks at the “confirmed infection rate” – which is the number of confirmed COVID infections for students and teachers, respectively, over a two-week period divided by the estimated student or teacher attendance. It also looks at a “confirmed and suspected infection rate” – which adds suspected cases to the numerator.
The database allows one to parse the data depending on the learning mode of in-person at full capacity, a hybrid partial in-person and remote approach, or completely remote. Here are the numbers:
In-person
Hybrid
Remote
Student Confirmed
0.17%
0.14%
No data
Student Suspected + Confirmed
0.47%
0.86%
No data
Teacher Confirmed
0.24%
0.25%
0.32%
Teacher Suspected + Confirmed
0.65%
0.76%
0.85%
Nothing to see here folks.
There appear to be no material differences between learning models. These data suggest that school has little, if any, effect on COVID rates. If teachers (the population most at risk of people at school) were contracting COVID at schools, the in-person and hybrid teachers should have higher infection rates than those teach remotely. The data do not show that.
The database allows one to select for other variables including the State, whether the school is urban, suburban, or rural, and whether the school is public or private. Changing those variables does not significantly change the infection rates, which further suggests that schools do NOT matter much when it comes to spreading COVID. There is no evidence in the dataset suggesting that remote learning schools are safer in terms of COVID.
Can we rely on this?
Before the stats people jump on me, I concede that the table above is not a substitute for a rigorous statistical analysis. But these data are best I have seen to date on the issue. I am unaware of any data showing the opposite – that schools actually are a nexus for contagion. Hopefully, similar, data driven studies are underway regarding school transmission (or lack thereof) of COVID, including additional detail on the effects of social distancing practices, if any, at schools.
We are a long way from March when schools shut down. The time for making decisions based on fear, politics, or relying on worst-case assumptions of what might happen is over. Administrators, teachers, and parents need to be provided with data and facts to make decisions. If the data in this study continue to be confirmed, I can’t see any real argument for doing anything other than opening schools fully back up.
Of course, my mind is open and if anyone knows of data that show schools-based COVID transmission above background community transmission is real, please let me know.
Like everything else these days, reopening schools has become just another issue for political cultists to fight about. The lack of nuanced leadership based on an objective view of what we know and what we don’t is, and I say this with extreme understatement, disappointing. My family is re-engaging with most of the pre-COVID activities of life, and I wanted to write down the reasons why.
First, the things I think are proven:
The risk of death posed to school age children by COVID is less than other risks of other illnesses that we have always accepted. The CDC’s current estimated COVID infection fatality rate or “IFR” (number of deaths/number infected) for age 0 to 19 years is 0.00003. To put that in perspective, the IFR of the 2017-18 influenza season for age 5-17, based on CDC data, is 0.00007. (I picked the 2017-18 flu season just because it was the last one with full data on the CDC’s flu website. Different years have slightly different numbers, but not enough to change the conclusion. There may also be differences in testing for COVID v. influenza, so this may not be a true apples-to-apples comparison, but I think the general patterns likely hold.)
The risk of death posed to parents and young teachers by COVID is about the same as the flu. The IFR for COVID for ages 20-49 is 0.0002. The IFR for the 2017-18 flu for ages 18-49 was 0.0002.
The risk of death posed to older people by COVID is greater than the flu. The COVID IFR for ages 50-69 is 0.005. The 2017-18 flu IFR for ages 50-64 was 0.0005. For people 70+ the COVID IFR is 0.054 and for people 65+ the 2017-18 flu IFR was 0.009.
The risk of severe COVID complications is significantly affected by “comorbidities” including cancer, chronic kidney disease, chronic obstructive pulmonary disease, immunocompromised state, serious heart conditions, sickle cell disease, Type 2 diabetes, and obesity (defined as a BMI of 30 or higher).
Among those who die from COVID, over 90% have at least one comorbidity. Here is the CDC report with the data. Thus, for healthy people the risks are probably an order of magnitude lower than stated above.
Things I think data show are likely, but not settled:
A significant portion (maybe half) of the population has pre-existing resistance to COVID. A paper in Science showed that blood samples taken before COVID existed have T cells that are cross reactive with COVID.
A significant portion of people who have COVID are asymptomatic. Studies suggest that asymptomatic people may be contagious but to a lesser extent. Its unclear whether asymptomatic children are contagious.
Some people report long term effects. It is unclear what is happening here, and I have not found a study that sorts it out, including all the potentially complicating factors. But it does appear that some people report COVID symptoms for months.
Masks may help reduce transmission if properly worn. Unclear whether the actual real world “wearing” of masks by people has much effect. Pretty sure that having kids wear masks is useless, based on years of observing kids.
Outdoor activities have a significantly lower risk of COVID transmission. Not only is there more spacing and airflow, but COVID does not live long outside. There are a bunch of primary studies showing this, but DHS has an interesting “SARS-Cov2 Airborne Decay Calculator”. As I type this in Austin Texas it shows the 99% virus decay at about 23 minutes, with the 50% decay at just 3:30.
The big thing that the politicians assume but for which I have strong doubts:
“We will have an effective vaccine in the near future.” Maybe. We don’t have a fully effective vaccine for the flu and there are no vaccines for other coronaviruses. I think it much more likely that COVID is an endemic part of our world for at least the next few years than its eradicated through a vaccine.
Things on the other side of the ledger:
Not living our lives has real costs that are not reflected in the COVID count. What is the damage to relationships because we cannot be physically close? How many people have spiraled into depression? How many have become addicted to alcohol or drugs? How many committed suicides? How many grandparents have been unable to hug their grandkids while a half a year of life has slipped through the hourglass, with not that many grains of sand left? How many kids for whom school was the island of stability are adrift? How many students who without resources and diligent parents fell ever further behind – and are still falling – because “virtual” learning is useless to them? These harms are difficult to quantify but they are real. And we each need to give them appropriate weight in deciding how to proceed.
Why I am pretty much done with COVID:
We are presented with a virus that is a low risk to healthy kids and most adults, but which can be dangerous for older people and unhealthy people. I don’t want to get it, but I am not terrified of getting it. Our immediate household is low risk, but we have parents and other friends and relatives who are older, so we need to be mindful. This is the situation for the foreseeable future.
The benefits of (smartly) reengaging in activities appear worth it considering those risks. For us that means outdoor sports are on. The kids can hang out with other kids outside. During the online school lunch break we let my son ride his bike to the school playground to have real recess with the other fifth grade boys. Scouting activities are on, all outside, where they should be. We are going camping with friends. We have made plans to get on a plane as a family, and I have already flown. We will likely be sending our kids back to school in person as soon as real school is an option, instead of half-baked come to school and do computer learning.
If there is one lesson that 2020 has taught us, it’s that nothing is certain. There are no riskless choices, just choices with different risks. And the risk of living a big chunk of life without doing things that are some the best things in life is bigger than the risk of a virus.
For something that is supposedly good for us, running can do a lot of damage. Our injuries rarely announce themselves with the “pop” of a tendon rupturing or the sight of a bone sticking out of the skin. Instead, running injuries are sneaky bastards. One day we are fine, the next a little stiff. Then a running buddy says, “hey you are limping.” Then we realize that we have gone through the entire bottle of ibuprofen in a month.
Some judge experience in years or miles. But real runners know that until you have plantar faciitis, a stress fracture or two, and the joy of an inflamed IT band, you are still a rookie.
We all know chronic running injuries are caused by big workload jumps and overtraining – but these are just physical manifestations of the same psychological problem: impatience.
To paraphrase Commander Stinger: Our egos are writing checks that our legs can’t cash. So, in a likely futile attempt to check my ego, I am writing down these rules for the inevitable next time I feel that nagging pain on a run.
Chris’s Iron Rules of Injury Prevention
Always run at least half my miles on rough trails. Almost all my running injuries start when I am doing high mileage road running. I almost never get hurt when a significant part of my training is on rough, uneven, trails. I think the reason is that rough trails keep my stride variable, so bad form cannot creep in. Trails also force my lower legs to be strong. Paradoxically, the rougher the trail the lower the chance it will cause a chronic injury. Smooth roads lead to weakness.
Always cross train. At least once a week do something other than run. My hierarchy of usefulness: barbell lifts > kettlebell lifts > bodyweight workout > bike > swim. Cross training allows me to still get a workout in while giving the ligaments, tendons, and bones a rest from the pounding. Having a cross-training discipline also provides an outlet for when you need to rest the legs (see 4 and 5 below).
Never rush training. Trying to get in shape in too short a time is a recipe for disaster because it forces big jumps in workload. How much time is enough varies depending on fitness and experience. I like to plan very long (6 month or more) training plans which allow for lots of intentional rest. Build in extra time to deal with injury contingencies.
When in doubt, rest. It takes some experience to distinguish between good pain and a precursor to actual injury. But even if unsure, the best thing to do is back off a little and rest. A few missed workouts will not make a difference in an otherwise dedicated program. Being healthy on race day trumps being injured but with more training volume.
If hurt, stopping running for a time is the only way to get better. Pay a little now or pay more later. There are no shortcuts for stress fractures or tendonitis. There is no miracle physical therapy. Certainly not for a guy in his 40s without the benefits of improved living through chemistry. The only way to make it better is to take time off. It may be three weeks, it may be two months, but running through it is just making the inevitable worse.
Note: None of this applies to a race. Finish the damn race no matter the hurt.